Mini automated greenhouse
Timeline: September - November 2025
Class: Hacking the Apocalypse - Atlas 4519
Role: Member in a group of 3 helping with physical build and electronics.

INTRODUCTION
The year is 2035. A decade of jingoistic trade wars combined with abandonment of social investments has led to the near unattainability of basic human needs, including food, water, clothing, and shelter from increasingly tempestuous weather. Artificial intelligence has eliminated 85% of blue collar work, and 100% white collar labor. Those who are valued serve a ruling class of trillionaires and billionaires who abandon the rest of the world’s population while occupying vast, decadent fortress-cities behind impenetrable defense. While 99% of the population spends years battling hunger, thirst, and each other, legends grow of a group of techno-rebels in the West. According to the stories, they produce clean water, chemical-free foods, durable and adaptable clothing, and thrive between the spaces sequestered by the ruling class.
Context / Class Design Fiction
To create an automated greenhouse that uses temperature, humidity, and soil-moisture sensors to control lights and trigger a watering hose when moisture drops too low, ensuring plants receive consistent, optimal care for healthy growth.
Goal
Physical tools: table saw, chop saw, drill, drill press, jigsaw, staple gun
Materials: 1×2 wood, screws, vinyl sheeting, cement/plant tray, soil, plants/seeds, soaker hose + hose attachment
Electronics: Arduino Uno, breadboard, temperature/humidity/soil-moisture sensors, photo-resistor, MOSFET, jumper wires, conductive aluminum tape, pixel lights, bilge pump, 5V battery, 12V power supply
Tools used
Food is one of the most important resources in a world scarce of them. We wanted to make sure you were able to grow your own food, while also keeping track of the data helping our plants grow, or fail. The electronics will allow you to track the humidity, temperature, and soil moisture of the greenhouse while automating when the water pump turns on depending on the soil moisture.
Project Description
GALLERY
~
GALLERY ~
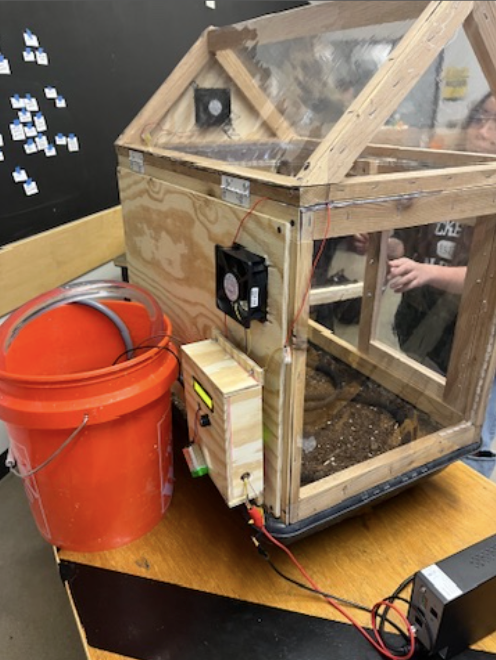
A show of the stats shown on the LCD screen
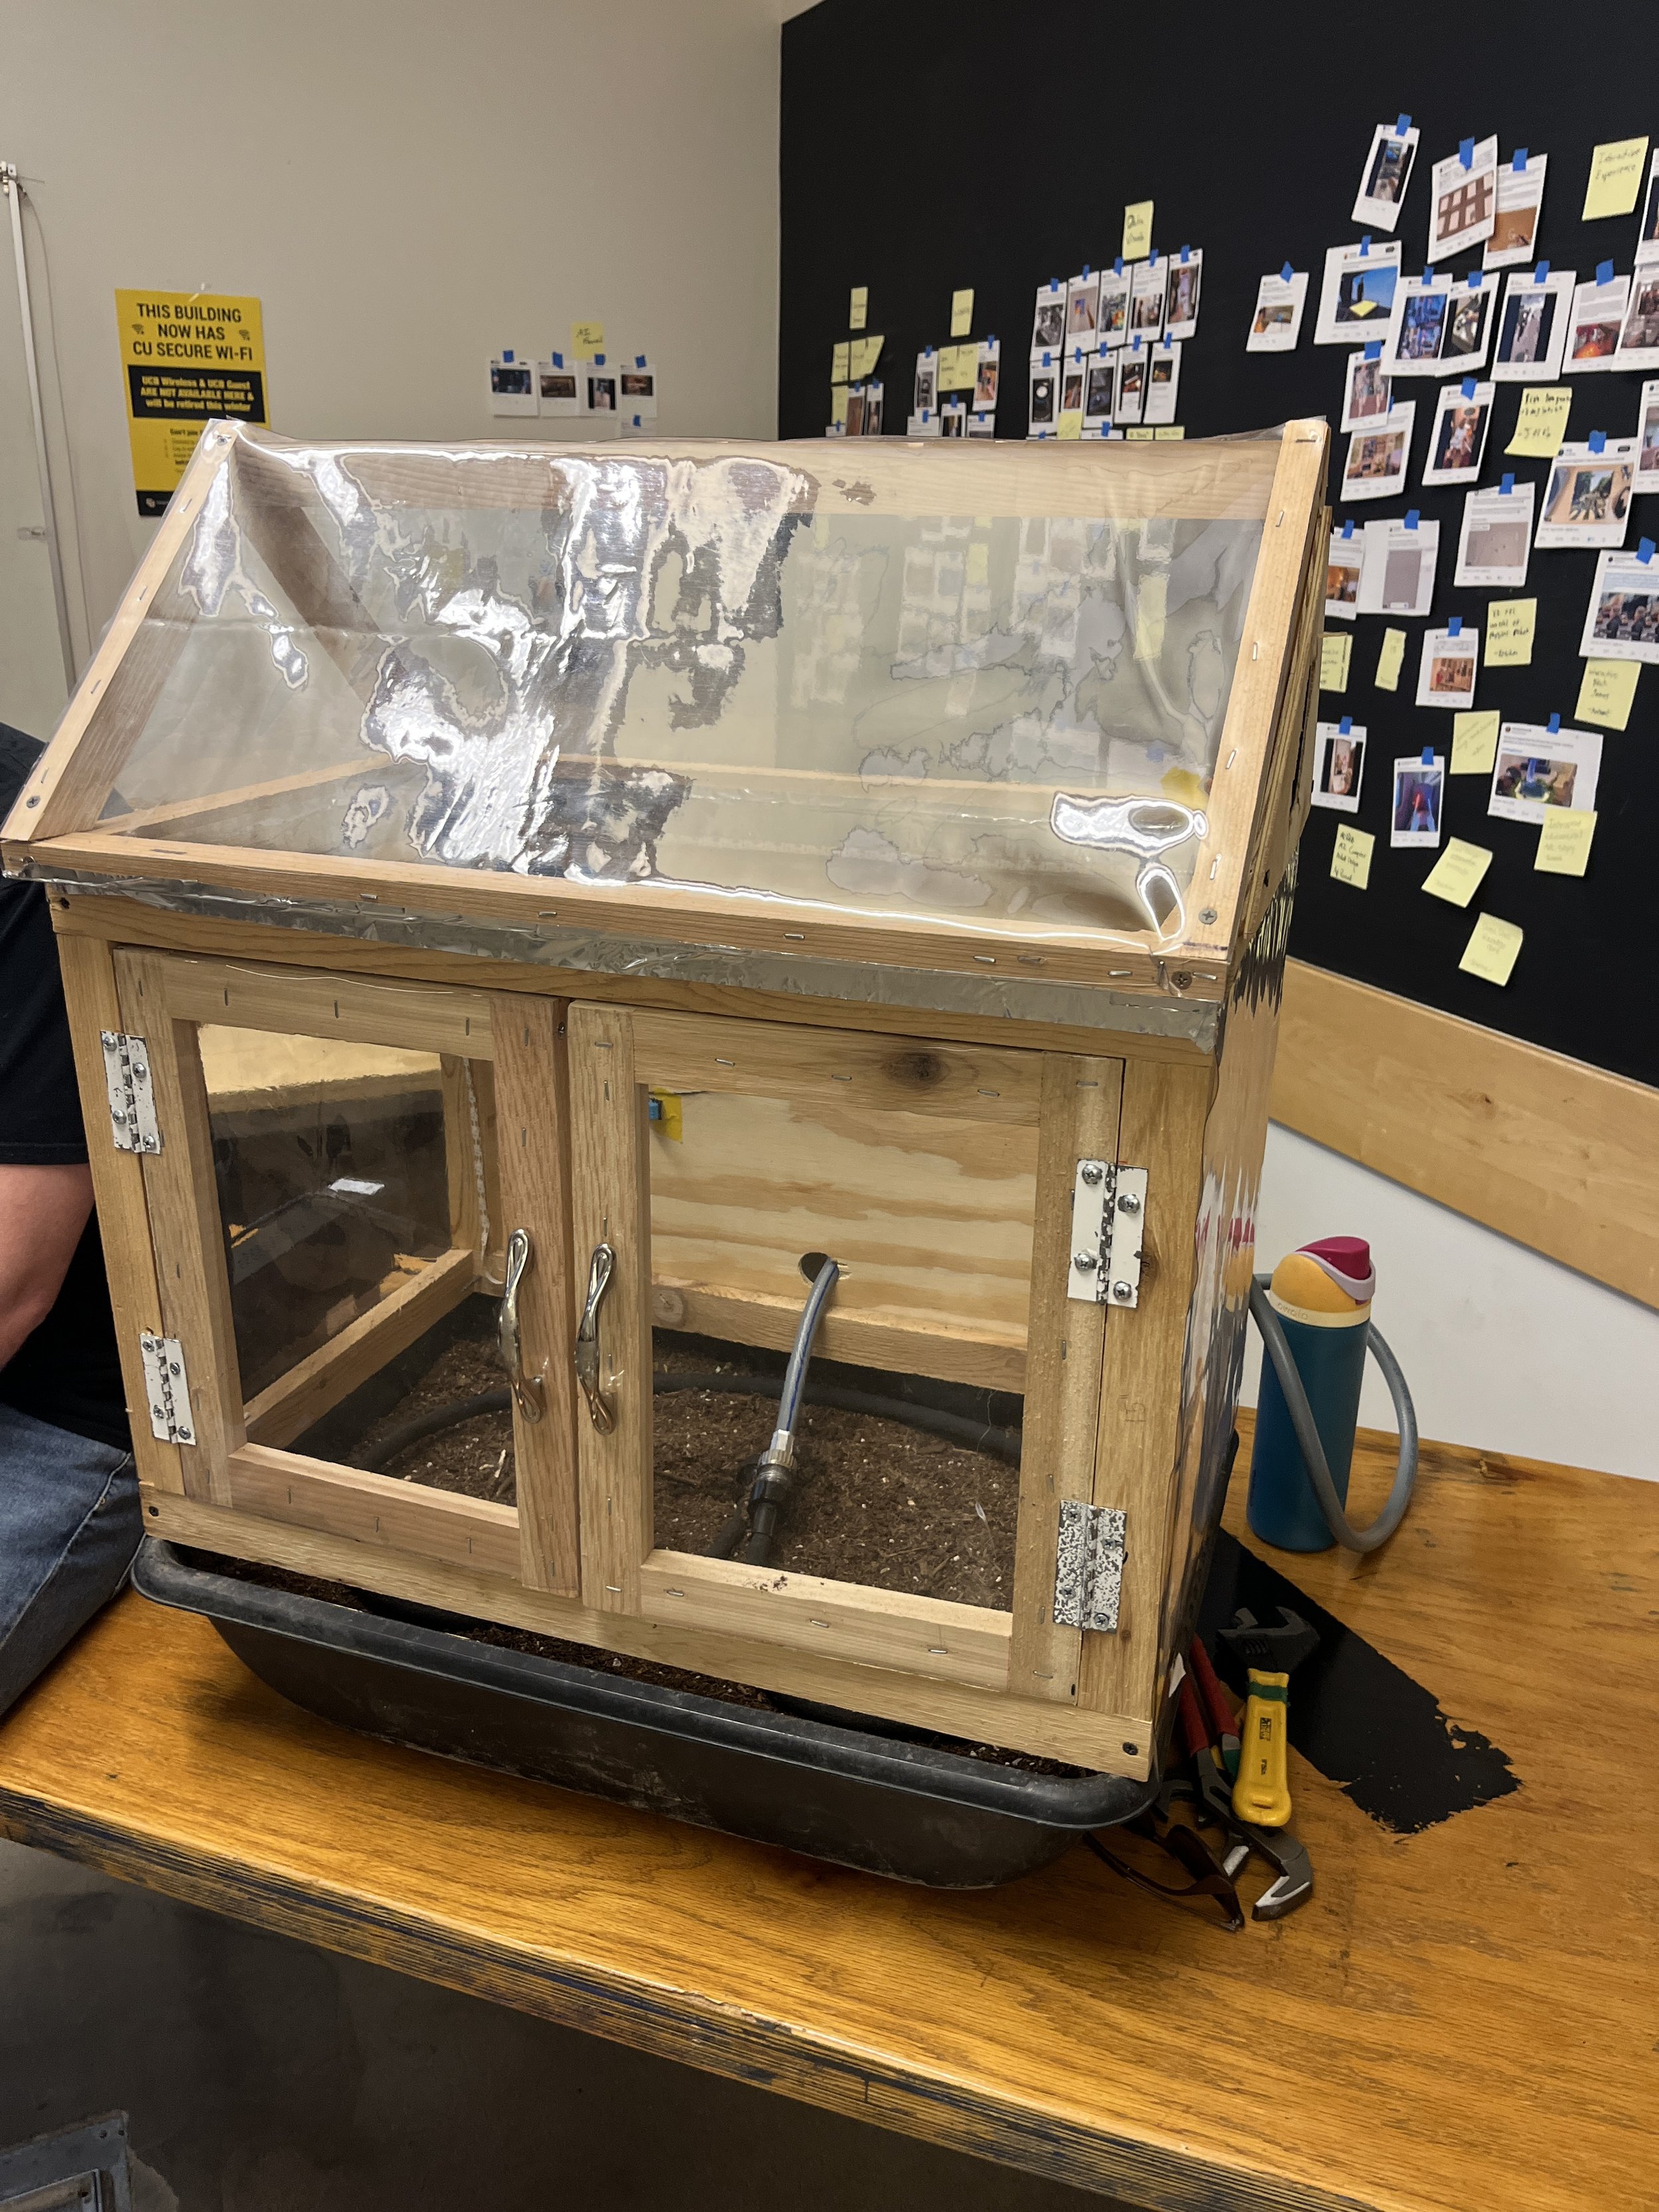
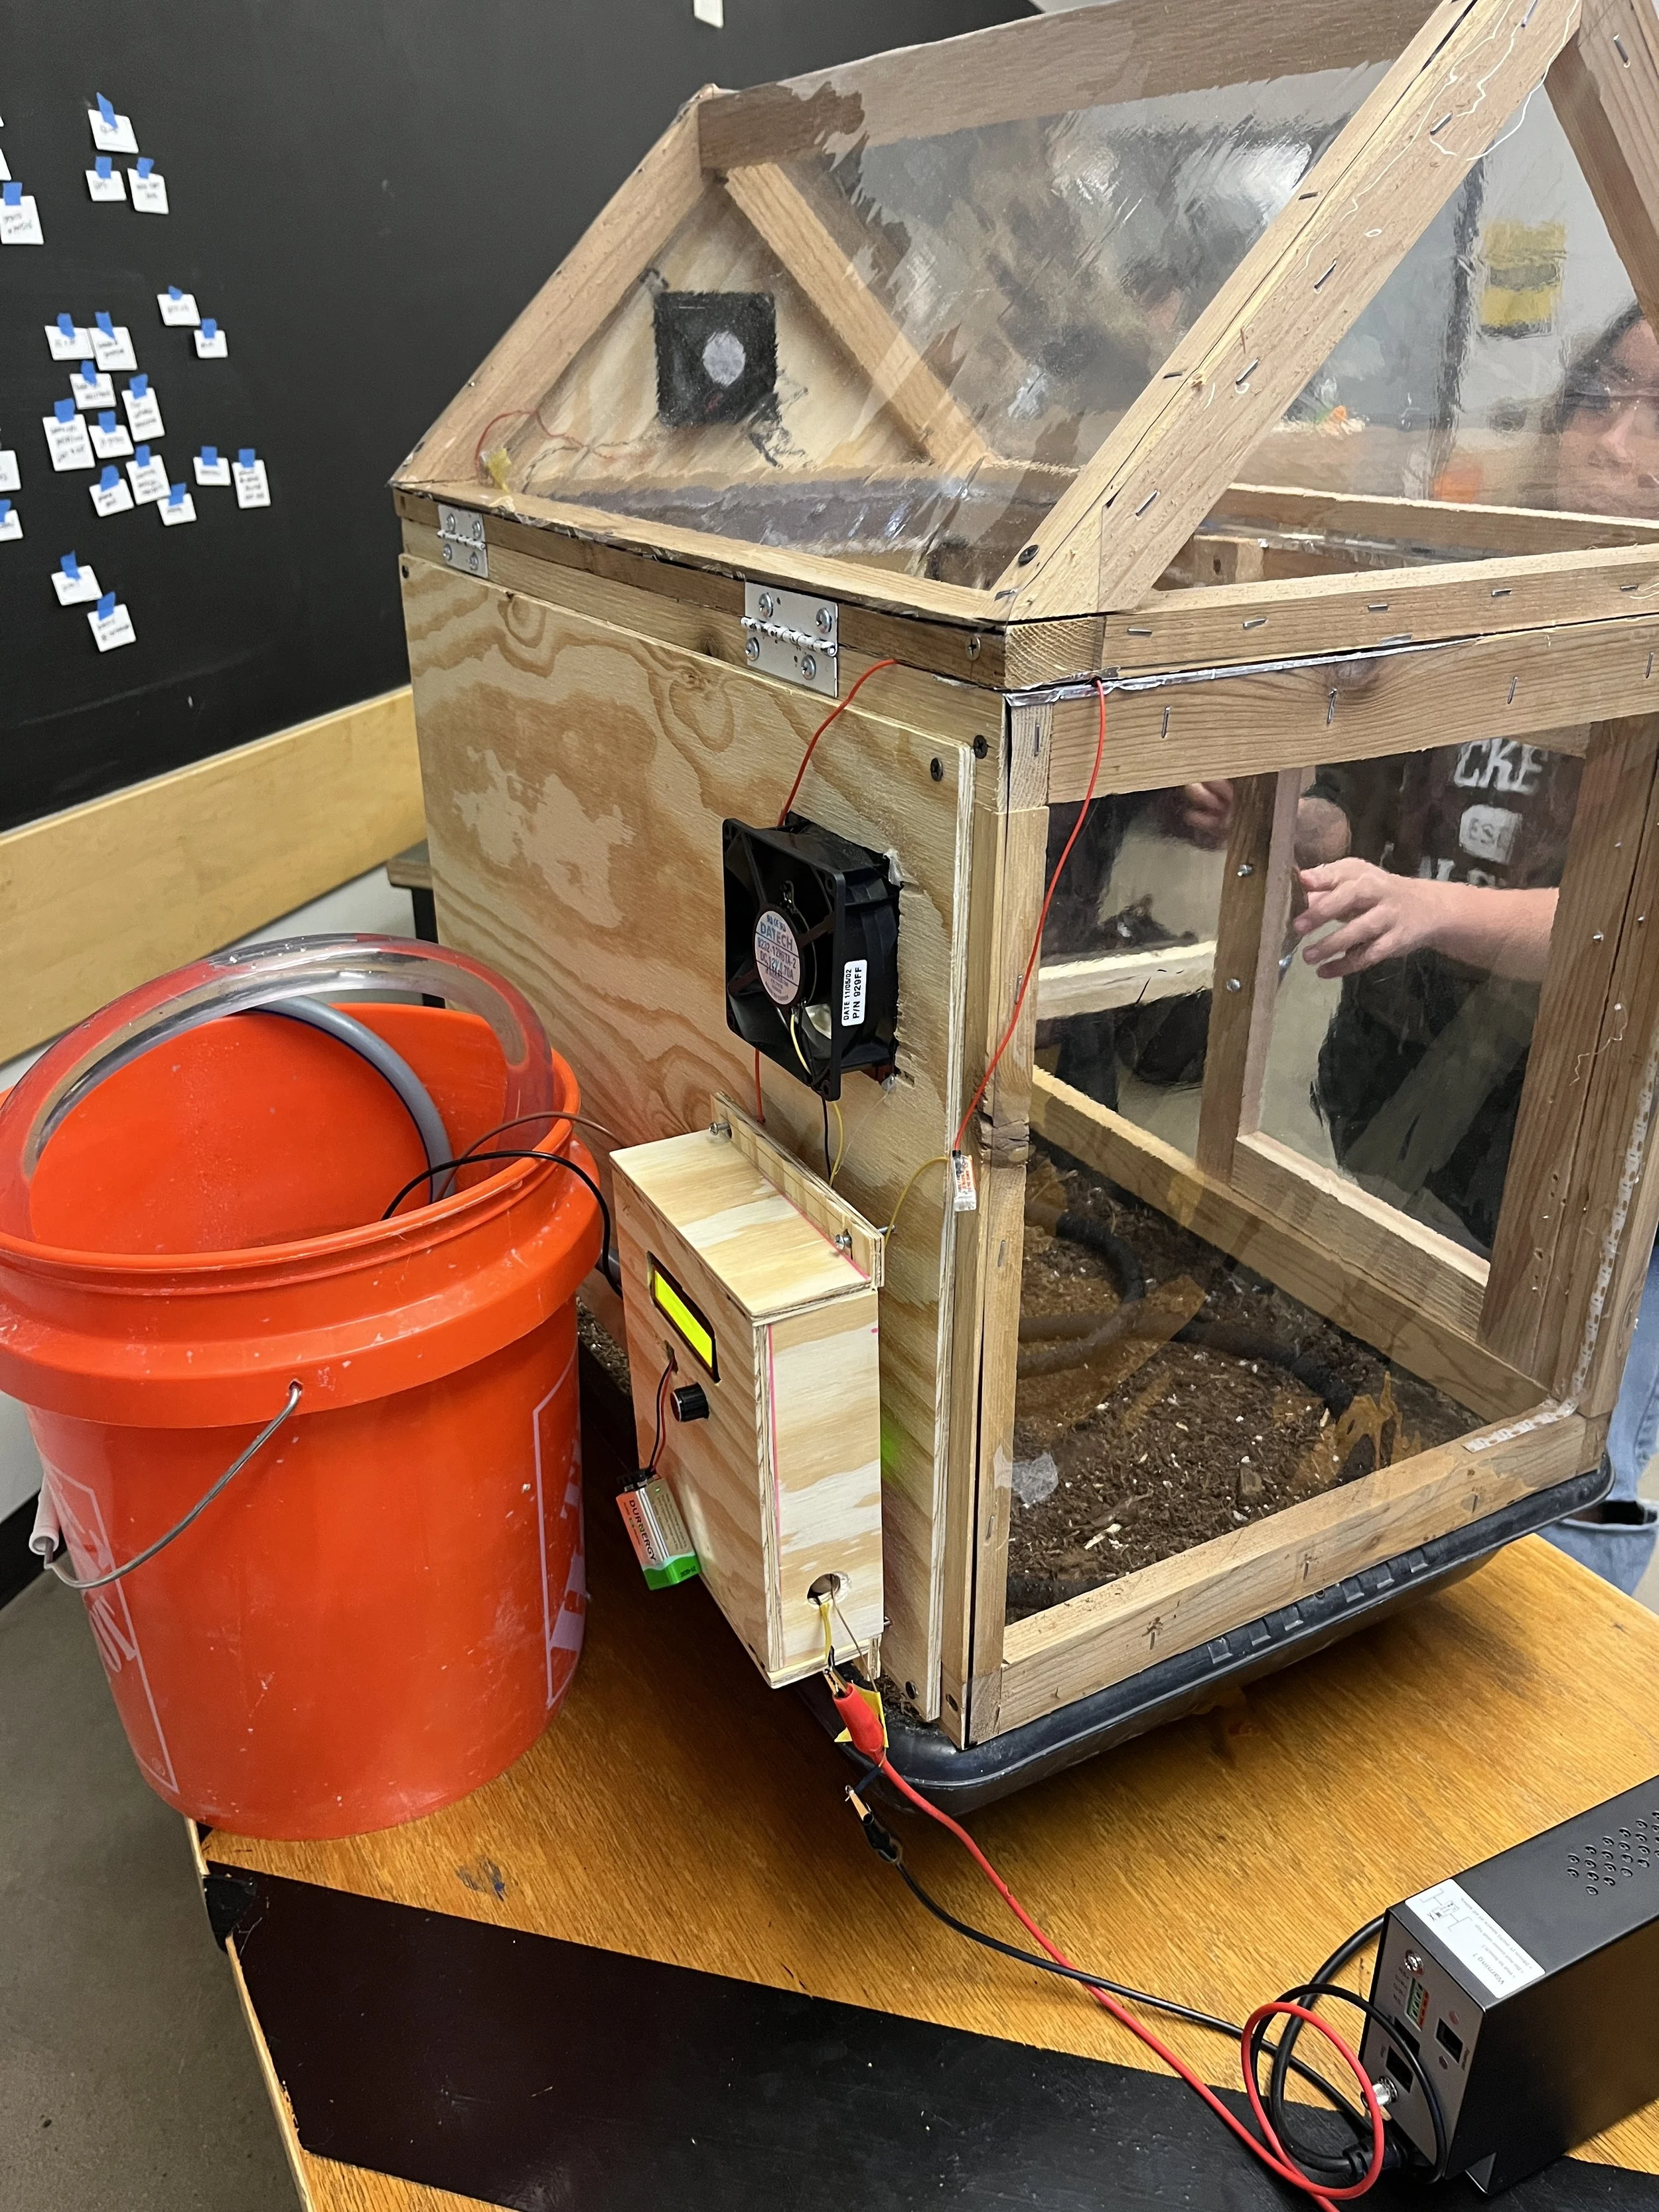
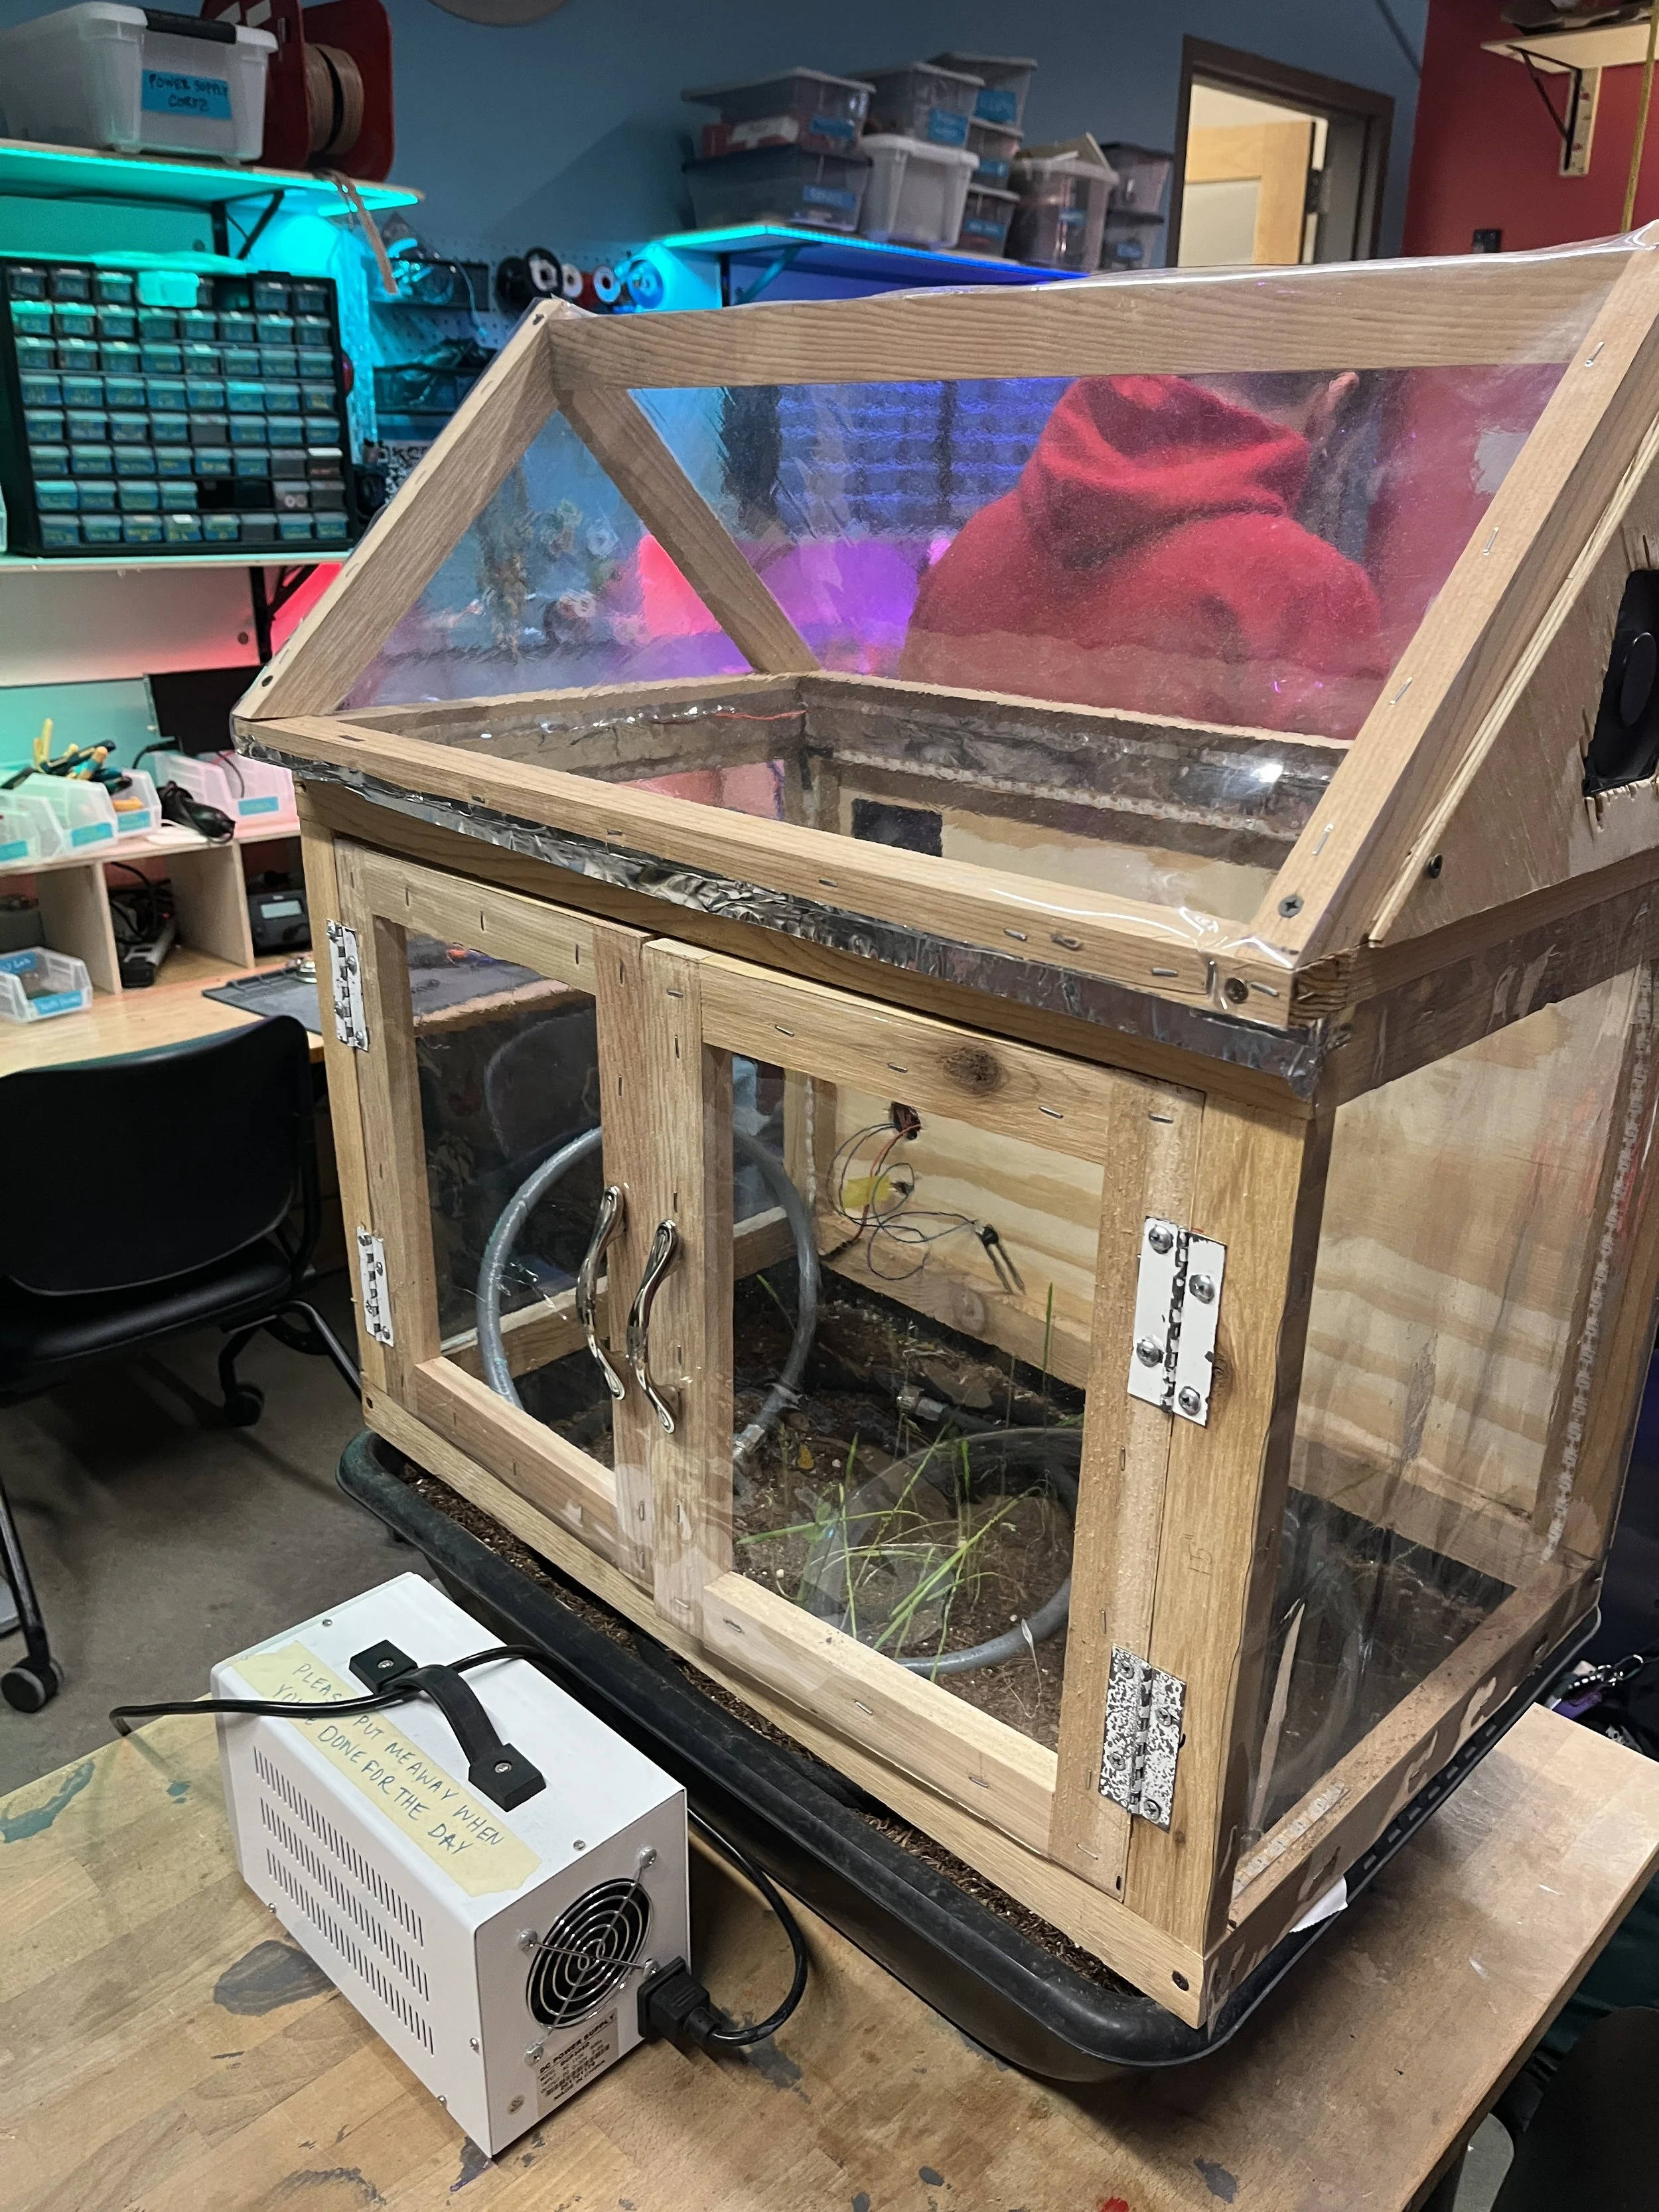
An overall view of the greenhouse.
A show of the darkness activated lights.


PROCESS
We began the build by gathering all the materials we needed. For the wooden frame, we calculated that the total lumber requirement would be 43.7 feet, broken into specific lengths. For the vinyl covering, we made sure to purchase at least 12 square feet of clear vinyl. Once everything was on hand, I moved into the cutting stage.
Material sourcing
The vinyl was easy enough to cut with scissors, but all the wood required a chop saw. We carefully measured and cut each piece to its required dimensions, double-checking lengths to avoid waste.
After cutting all the lumber, we moved on to constructing the frame.
Cutting the Components
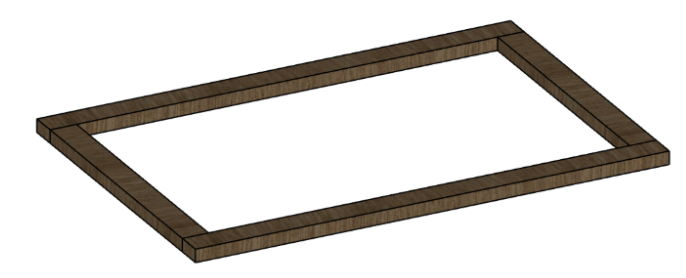
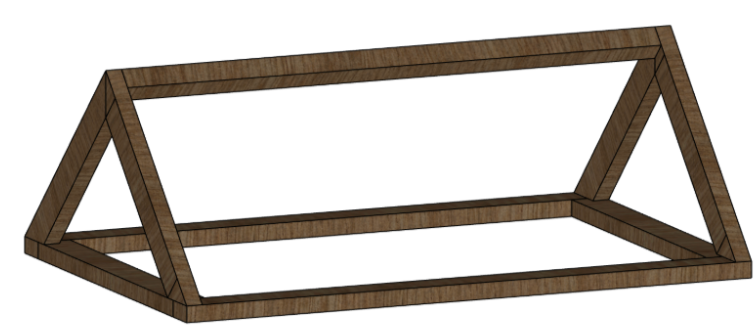
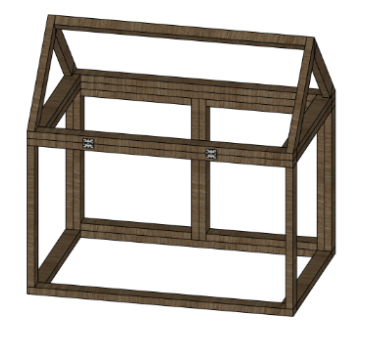
We started by assembling three rectangular bases. To keep things consistent and accurate, we dry-fitted each rectangle first, marked the screw locations, drilled pilot holes, and then screwed each joint together. This step established the main structural sections that would later form the lower frame and the roof base.
Building the Rectangular Bases
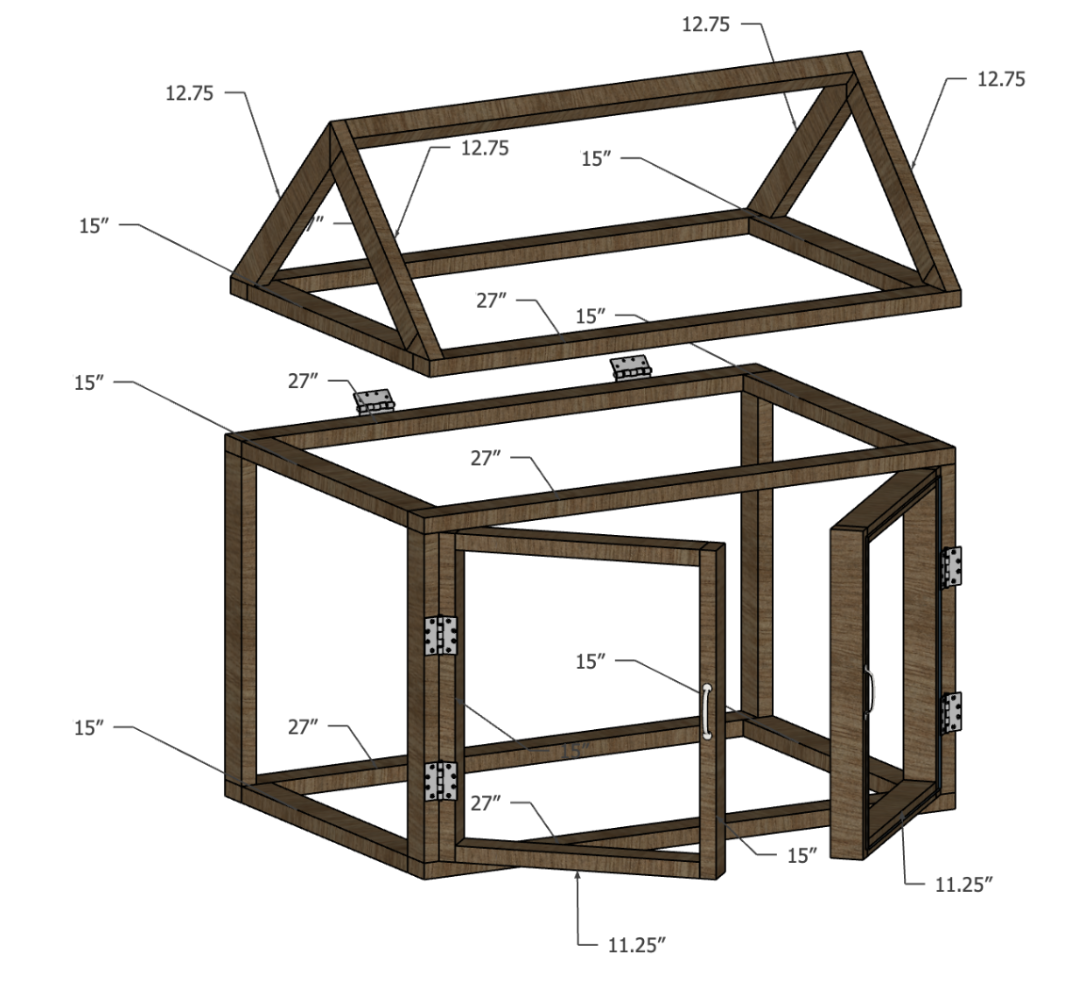
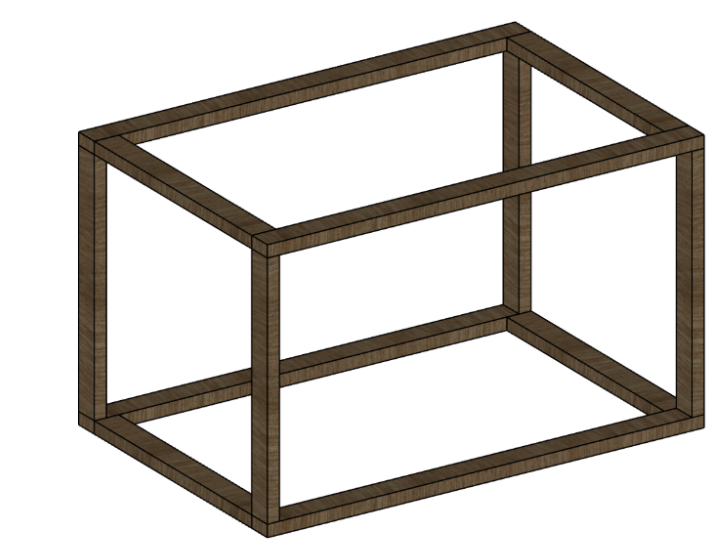
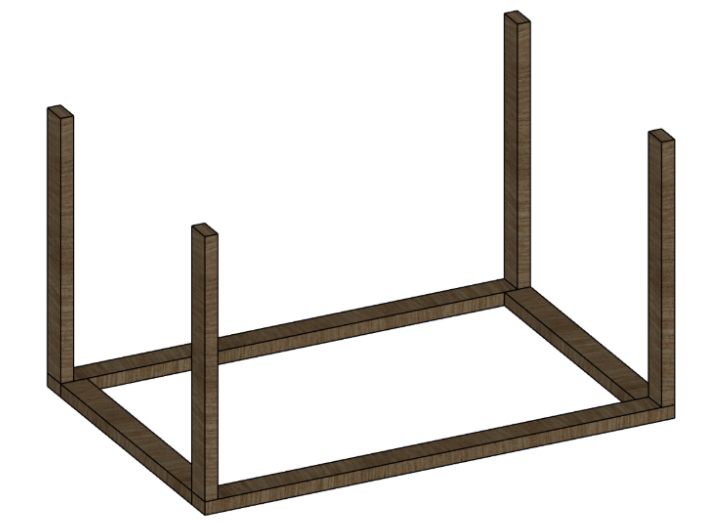
Adding Vertical Posts and the Top Rectangle
Once the bases were done, we attached the vertical posts at all four corners of each base. We repeated the familiar process: marking, drilling pilot holes, and fastening them with screws. With the posts upright, we added the top rectangle, completing the basic structural “box” of the greenhouse.
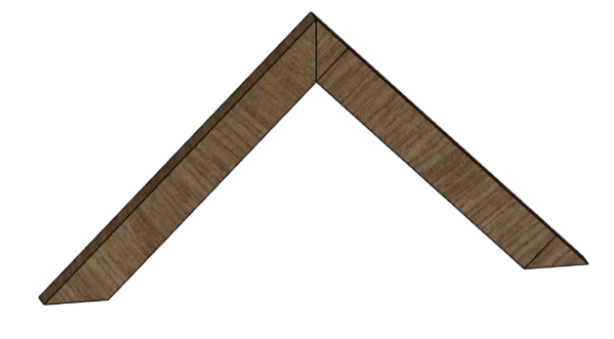
For the roof, we worked with the four 11.25" pieces. Using the chop saw, we cut 45º angles on both ends of all four pieces. Then we paired them into two sets and aligned the angles to form 90º peaks. After drilling pilot holes, we screwed the angled pieces together to create two triangular roof segments.
We then attached these triangles to the top rectangle from earlier, again using the pilot-hole-and-screw method. Once the triangles were secured, We added the 25.5” piece across the top to complete the roof ridge.
Constructing the Roof


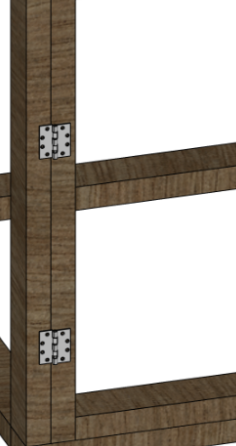
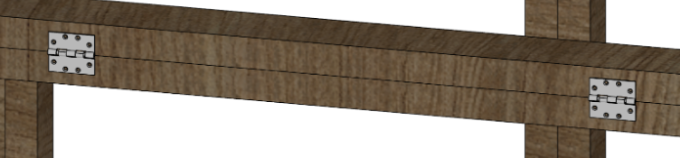
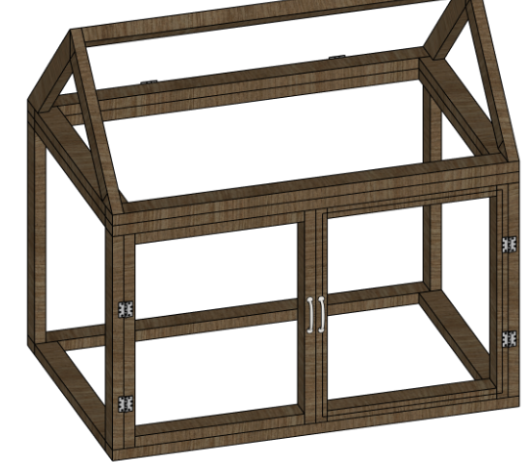
With the full wooden structure assembled, we shifted to hardware. We placed the hinges along the back, lined them up across two connecting wood pieces, marked the pilot holes, drilled them, and then screwed the hinges into place. We repeated the same process for installing the hinges on the doors.
Installing hinges
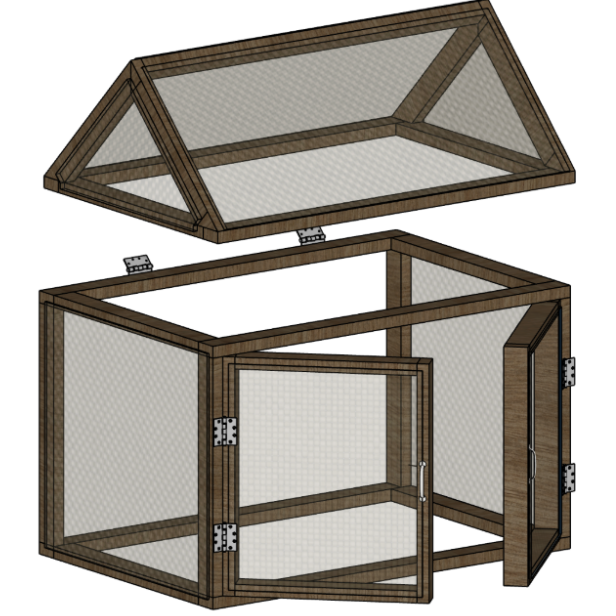
Next, we began covering the structure. Using a staple gun, we attached each pre-cut vinyl piece to its corresponding side. This step required stretching and aligning the vinyl to minimize sagging or wrinkles.
Attaching the vinyl panels
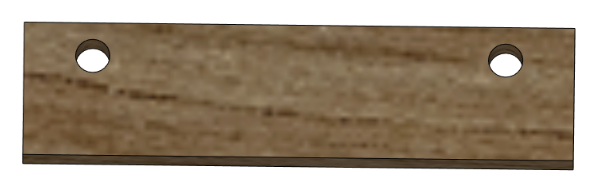
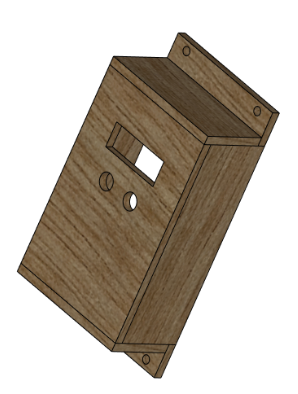
To make the electronics enclosure, we cut the seven pieces. We started by drilling hanging holes, placed near the top edge so the enclosure could mount onto the back of the house. Next, we worked on the front face. Using both a drill and a router, we created the cutout for the display screen. We drilled a hole in each corner of the intended rectangle to make openings big enough for the router bit to enter, then routed out the full shape. We also drilled holes for the potentiometer and mounting bolts.
After all cuts were finished, we glued the enclosure together and added an interior shelf for support.
Building electronics enclosure


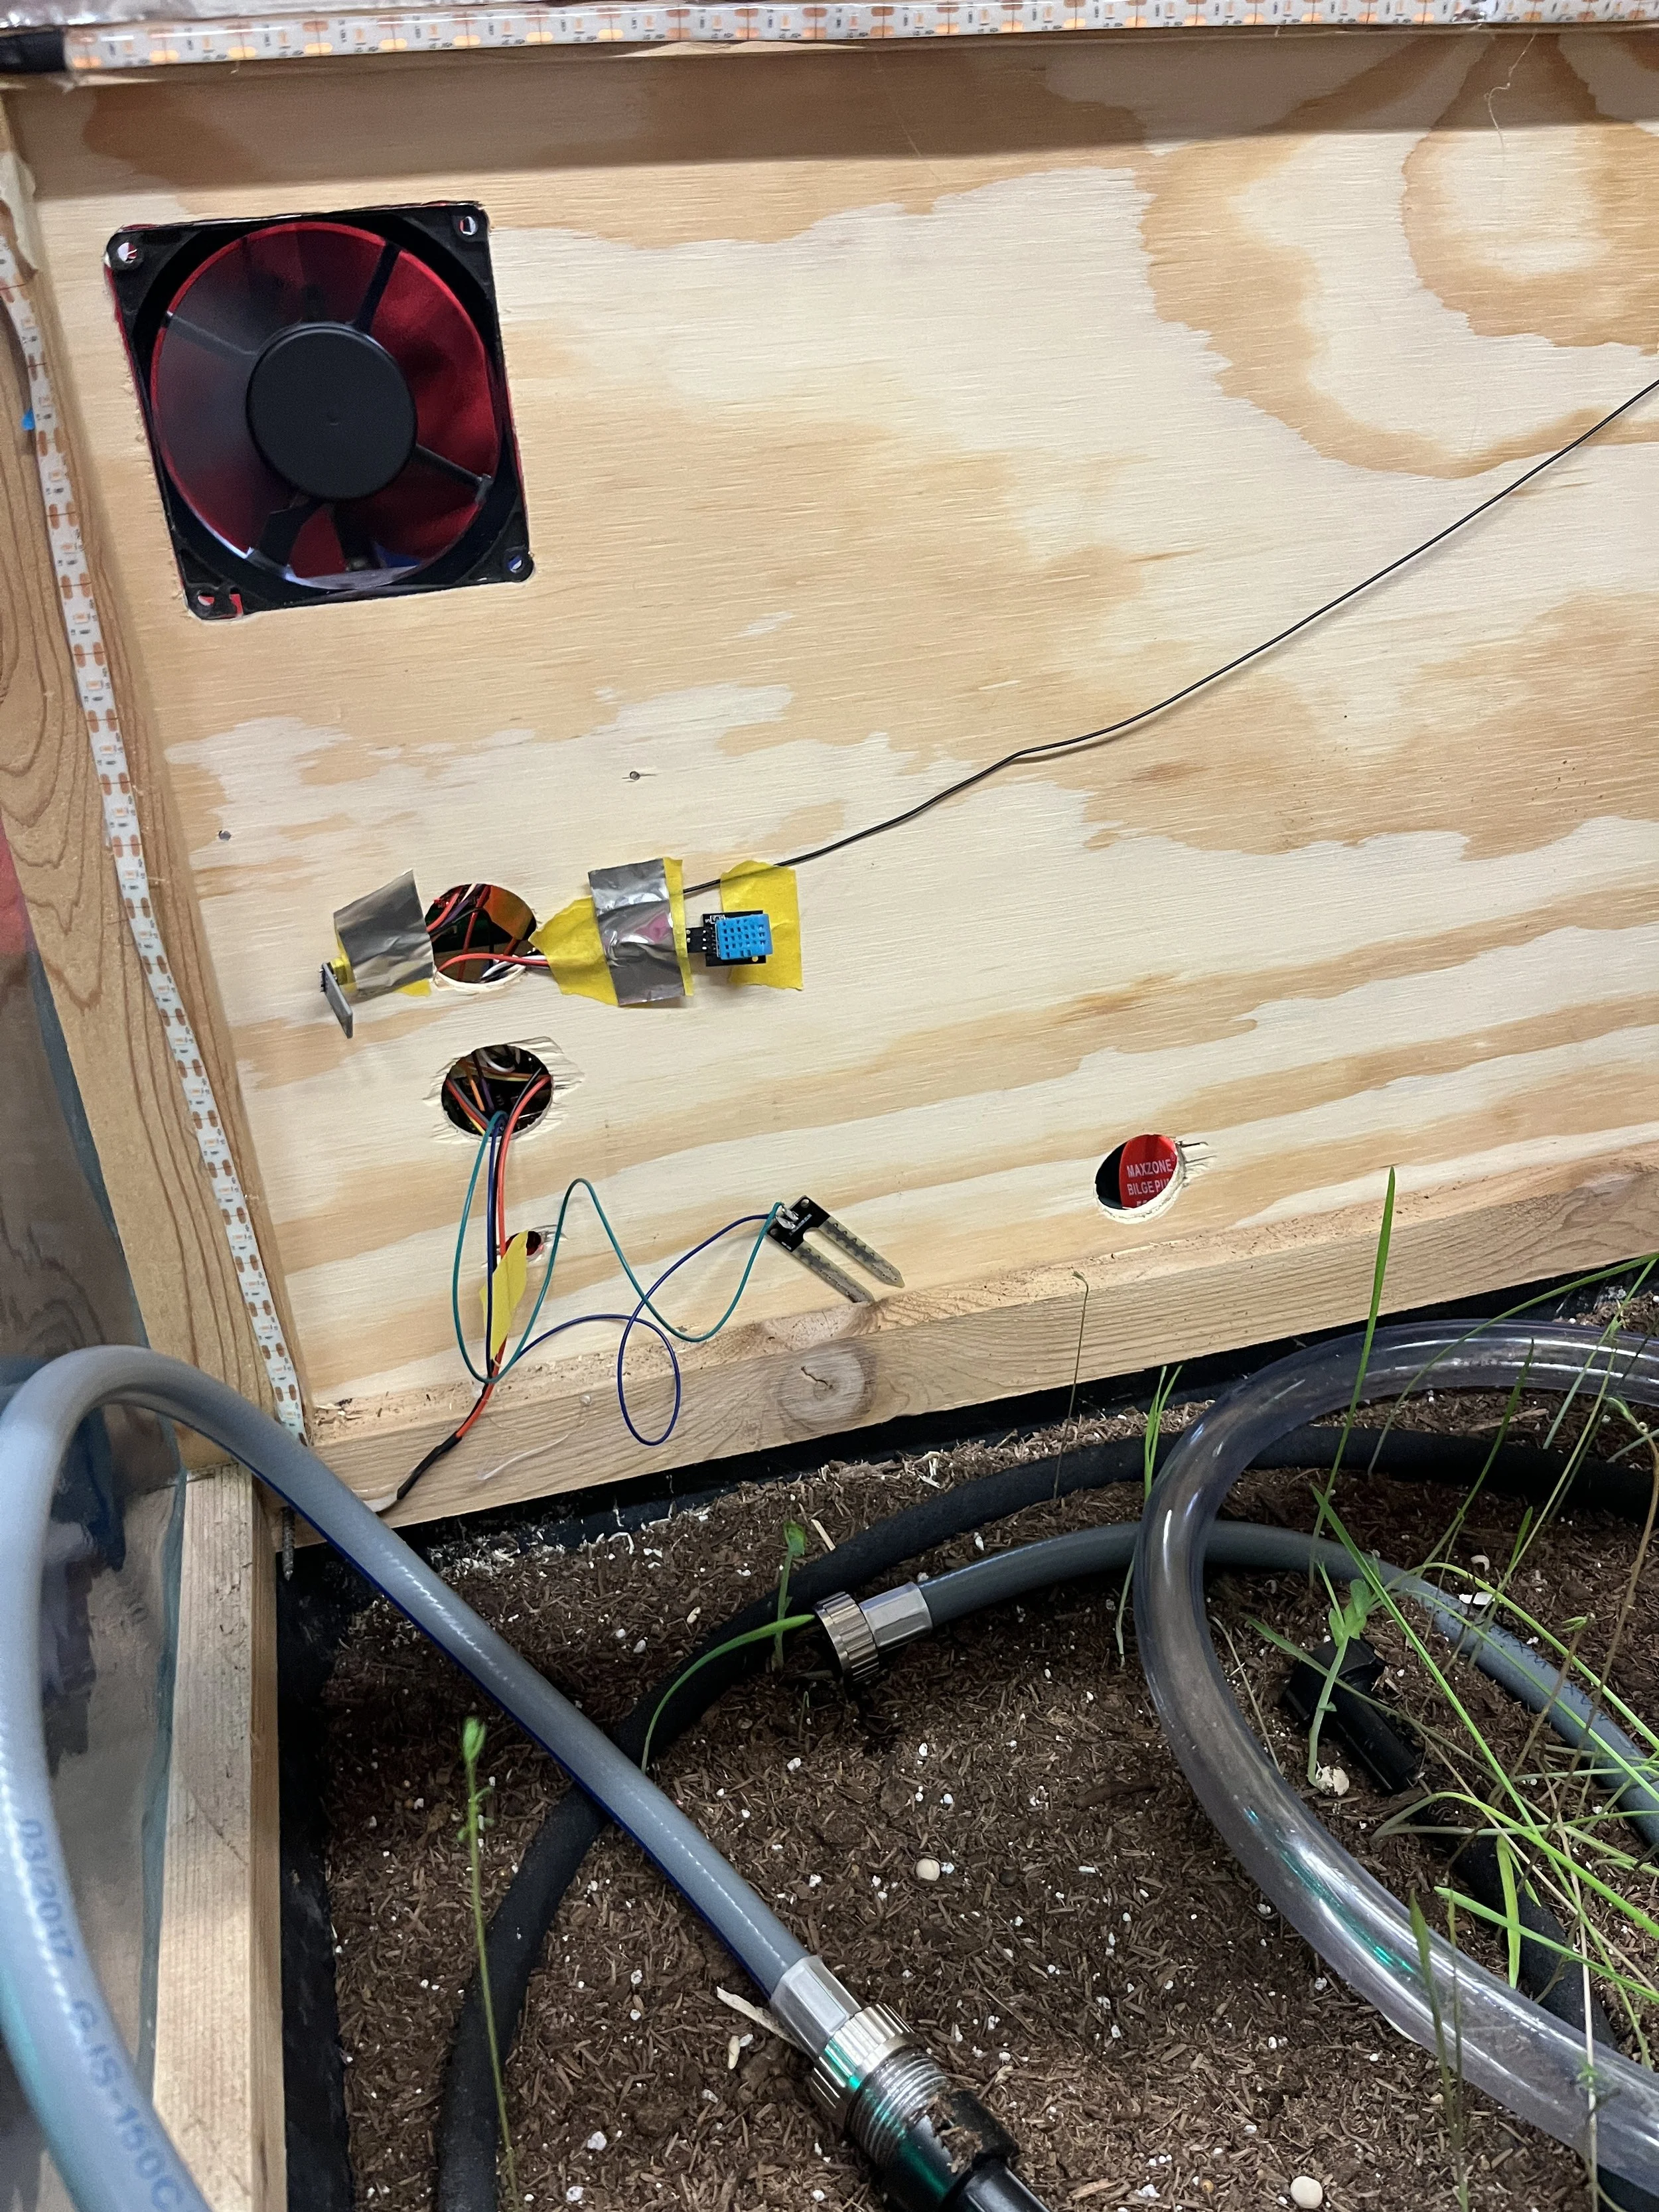
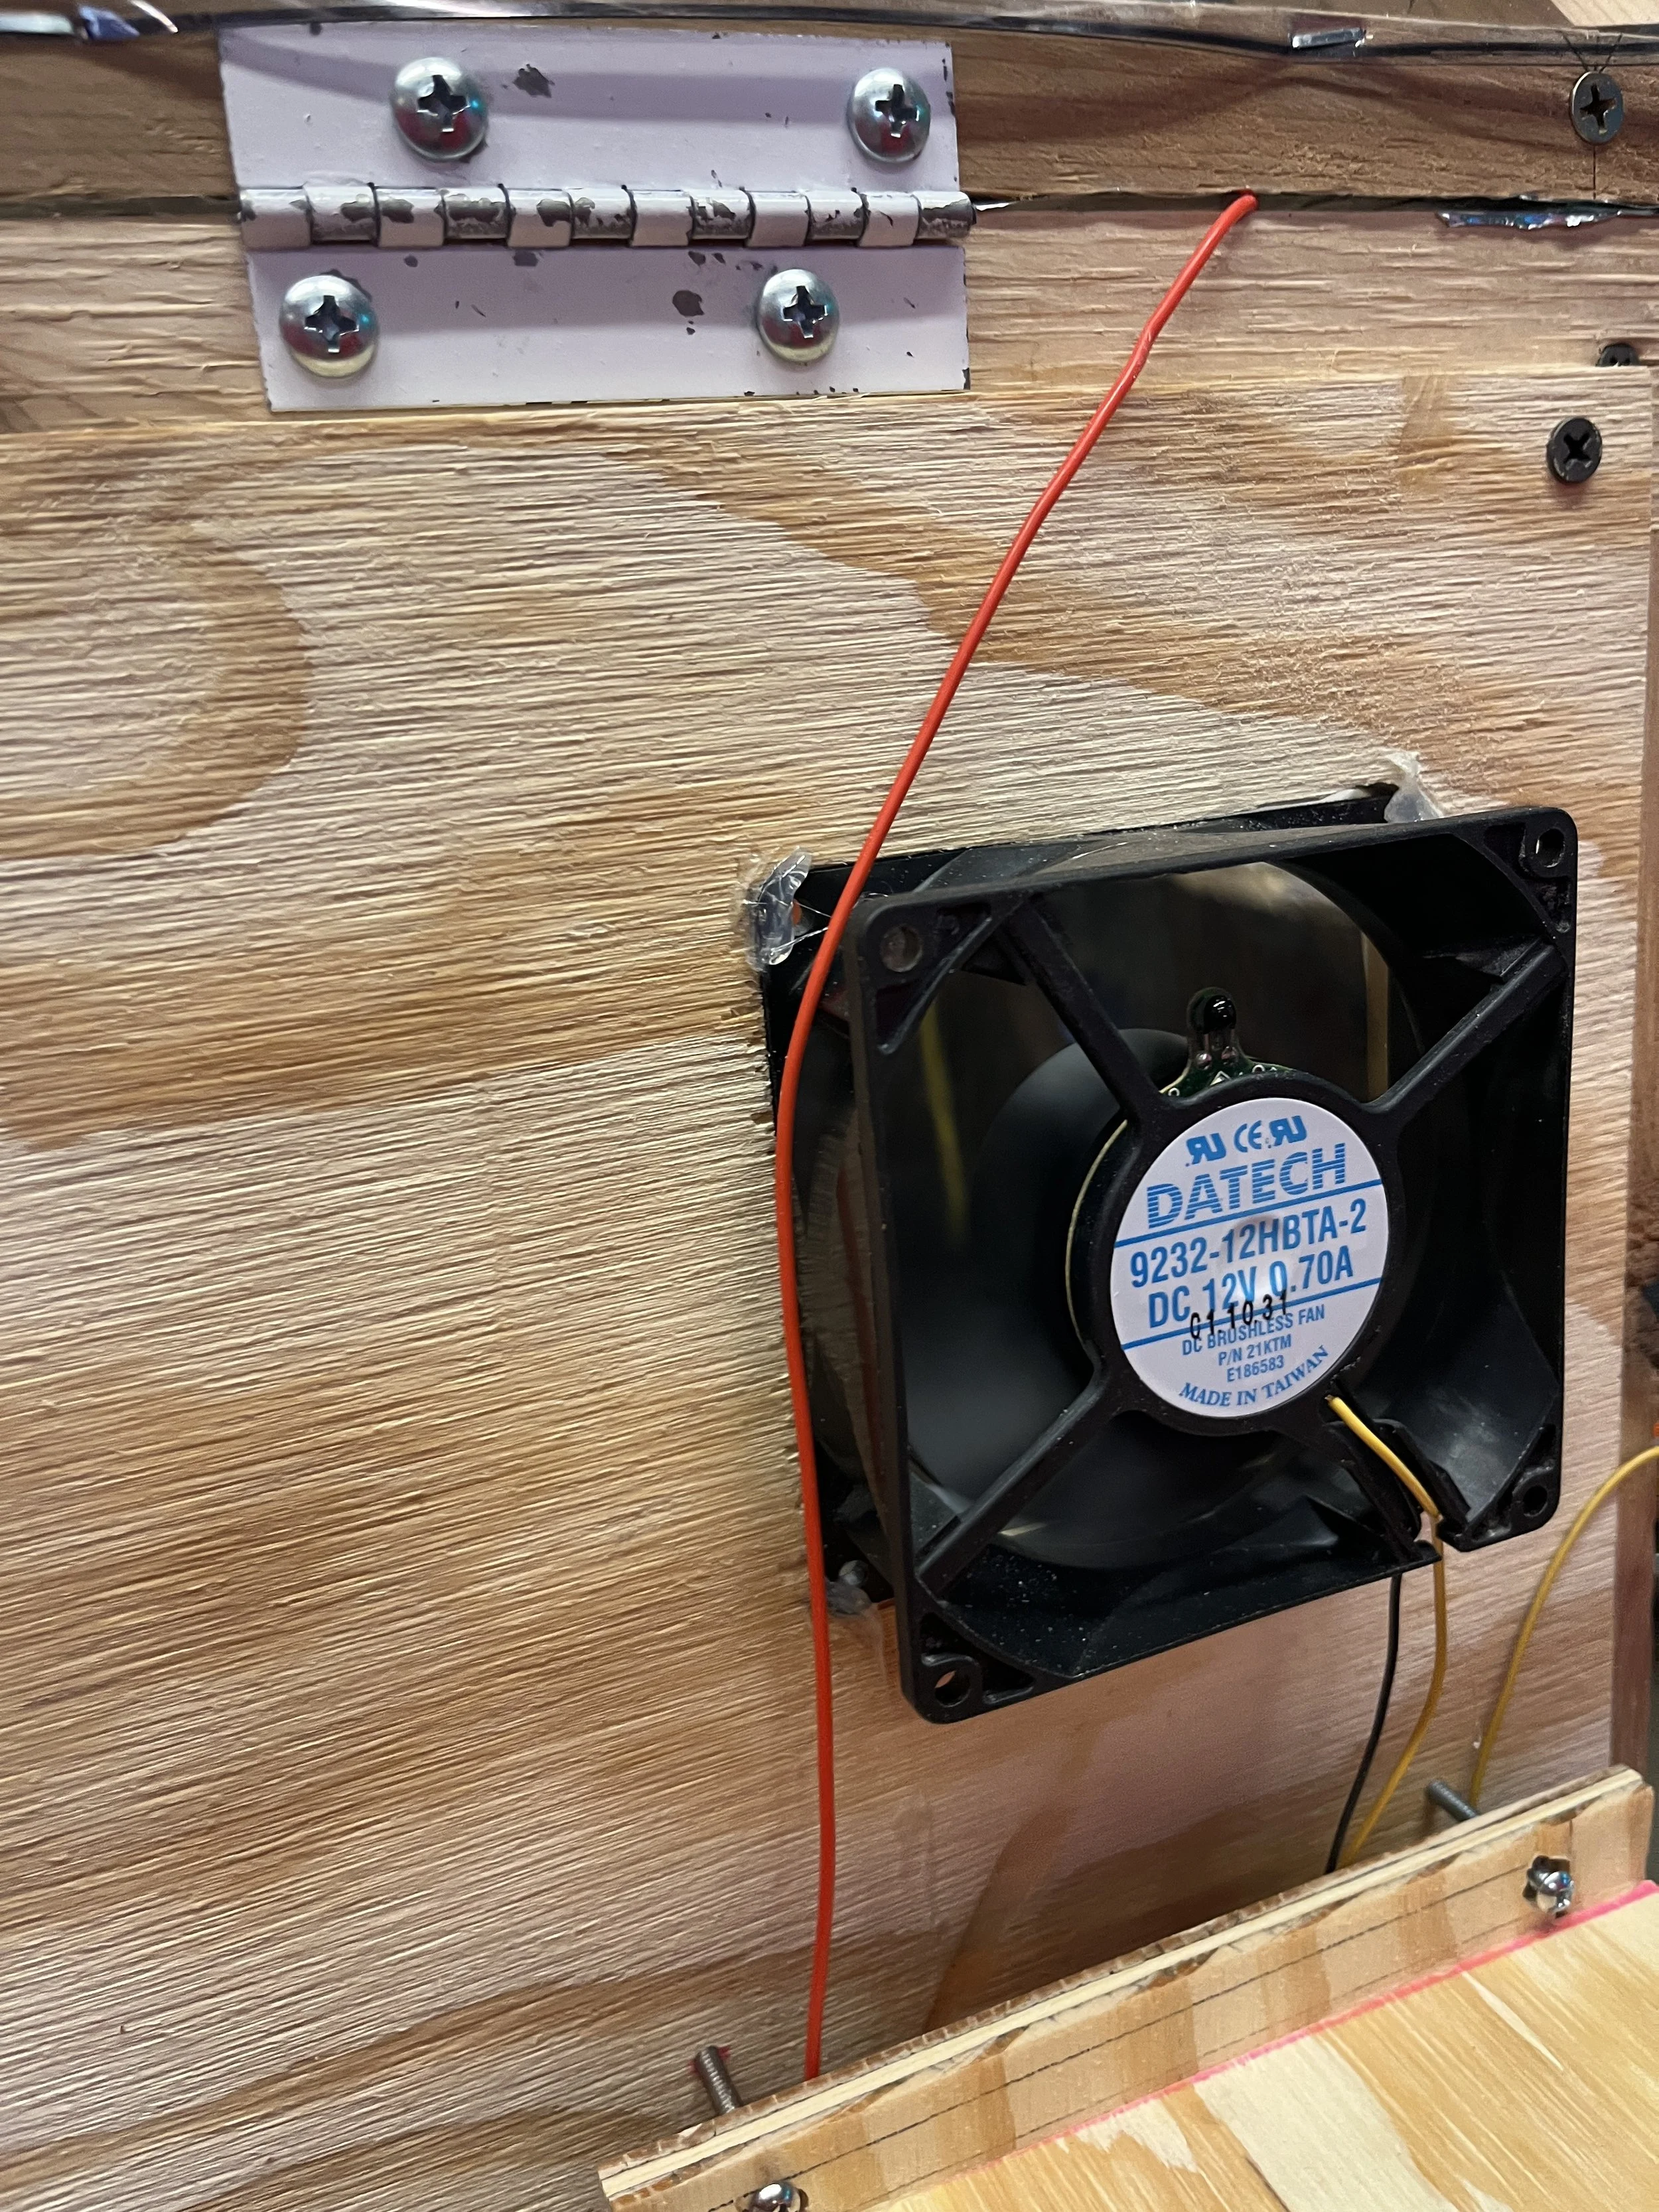
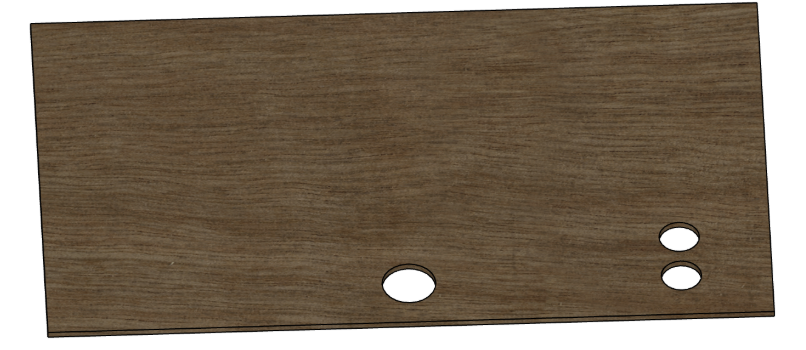
Before mounting the back panel, we drilled openings for the irrigation and sensors:
One central hole for the soaker hose
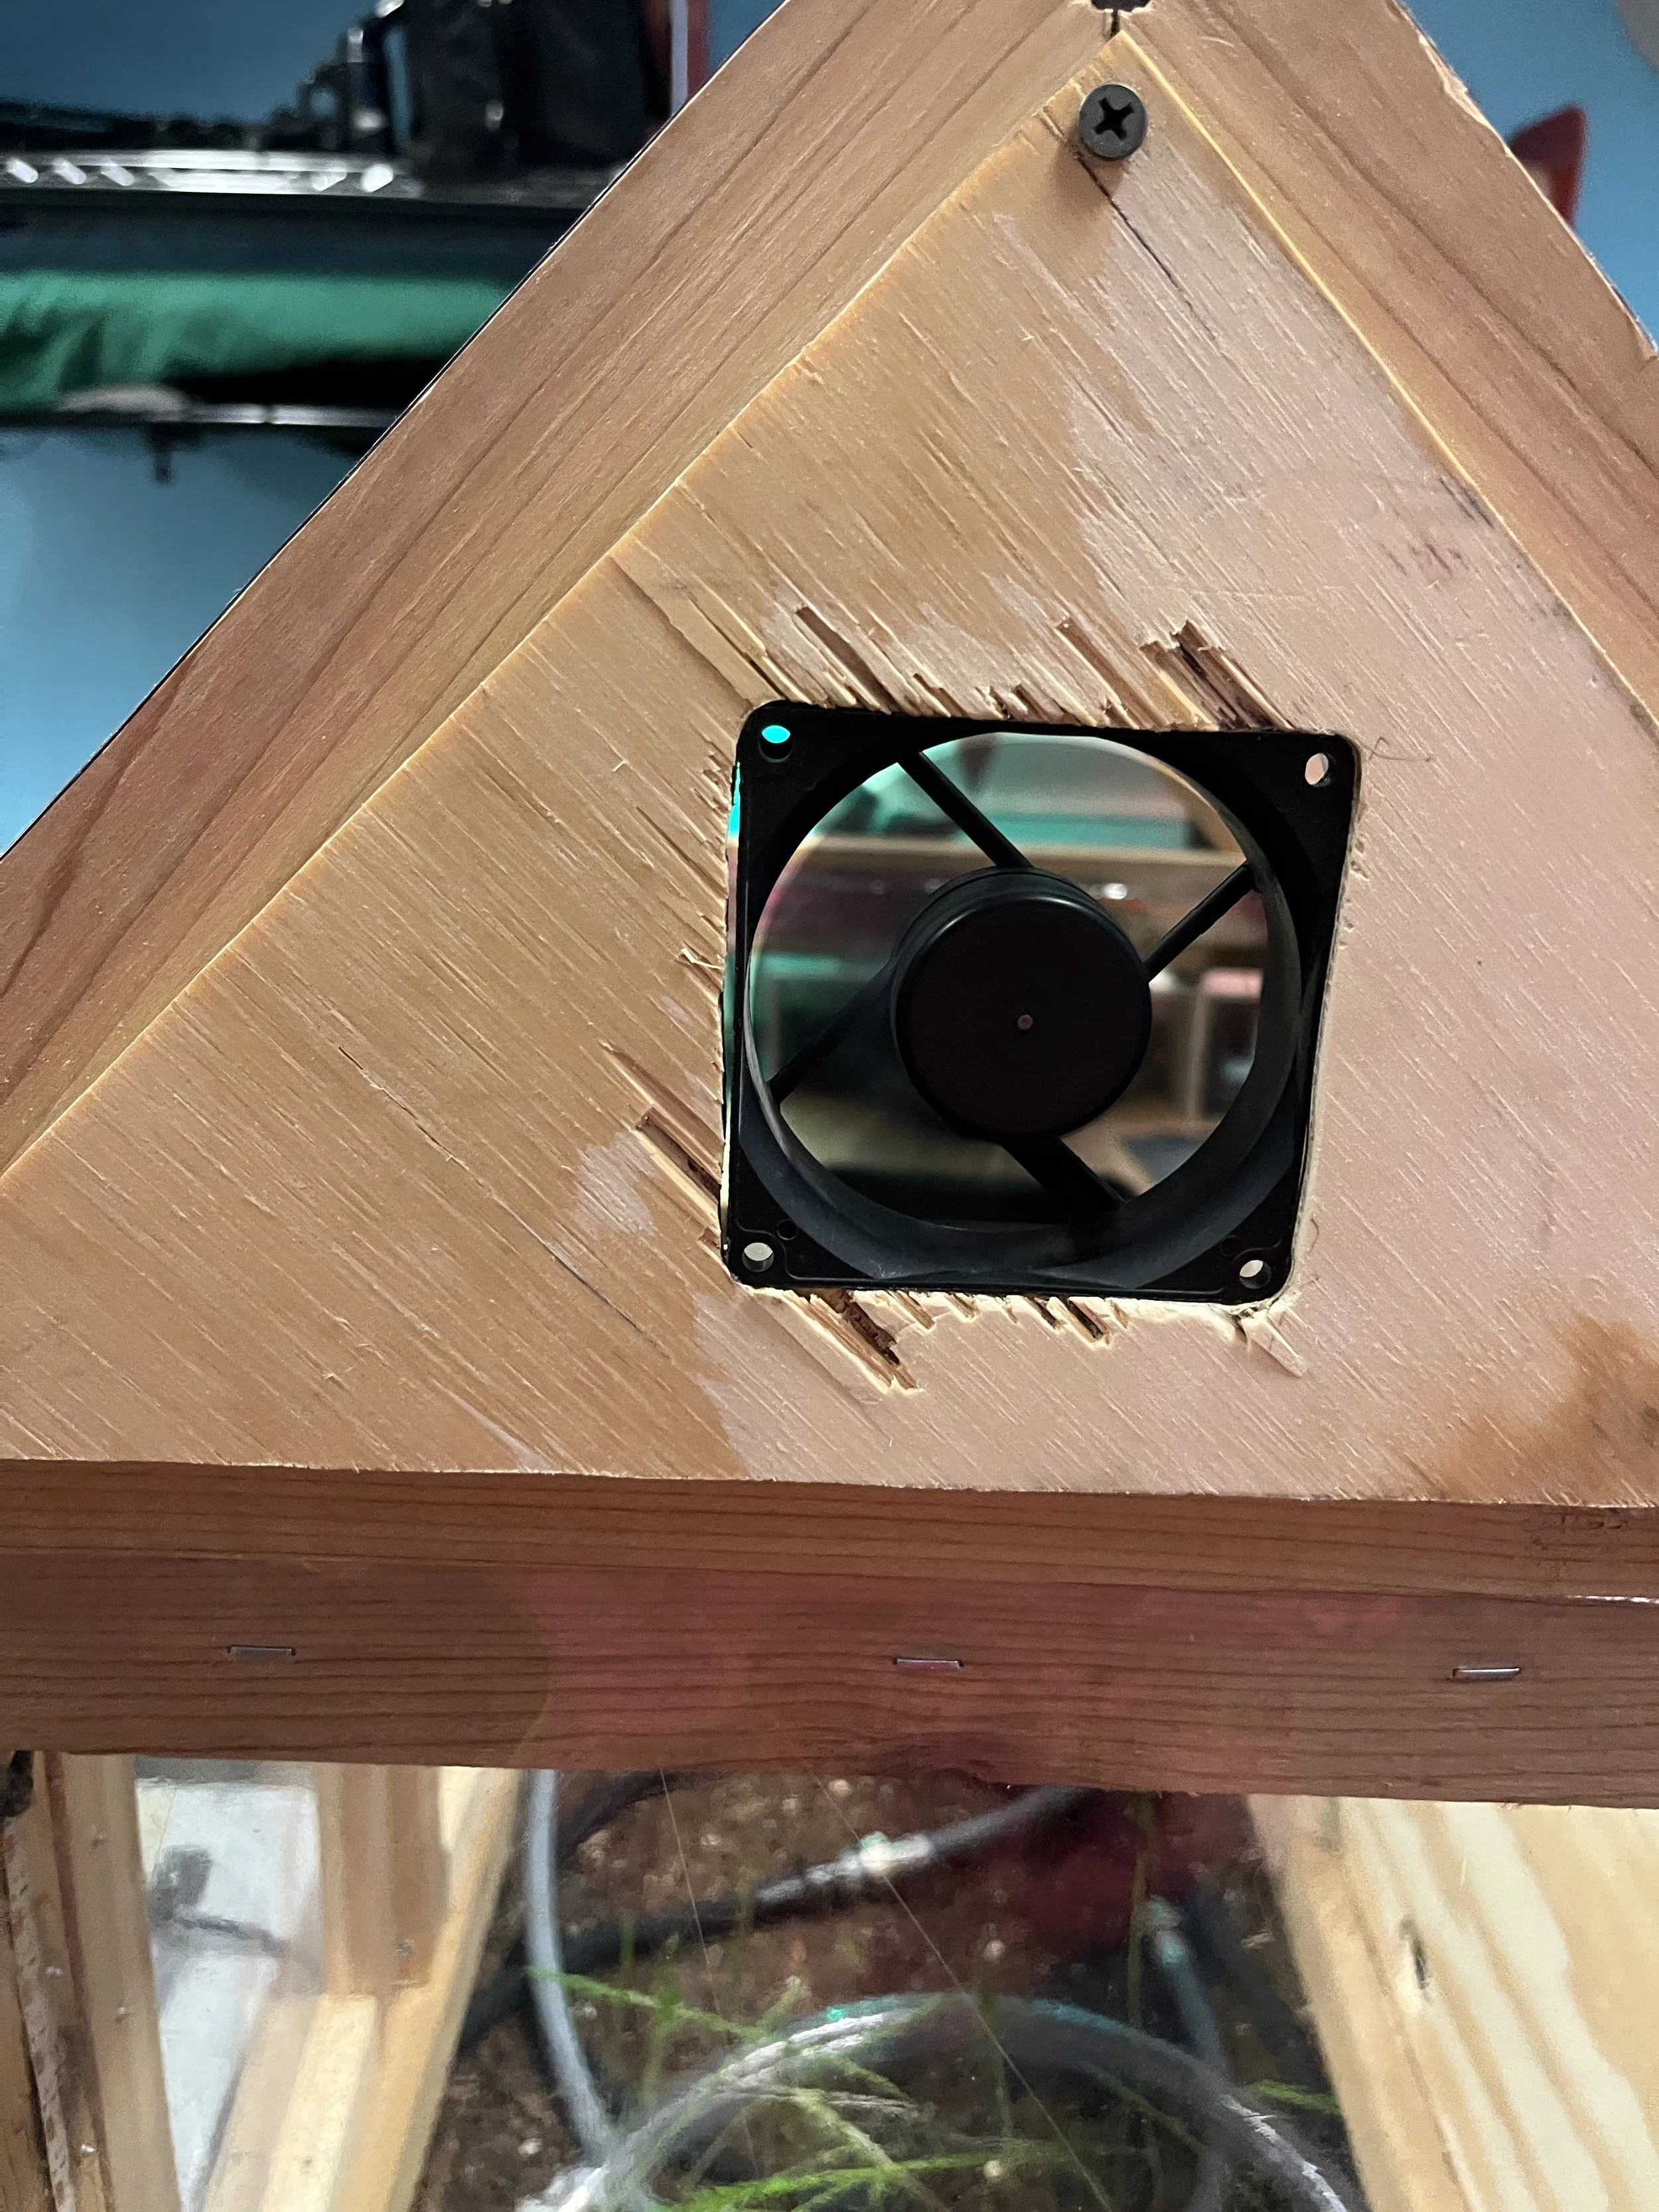
Two large holes for airflow or sensor access
We then mounted the panel onto the greenhouse frame using screws at the corners.
Preparing and mounting the back panel
I mounted the electronics enclosure onto the greenhouse, plugged all components in, and did a final pass to ensure everything was secure and functioning properly.
Final assembly

Electronics
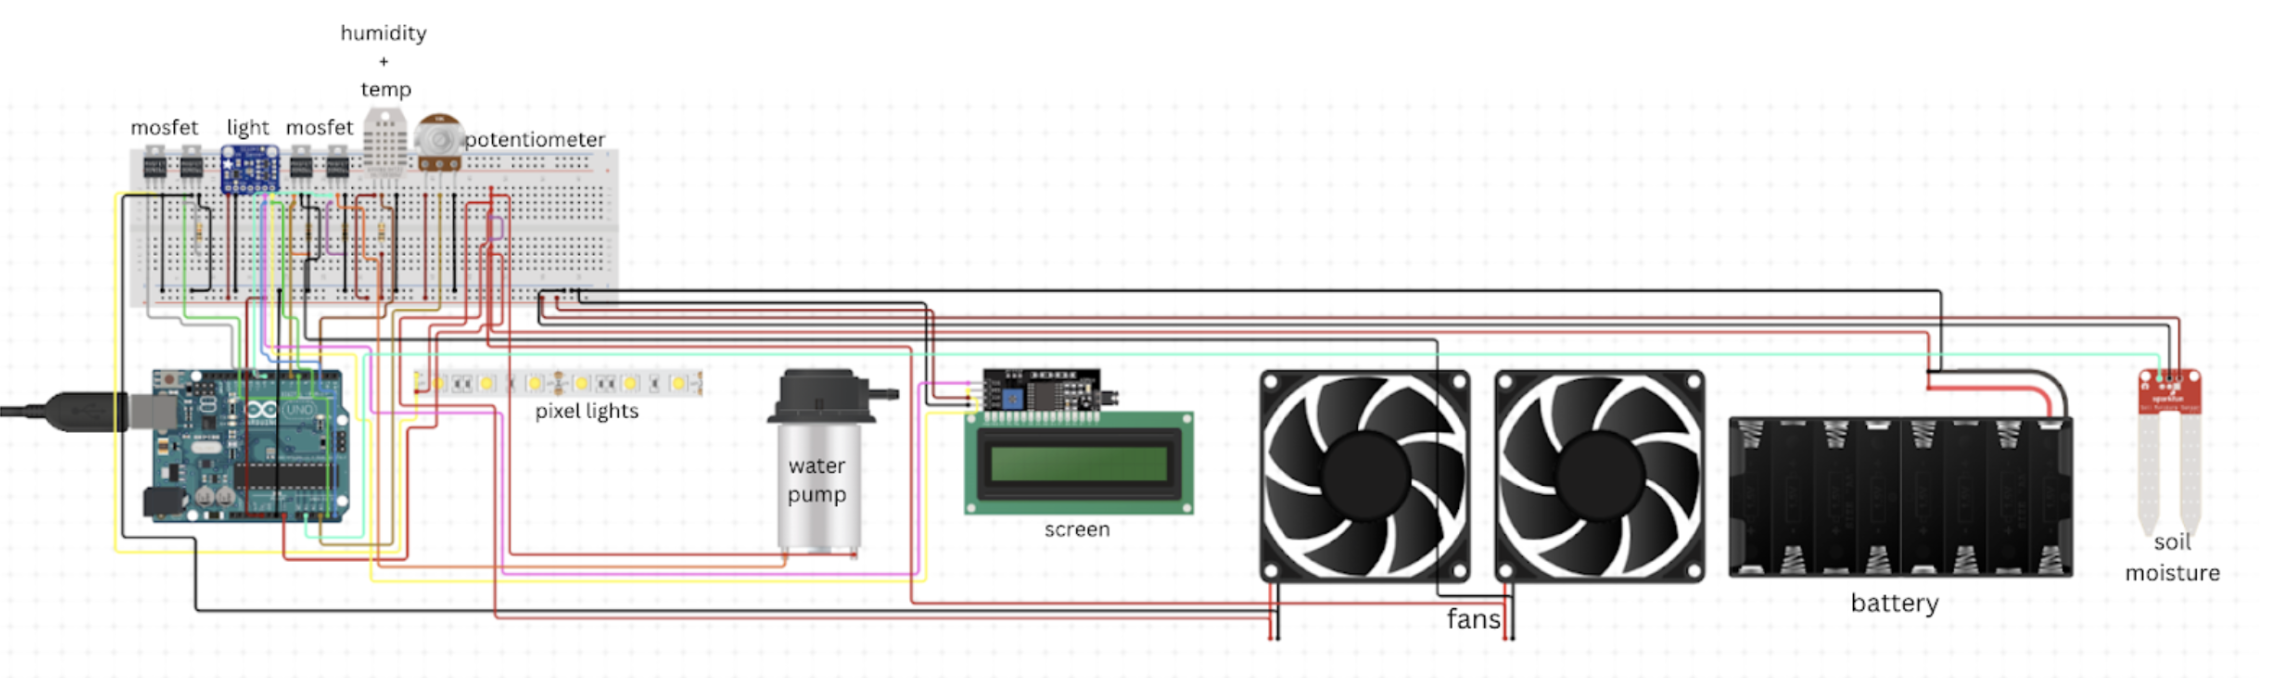
The electronics build followed a general wiring diagram:
A 12V external power supply and a 5V battery-powered subsystem
An Arduino Uno to read sensors (light, temperature, humidity, soil moisture)
MOSFETs to control 12V loads such as the pumps and fans
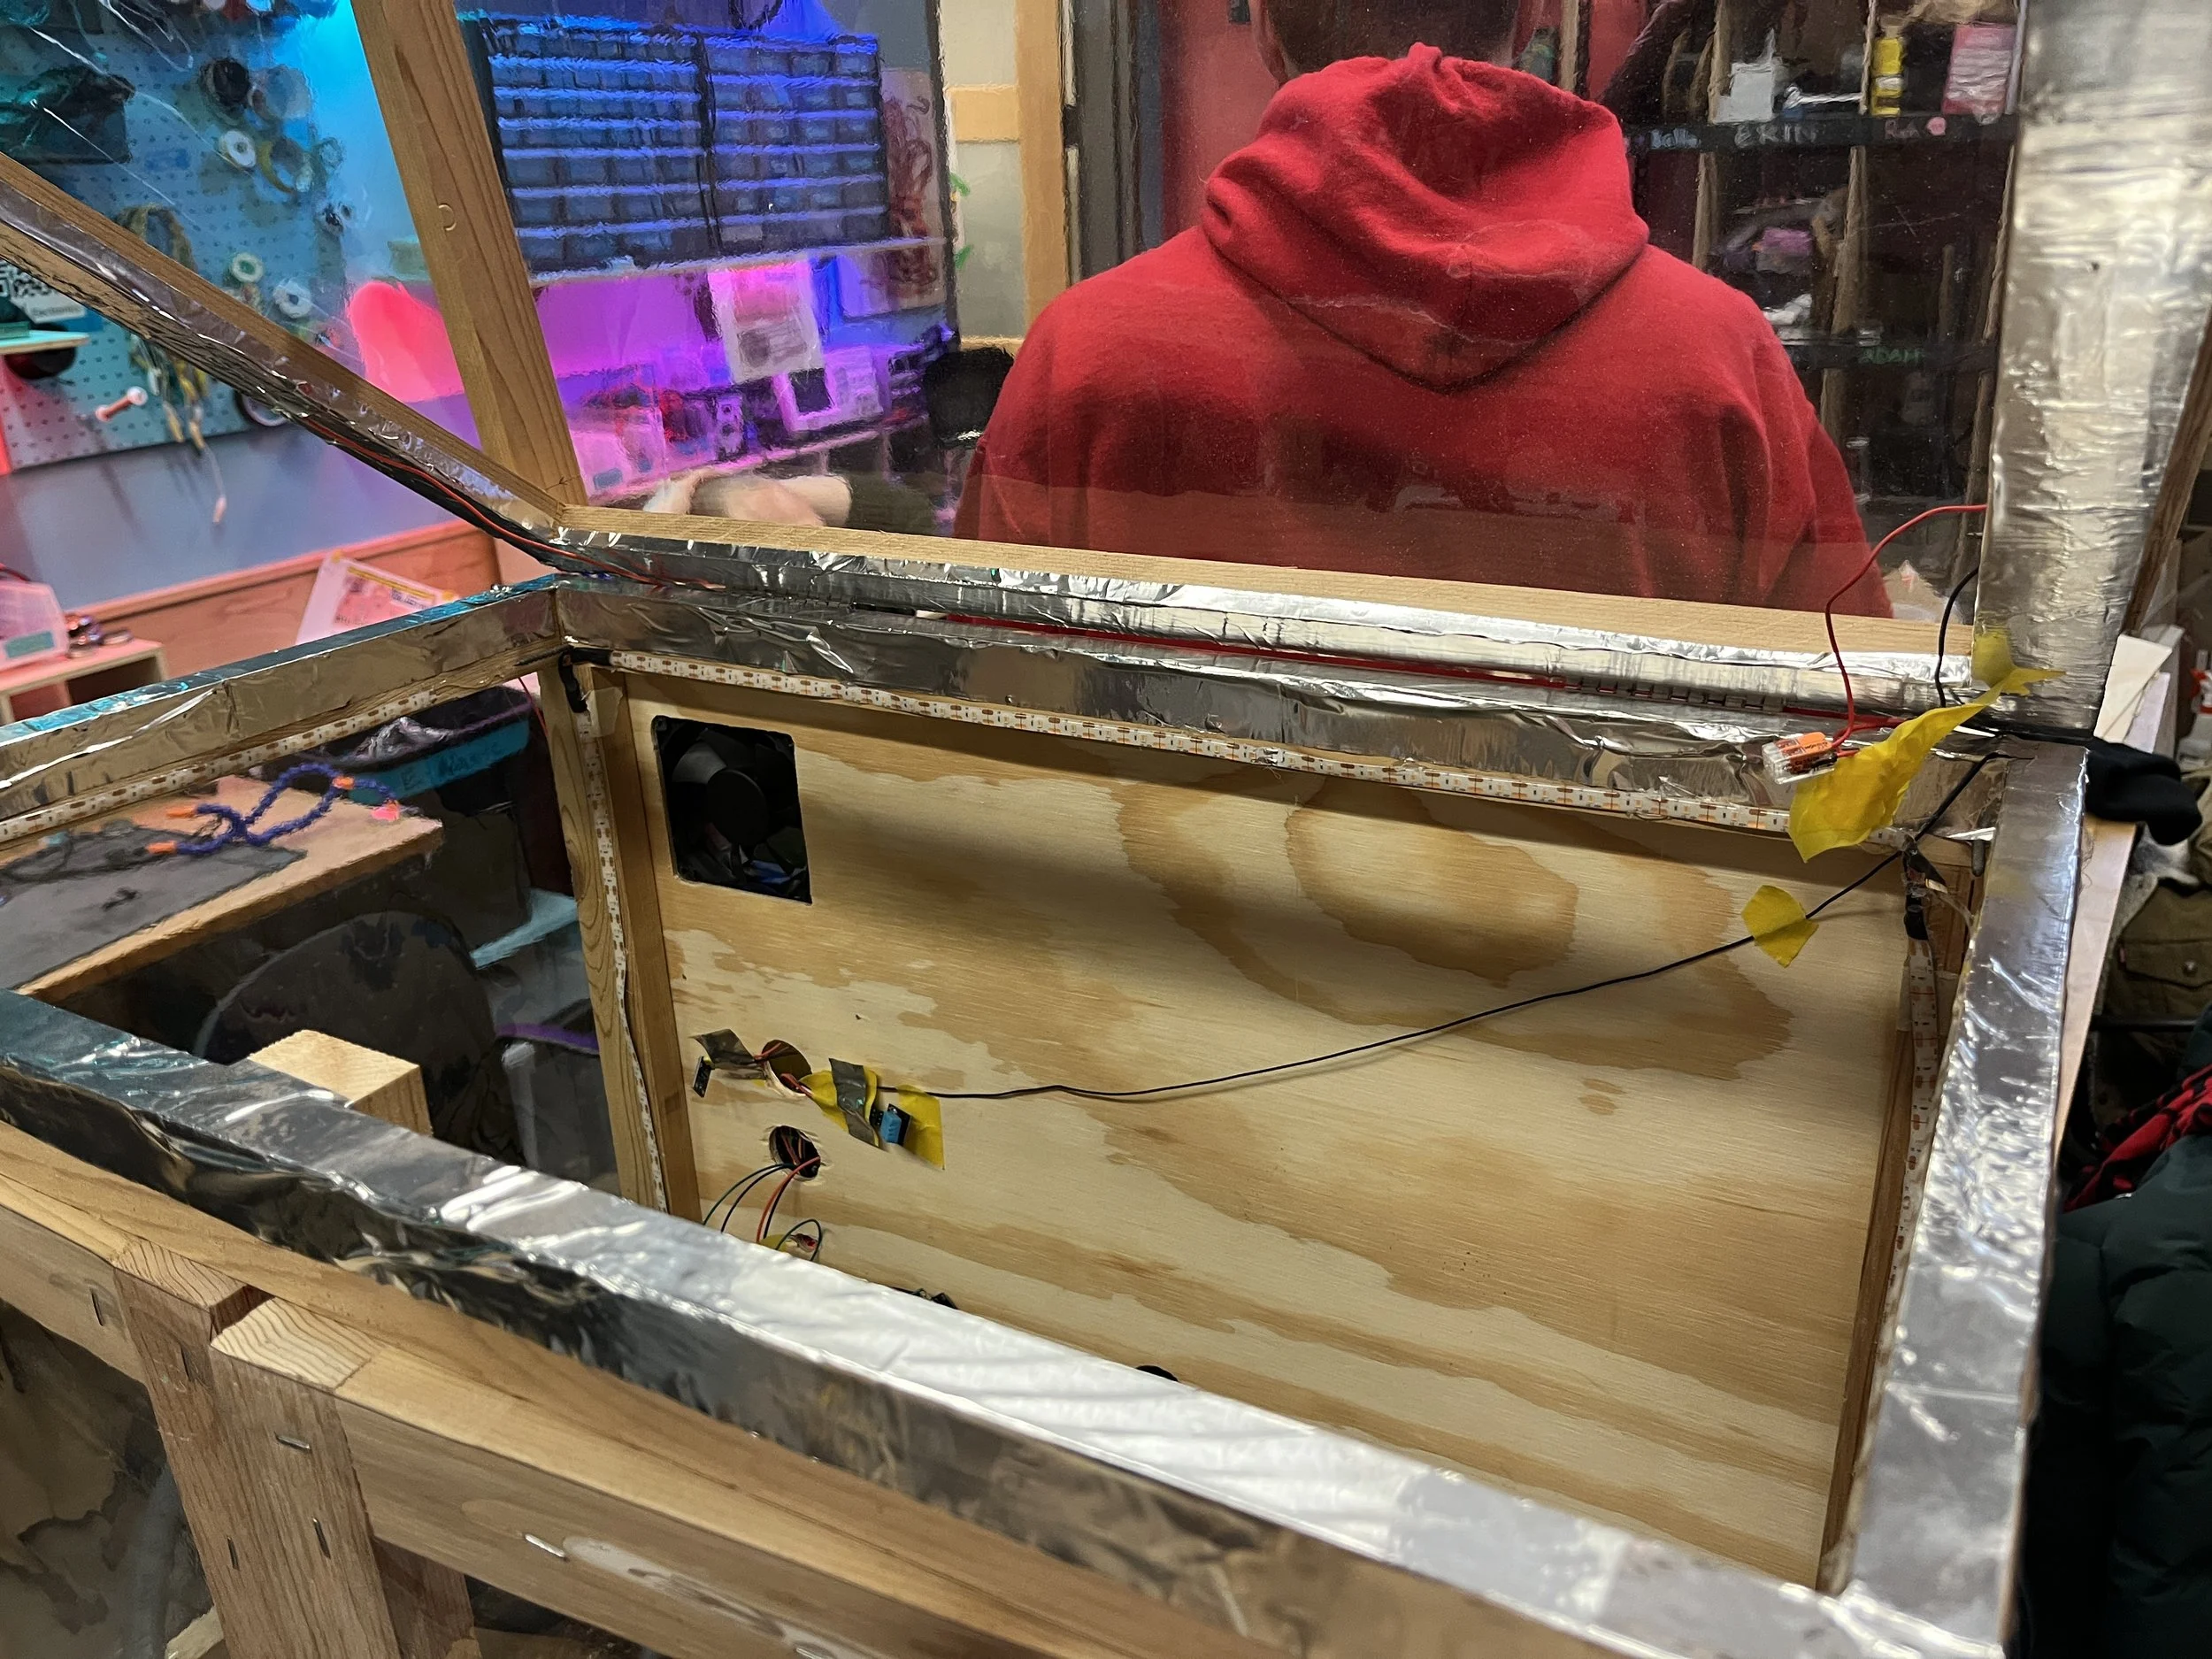
I used heat-shrink tubing to organize and insulate junctions. For the LED strip routing around the top edge and down each leg, I soldered each leg of lights in a corner configuration.
Once everything was wired, we assembled the components inside the enclosure box.
FINAL NOTES
Heating element: A future development could be to add in a heating element to account for when it gets cold or lack of sun. Right now there is nothing in the greenhouse to keep it from getting too cold outside. Obviously we made this build in Colorado where it gets into the negatives in the dead of winter. If we added the heating element or heavy duty grow lights, then we could solve the issue of possible freezing and killing of the plants in the winter, therefore not halting our produce during the winter, and having the greenhouse serve its purpose.
Modular: Another great option for the future if people desire more planting and growing opportunities is to build more of the base without the slanted roof, add in the conductive tape to the top of the house and bottom of the top house so that when they are connected it completes the circuit. Right now the Greenhouse is one layer, so it has fairly limited planting space. If it was able to become modular, then there is much more space for even more plants, and therefore food to sustain the population.
Future development
Power source: Currently we have no connection to an outside power module in order to get to a consistent 12V power supply. Having a consistent power supply embedded would make the system more consistent and efficient. Having to connect jumper wires and turn on the module could be problematic and is not the first choice.
Electronics enclosure access and sturdiness: The current electronics set up is an open backed box that has holes sliding onto screws to be taken off when needed. This is possibly a problematic design as it is hard to access the electronics to attach and to modify. In the future the front or the side should probably be a hinged door to access the wires in a safer and easier way. Another problem is that we put plywood on the back of the greenhouse for the possibility of it being mounted. The box was put on the back so as to not block lighting from the clear vinyl for the greenhouse. Those two decisions together contradict each other, as now it is not mountable with a box on the back. It would probably have to be moved in a future build so that the greenhouse can be moved or pushed flush against a wall.
Plumbing: A slightly unrelated problem is the watering situation. The connections between the soaker hose and the regular hose, and the regular hose and the pump, is not secure. The water was leaking, which caused danger and caution for the electronics. However, this is most likely an issue that can be solved with a project from the water module. We did not put a ton of time into the plumbing connections, as we figured it fell under the umbrella of a water project.
Problems of note