Test in Materials: Wood + Acrylic
Timeline: 3 weeks, November 2025
Class: Material Studies and Practices – ATLS 3710
Role: Sole creator and researcher

INTRODUCTION
Context
This project was completed for a materials-focused course that surveys the physical, cultural, and chemical dimensions of creative materials. Throughout the semester, we worked hands-on with wood, plastics, minerals, metals, and fibers — examining how these materials behave, where they come from, and more.
For the final project, students were asked to combine two or more materials studied in the course to create an object of their choice. The project required a research-based understanding of material histories, a written engagement with an expert text, and documentation of the tools and processes involved in fabrication.
Summary
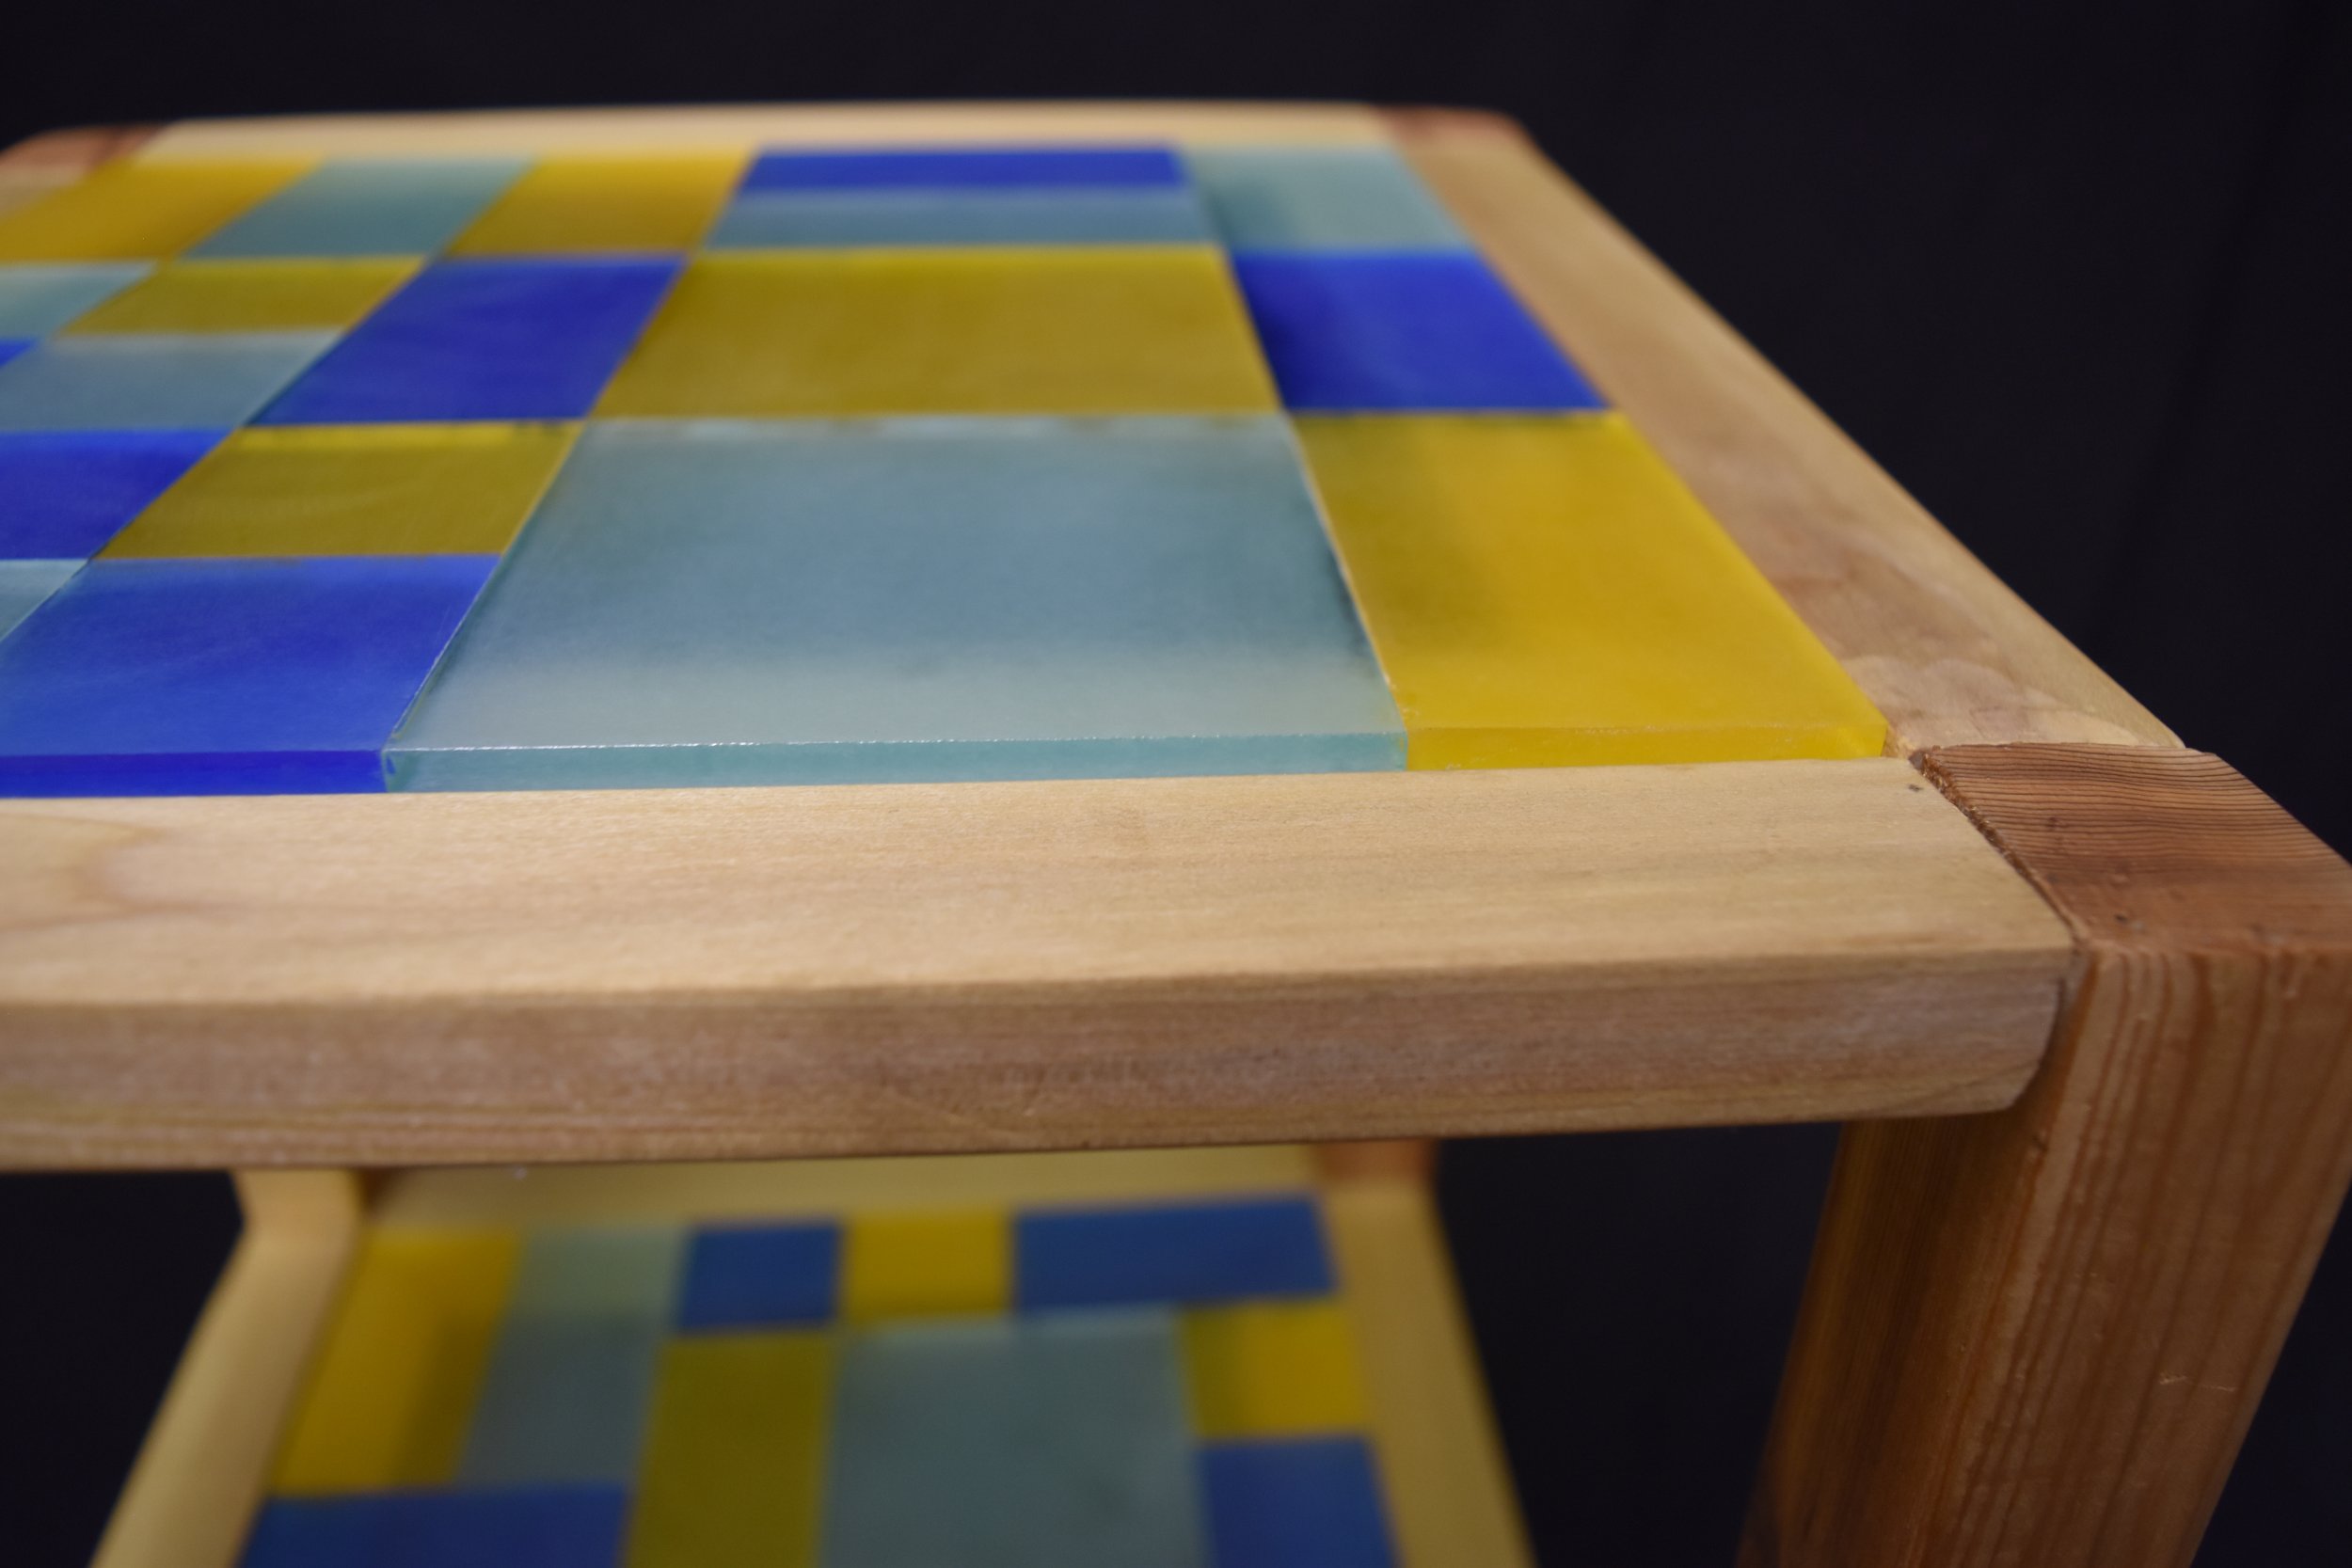
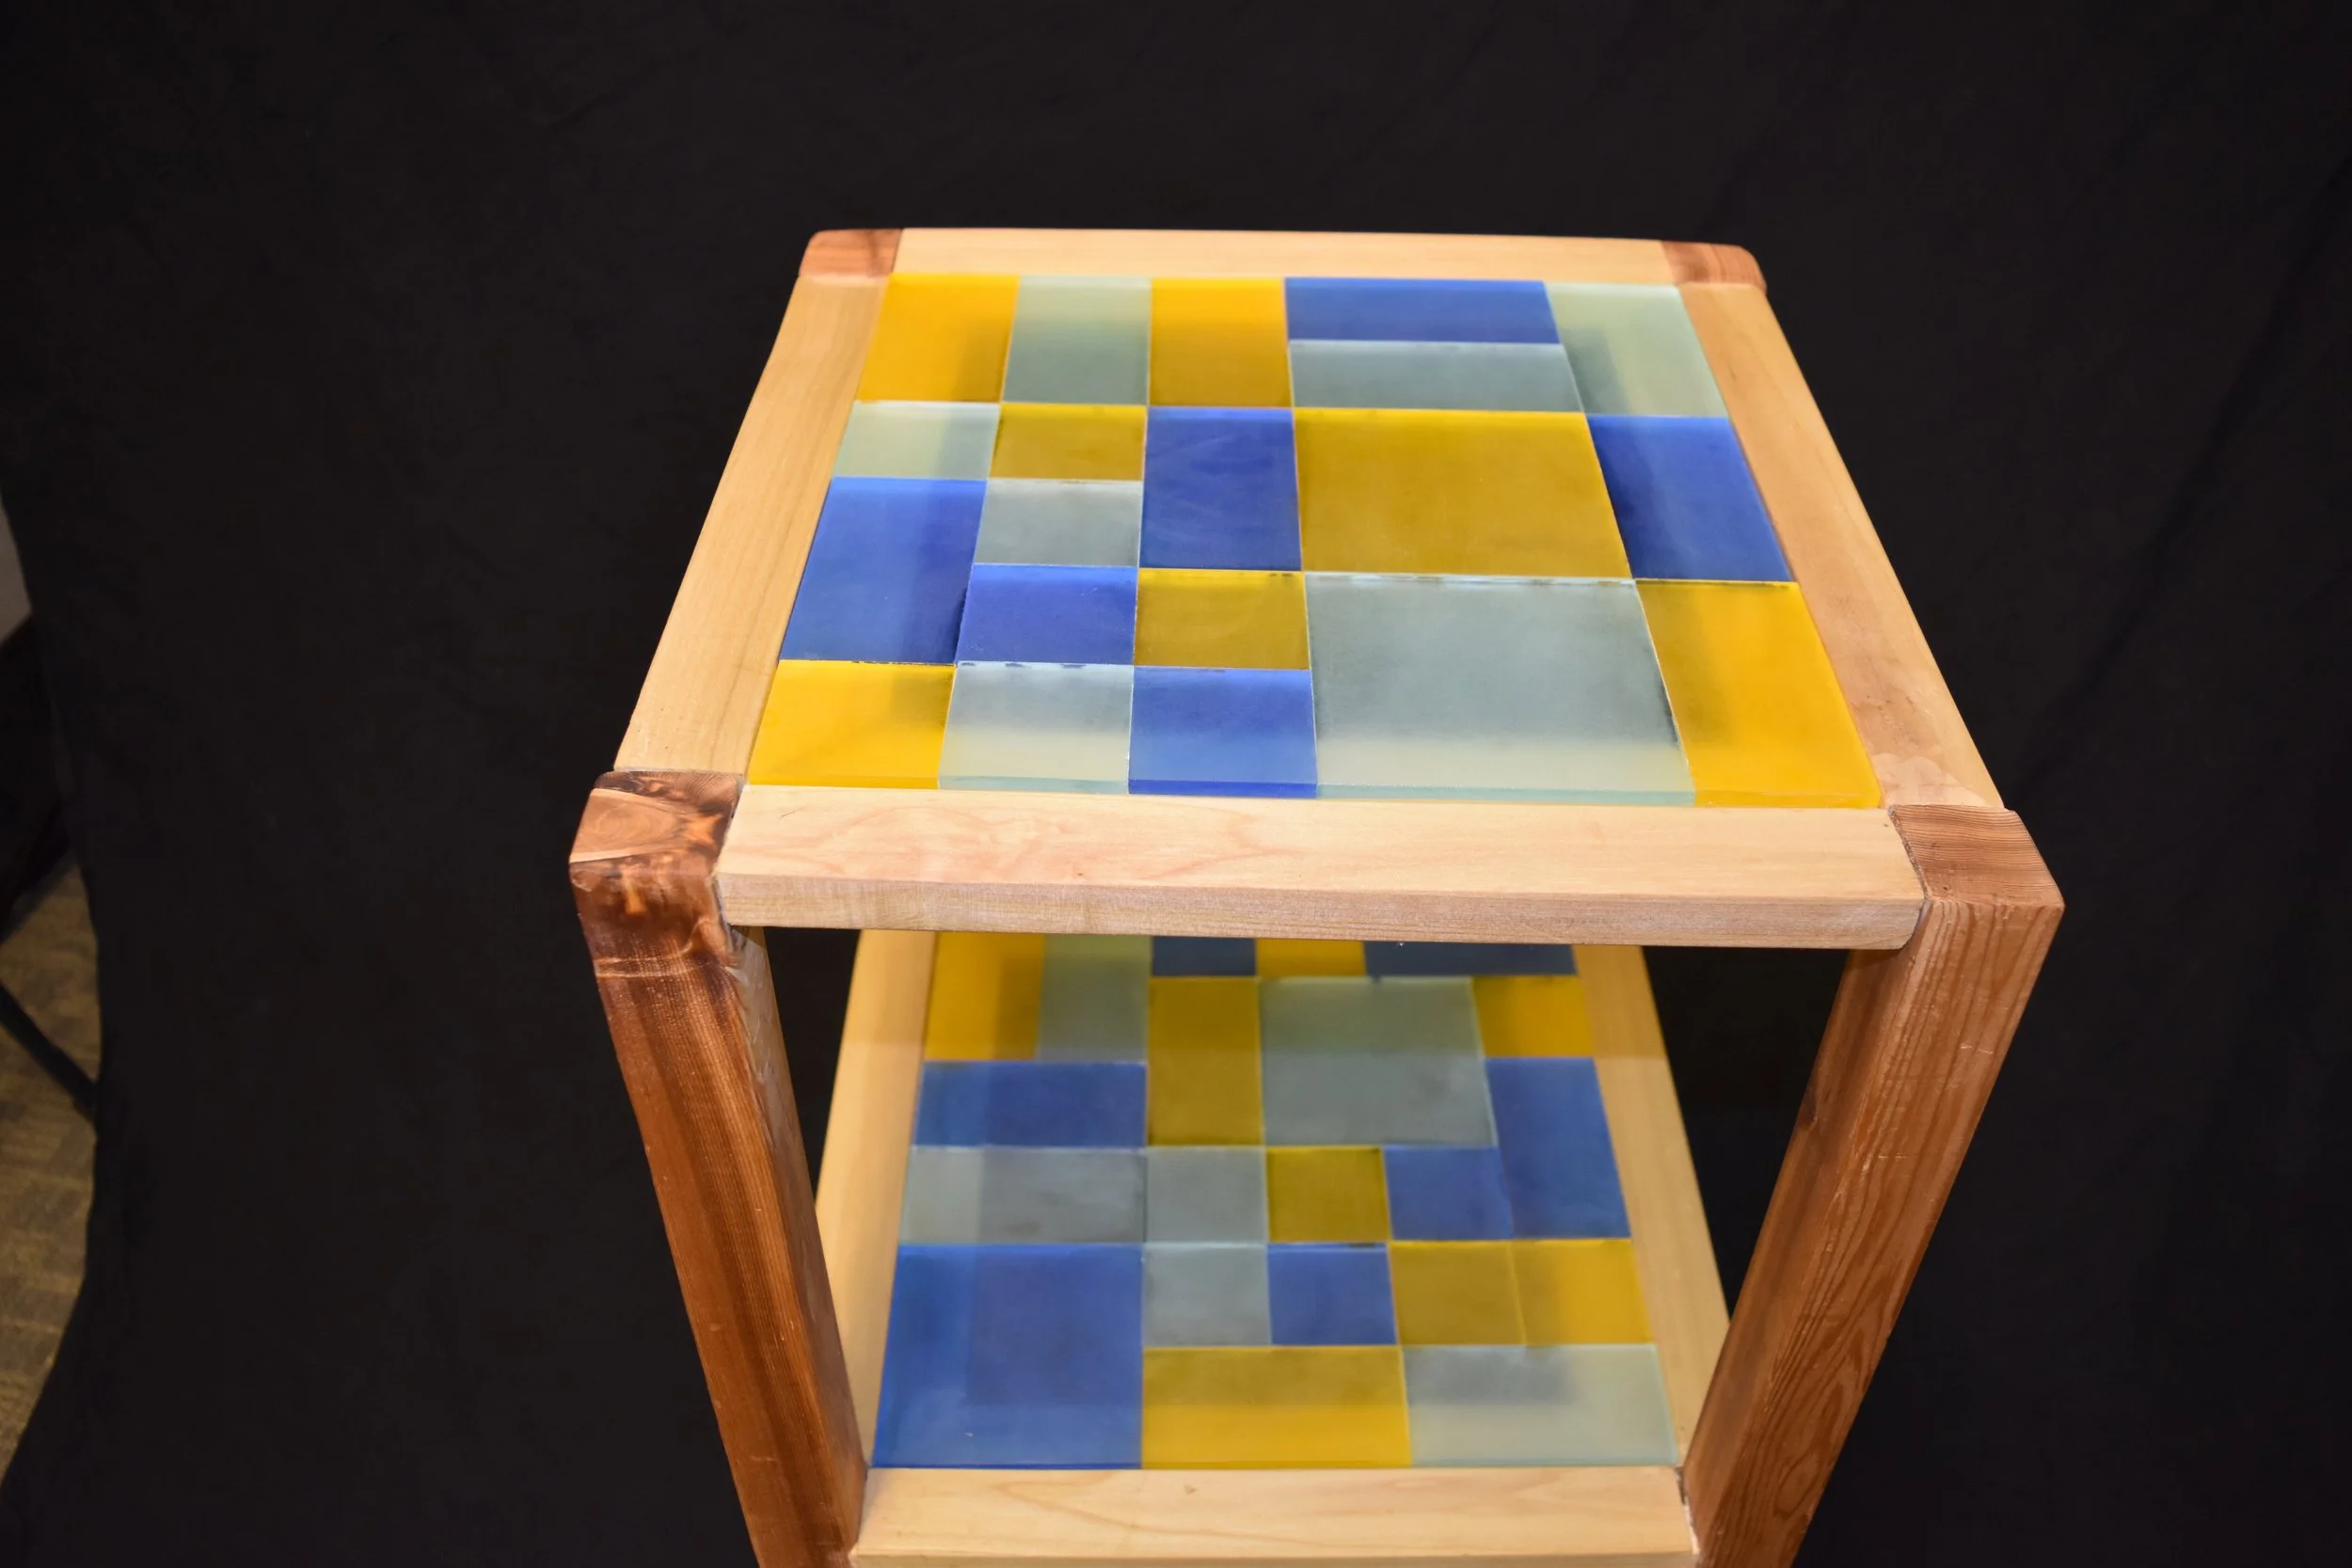
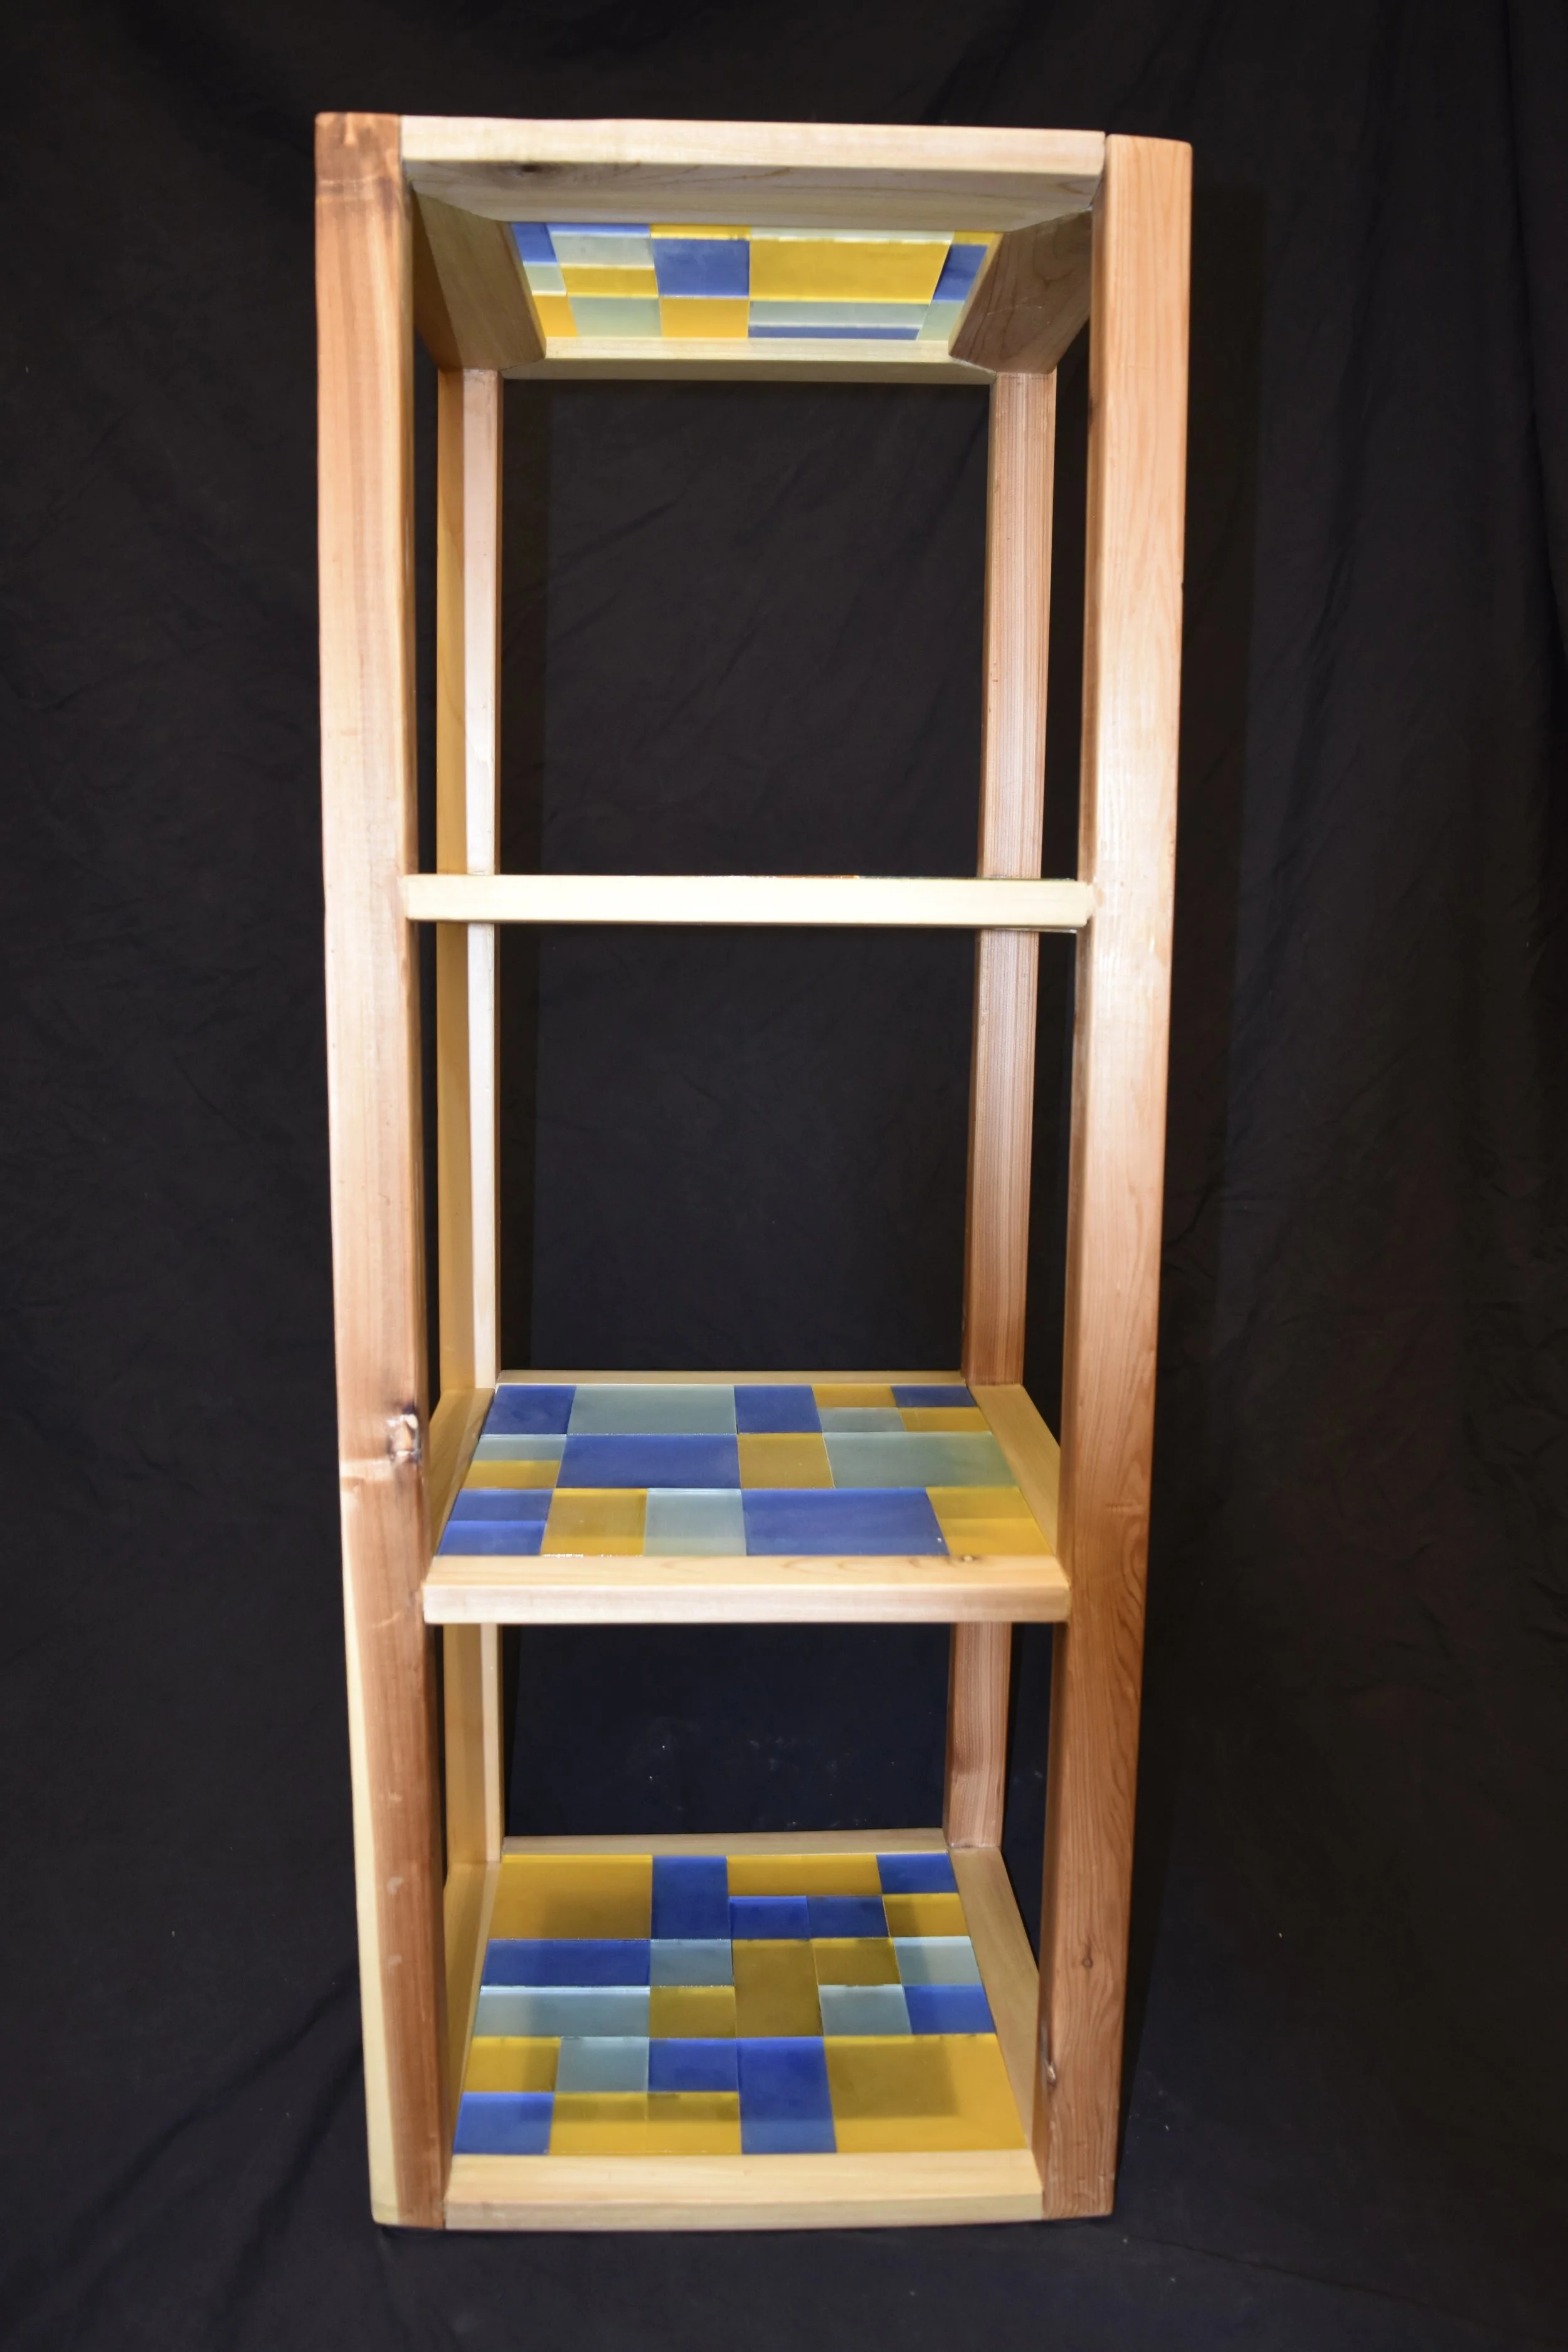
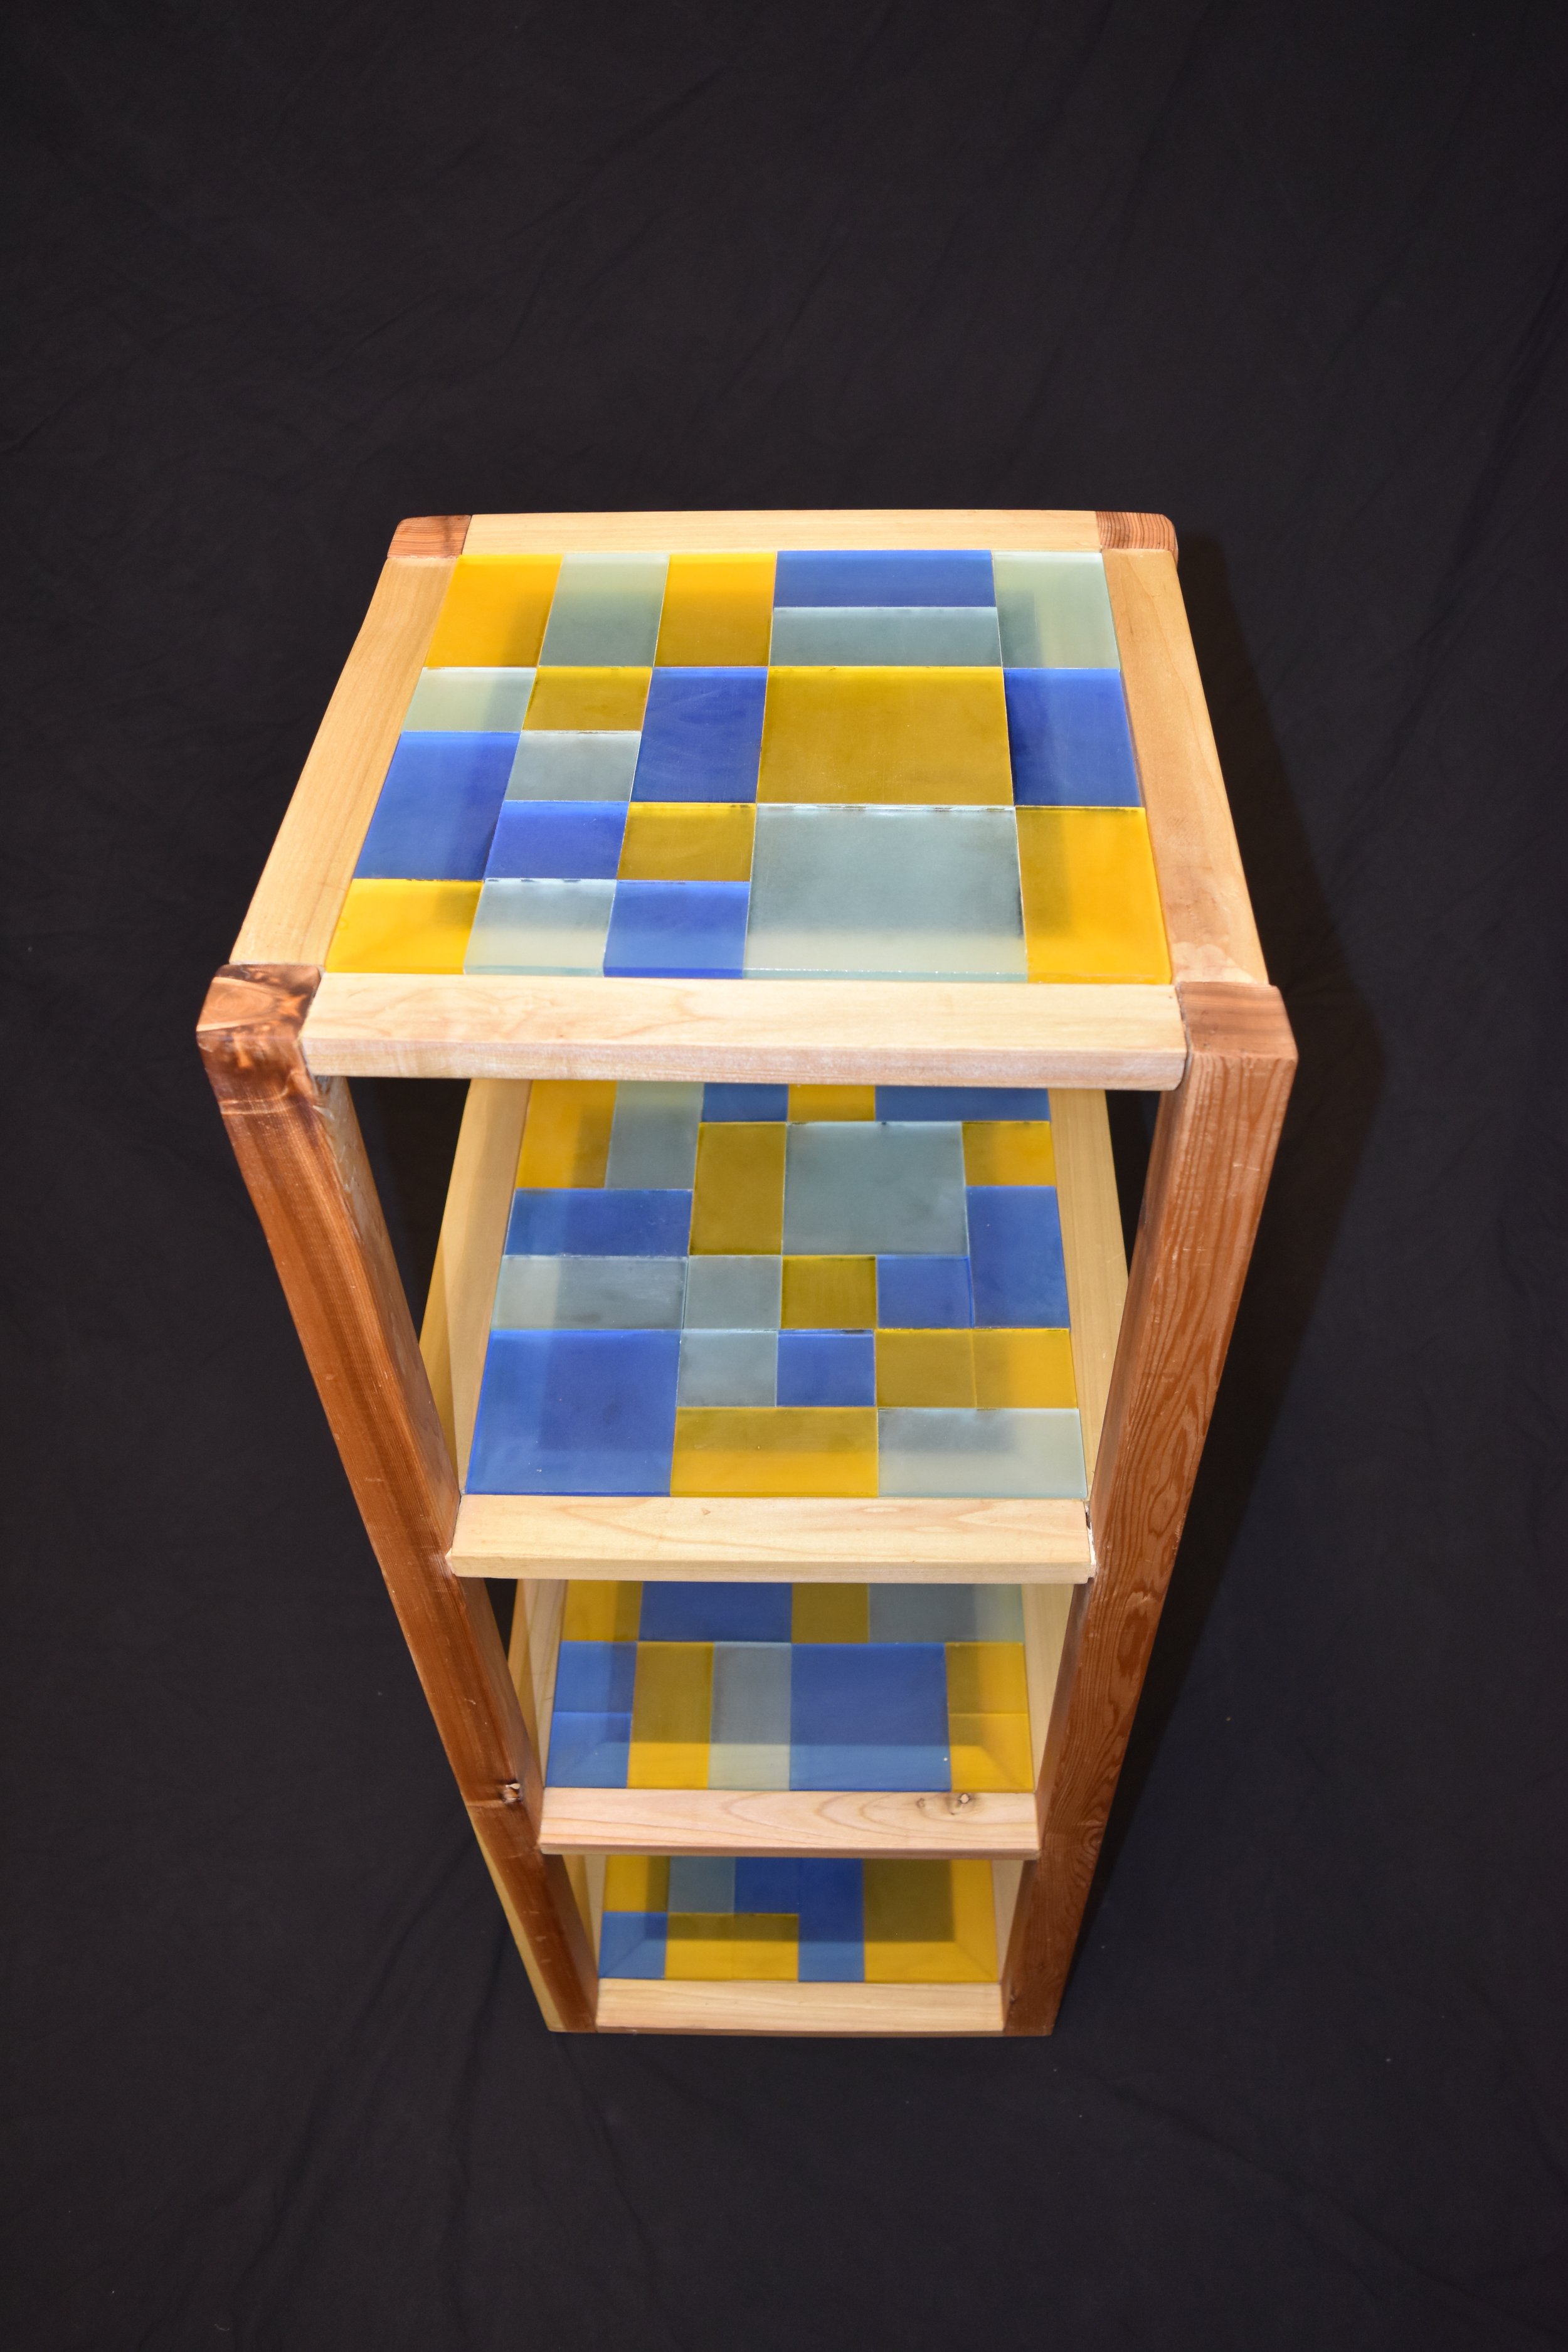
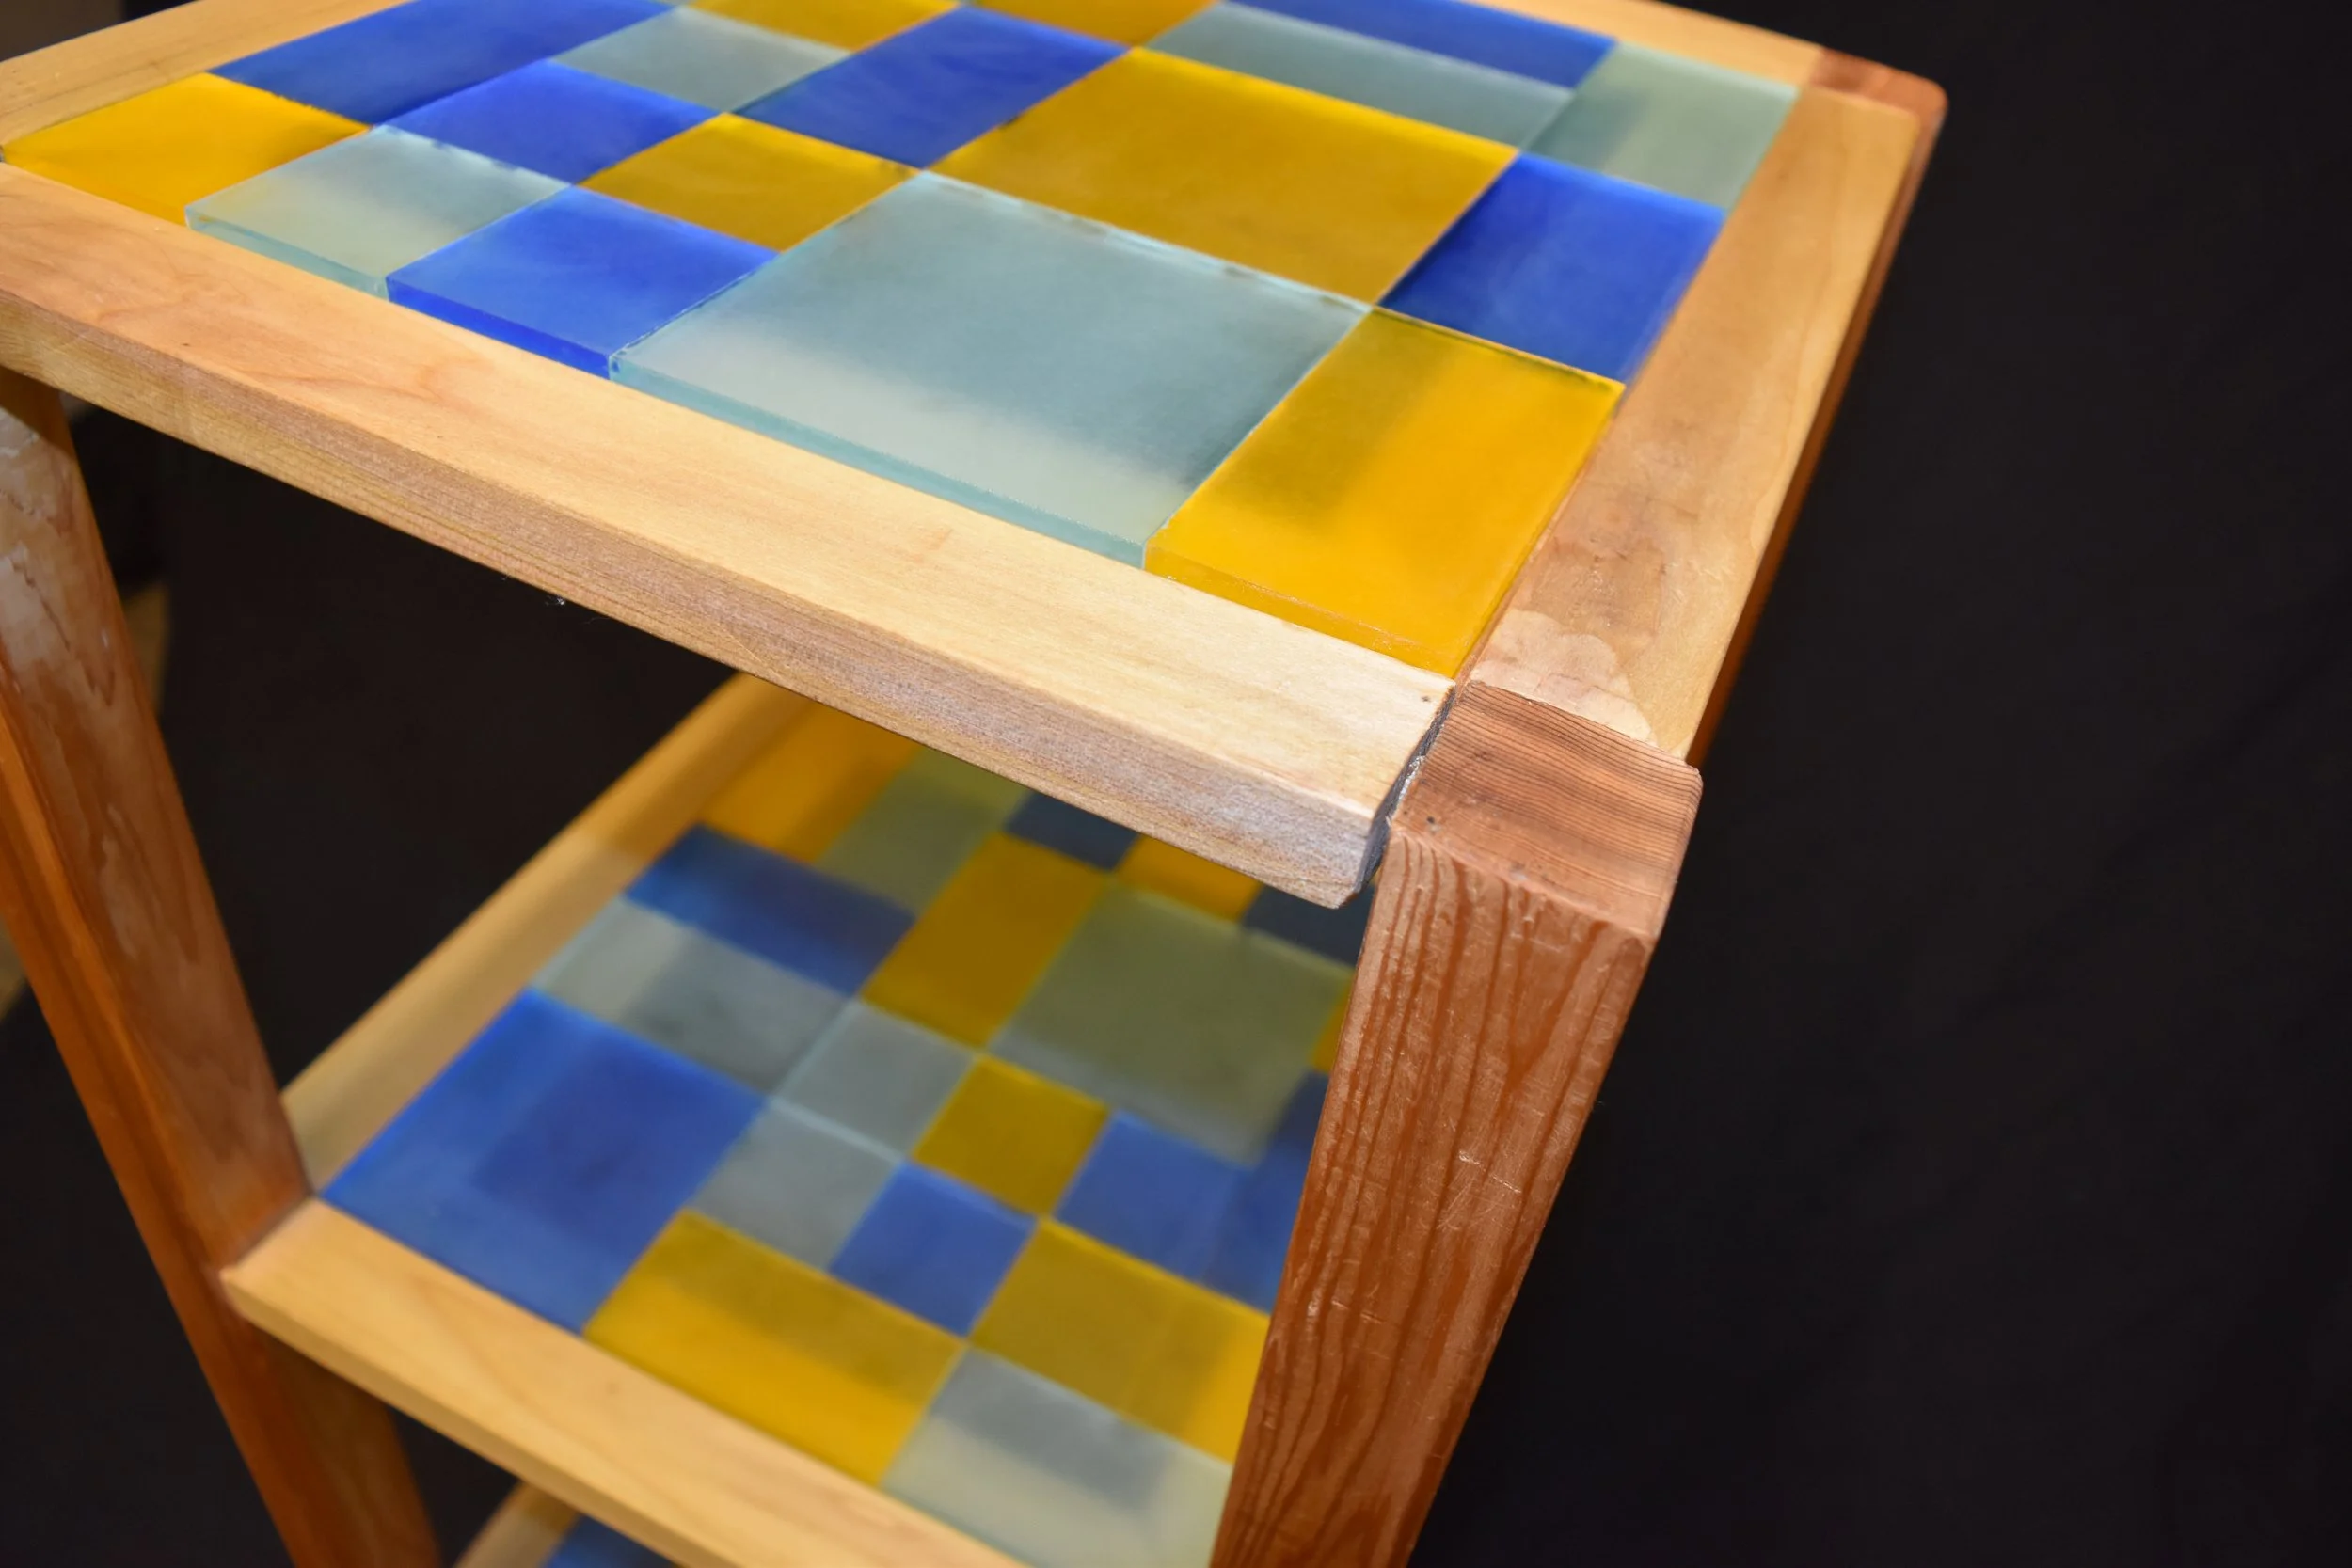
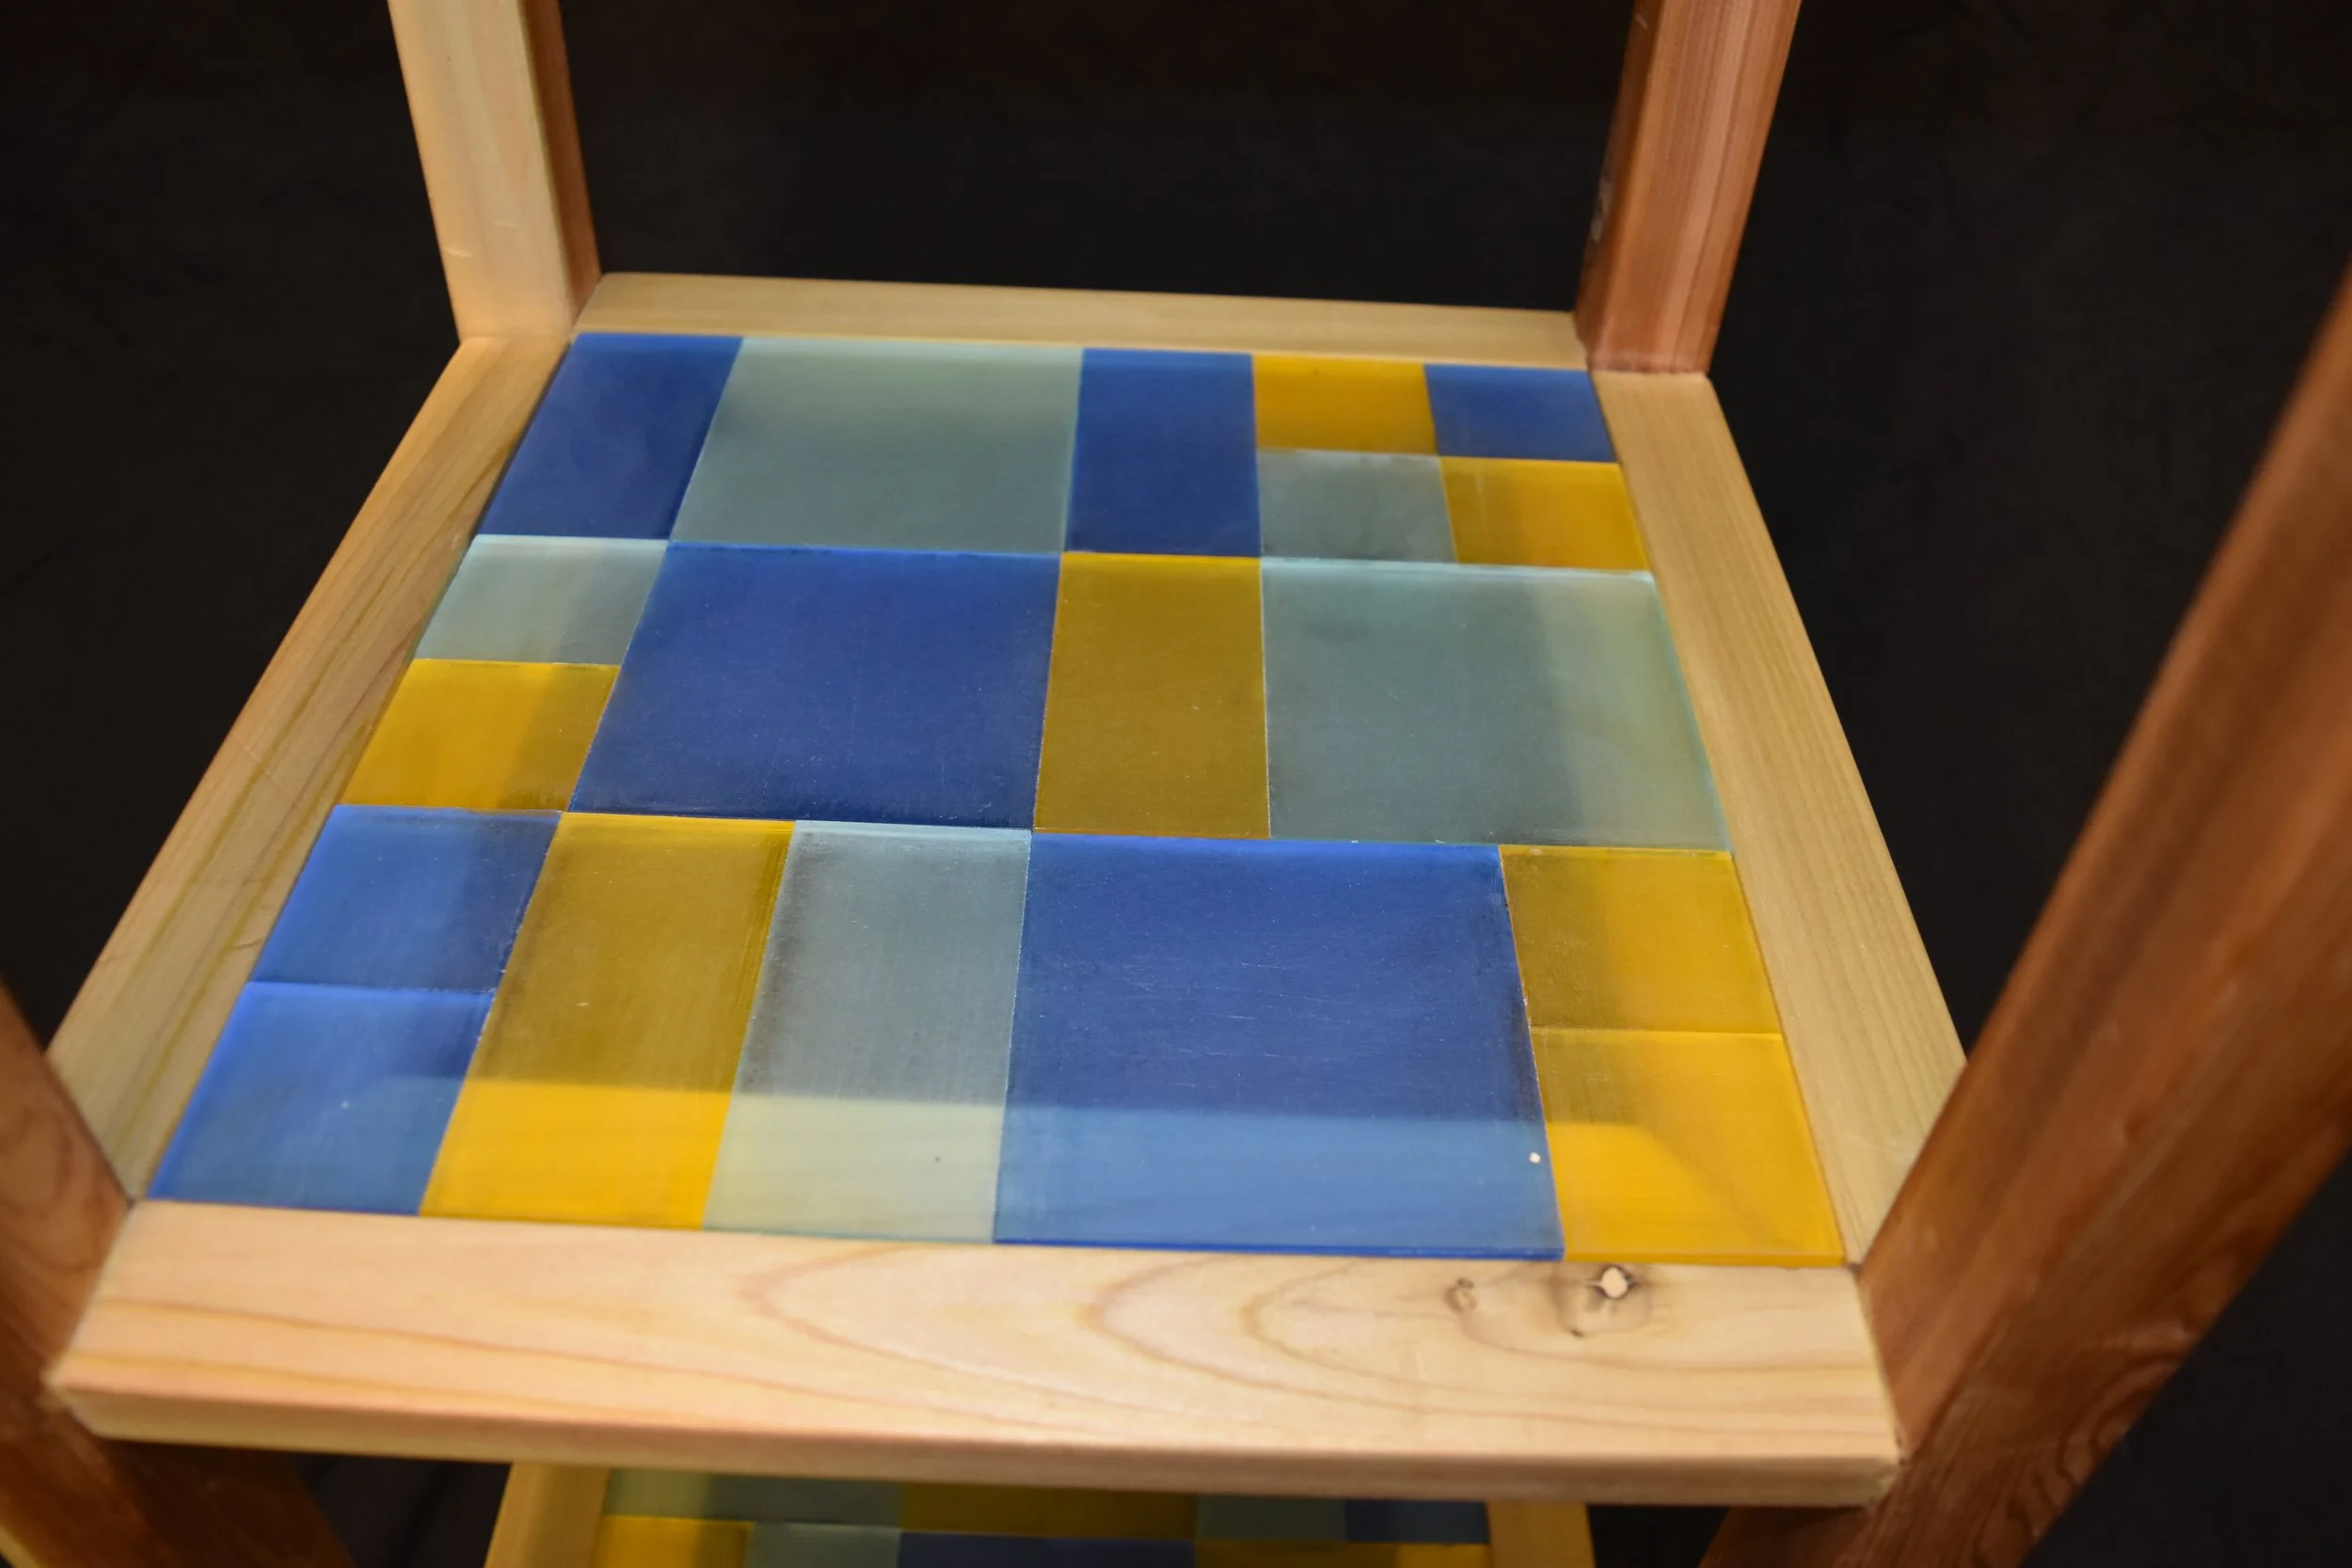
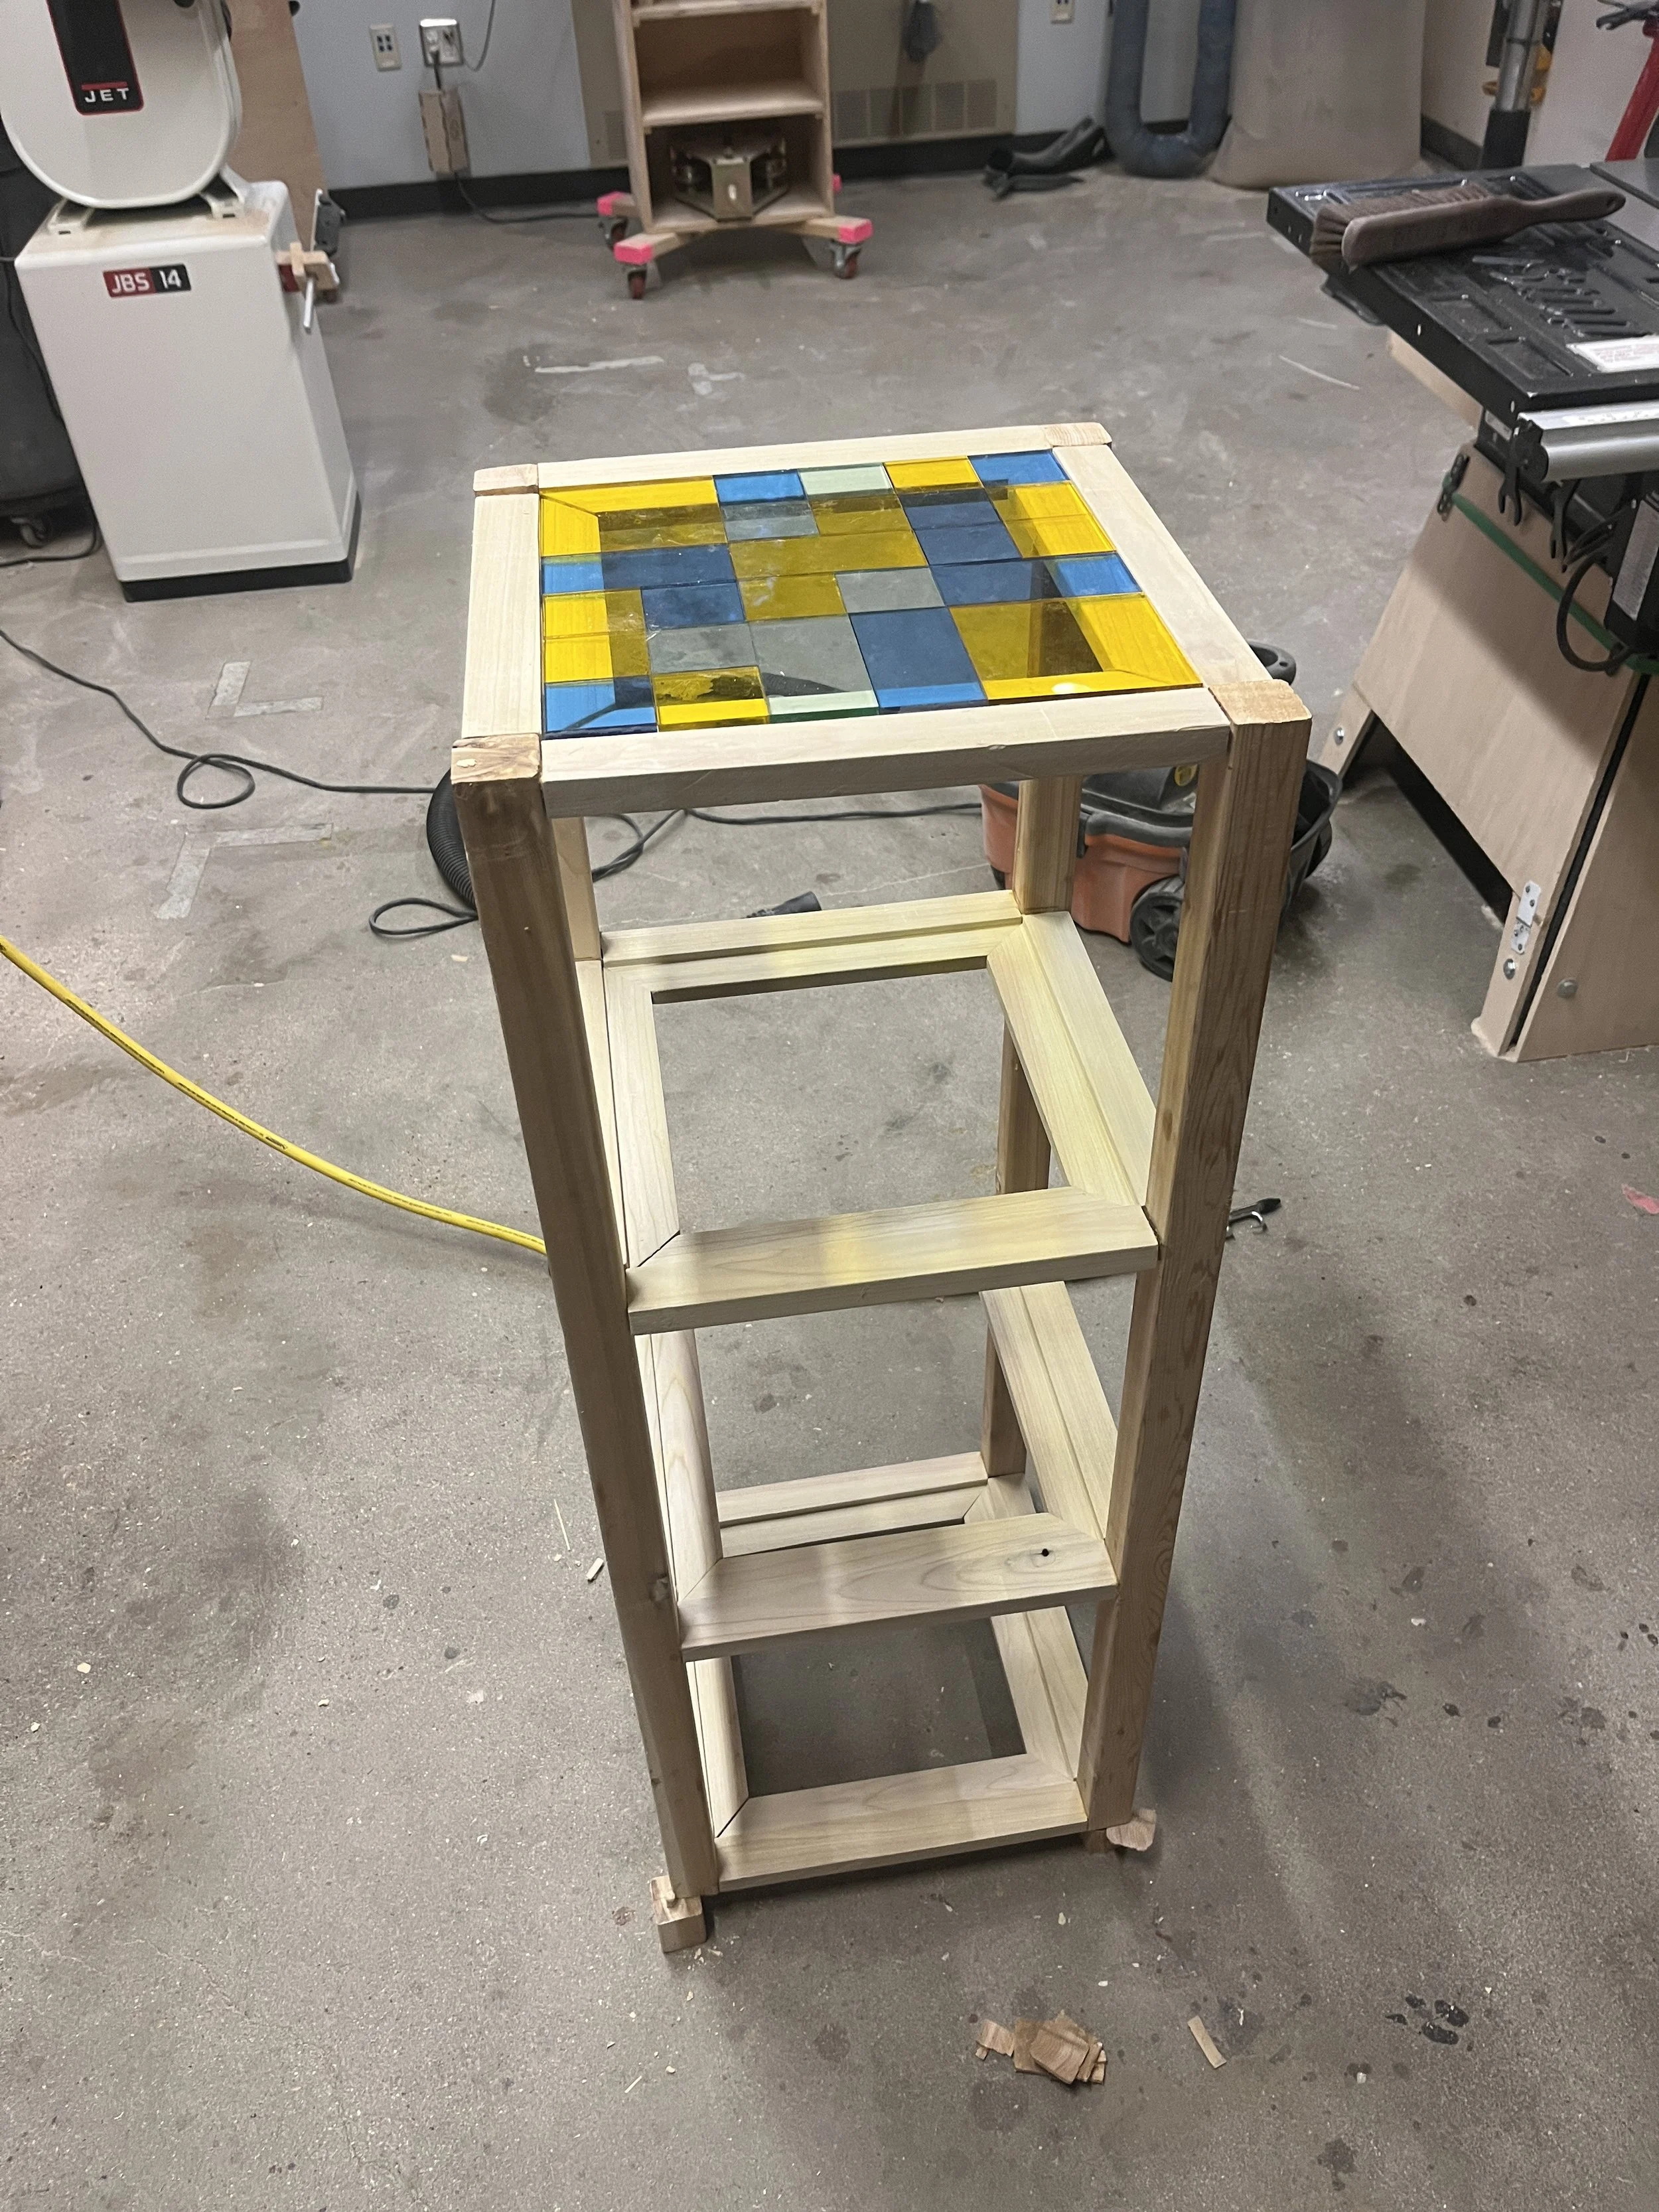
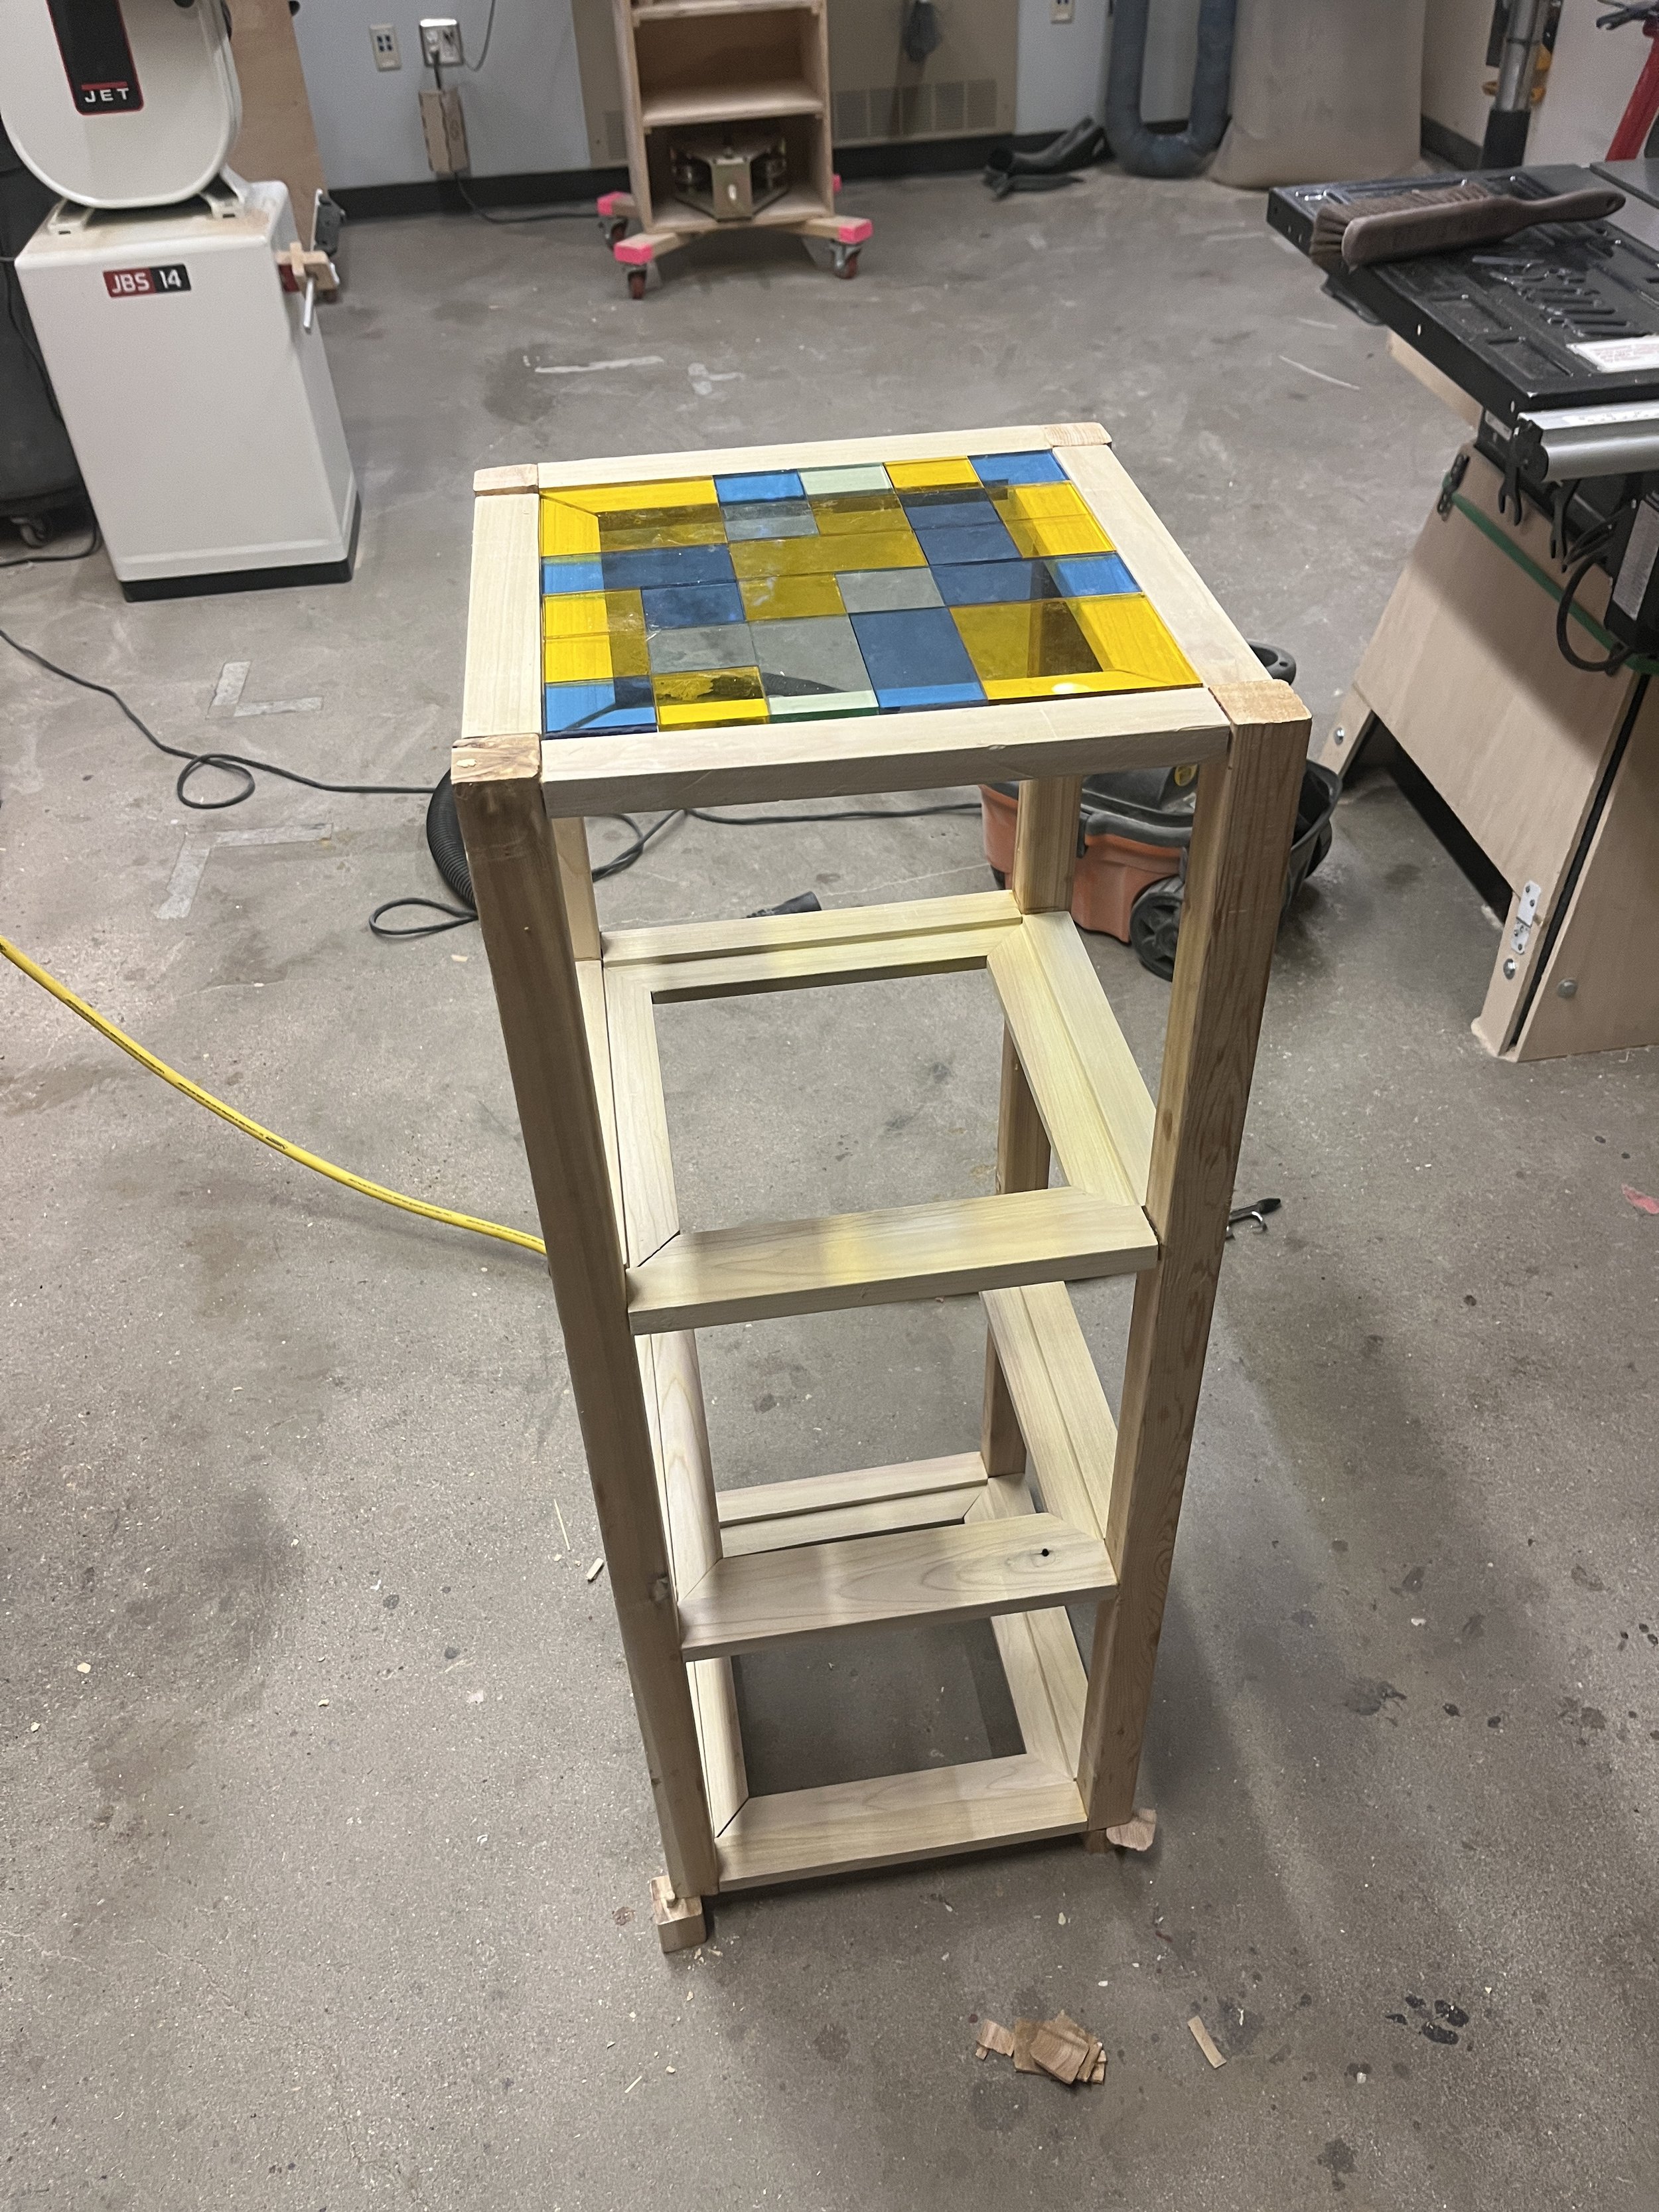
For my final project, I created a wood and acrylic shelf inspired by Shiro Kuramata’s exploration of transparency and the illusion of weightlessness. By combining cedar and poplar with translucent acrylic inserts, I experimented with the contrast between grounded natural materials and light-diffusing synthetics.
Tools used
Materials: cedar wood, poplar wood, 1/4" acrylic, 3/8” pine dowels
Physical tools: table saw, chop saw, drill, drill press, orbital sander, sandpaper, belt sander, Japanese saw, chisels, files,
Extras: wood glue, wood filler, Rubio Monocoat stain
GALLERY
~
GALLERY ~


STUDY IN MATERIALS USED
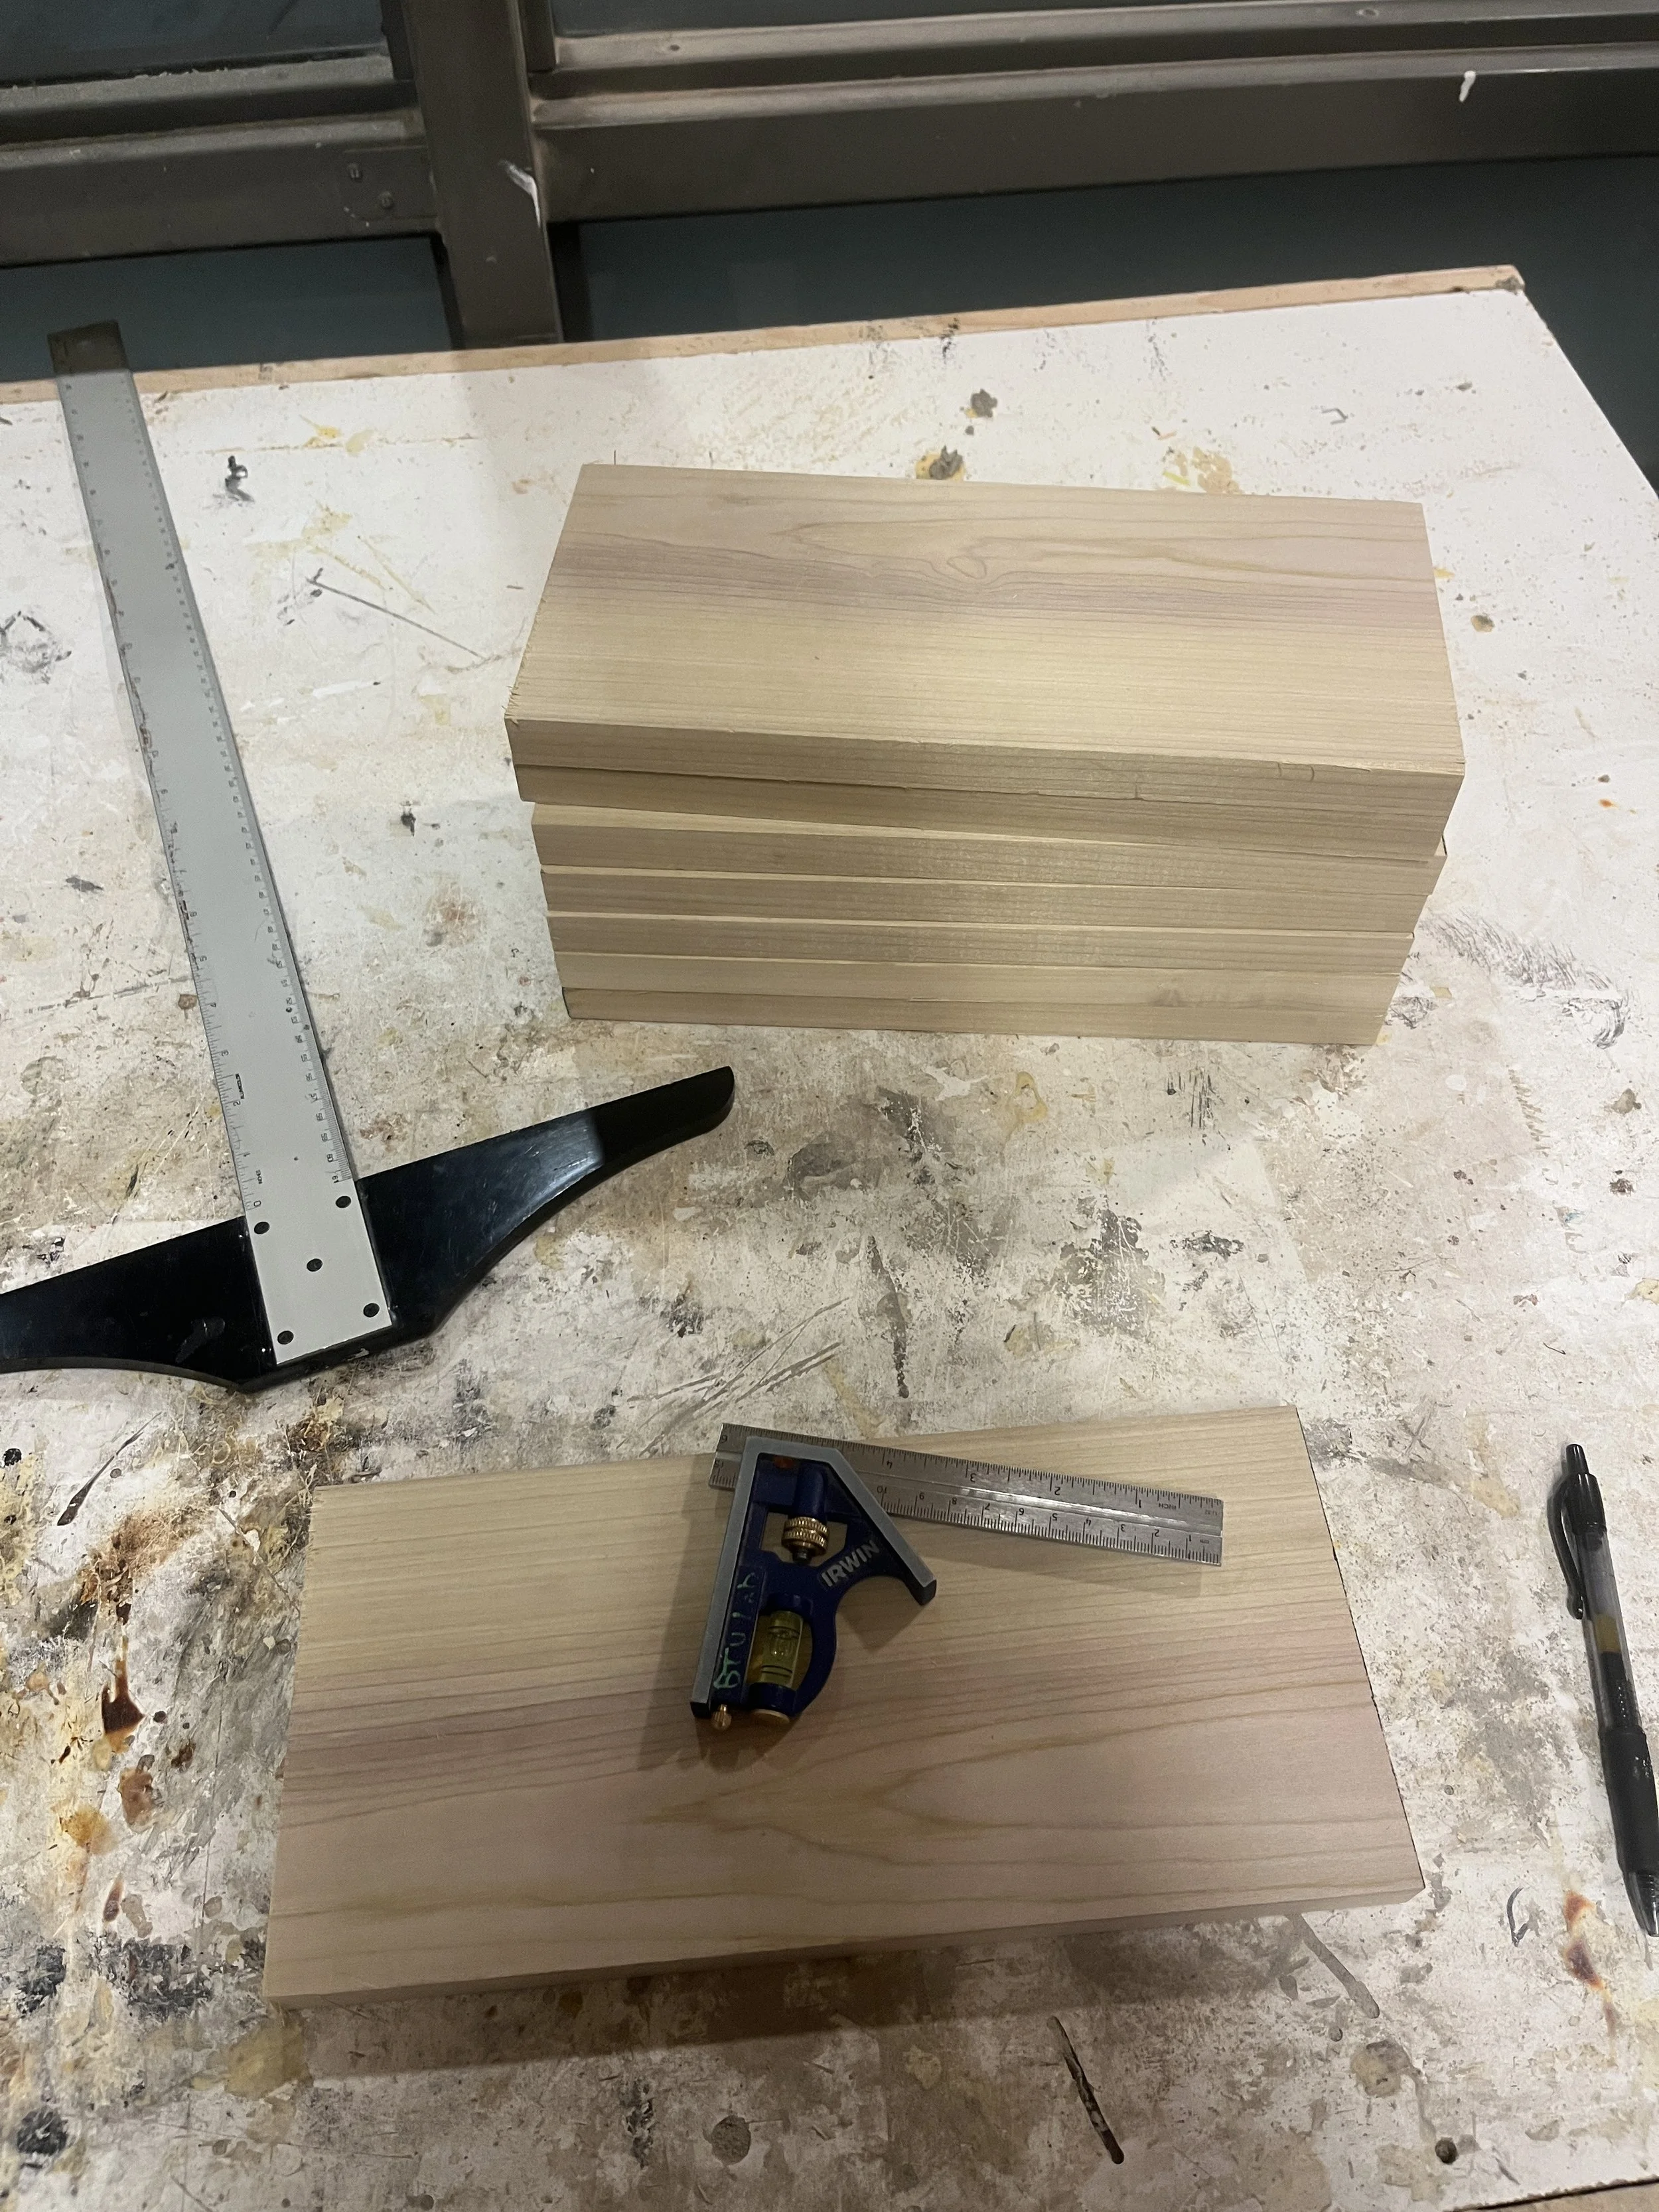
Cedar
Cedar wood refers to a variety of types. The type referred to just as “cedar” and that is commonly used for lumber are the variations like Western Red Cedar and Eastern Red Cedar, and these are native to North America on both the west and east coast. Cedar is a hardwood that is naturally weather and insect resistant. Cedar is also special in that with time and sunlight exposure, it turns silver or gray. Due to its natural resistance, cedar is used for a lot of outdoor applications. It is normally knotty and straight-grained.
Poplar
Commercial poplar wood is primarily the yellow-poplar tree. It is also known as Liriodendron tulipifera or the tuliptree. The yellow-poplar tree is native to the Eastern United States, parts of Eastern Canada, and parts of Europe. It is often referred to as “rainbow poplar”. Poplar is a hardwood as it comes from a dicot. Its texture is fine and even, it is easy to carve and finish, but that means it also shows any dents or mistakes.
Acrylic
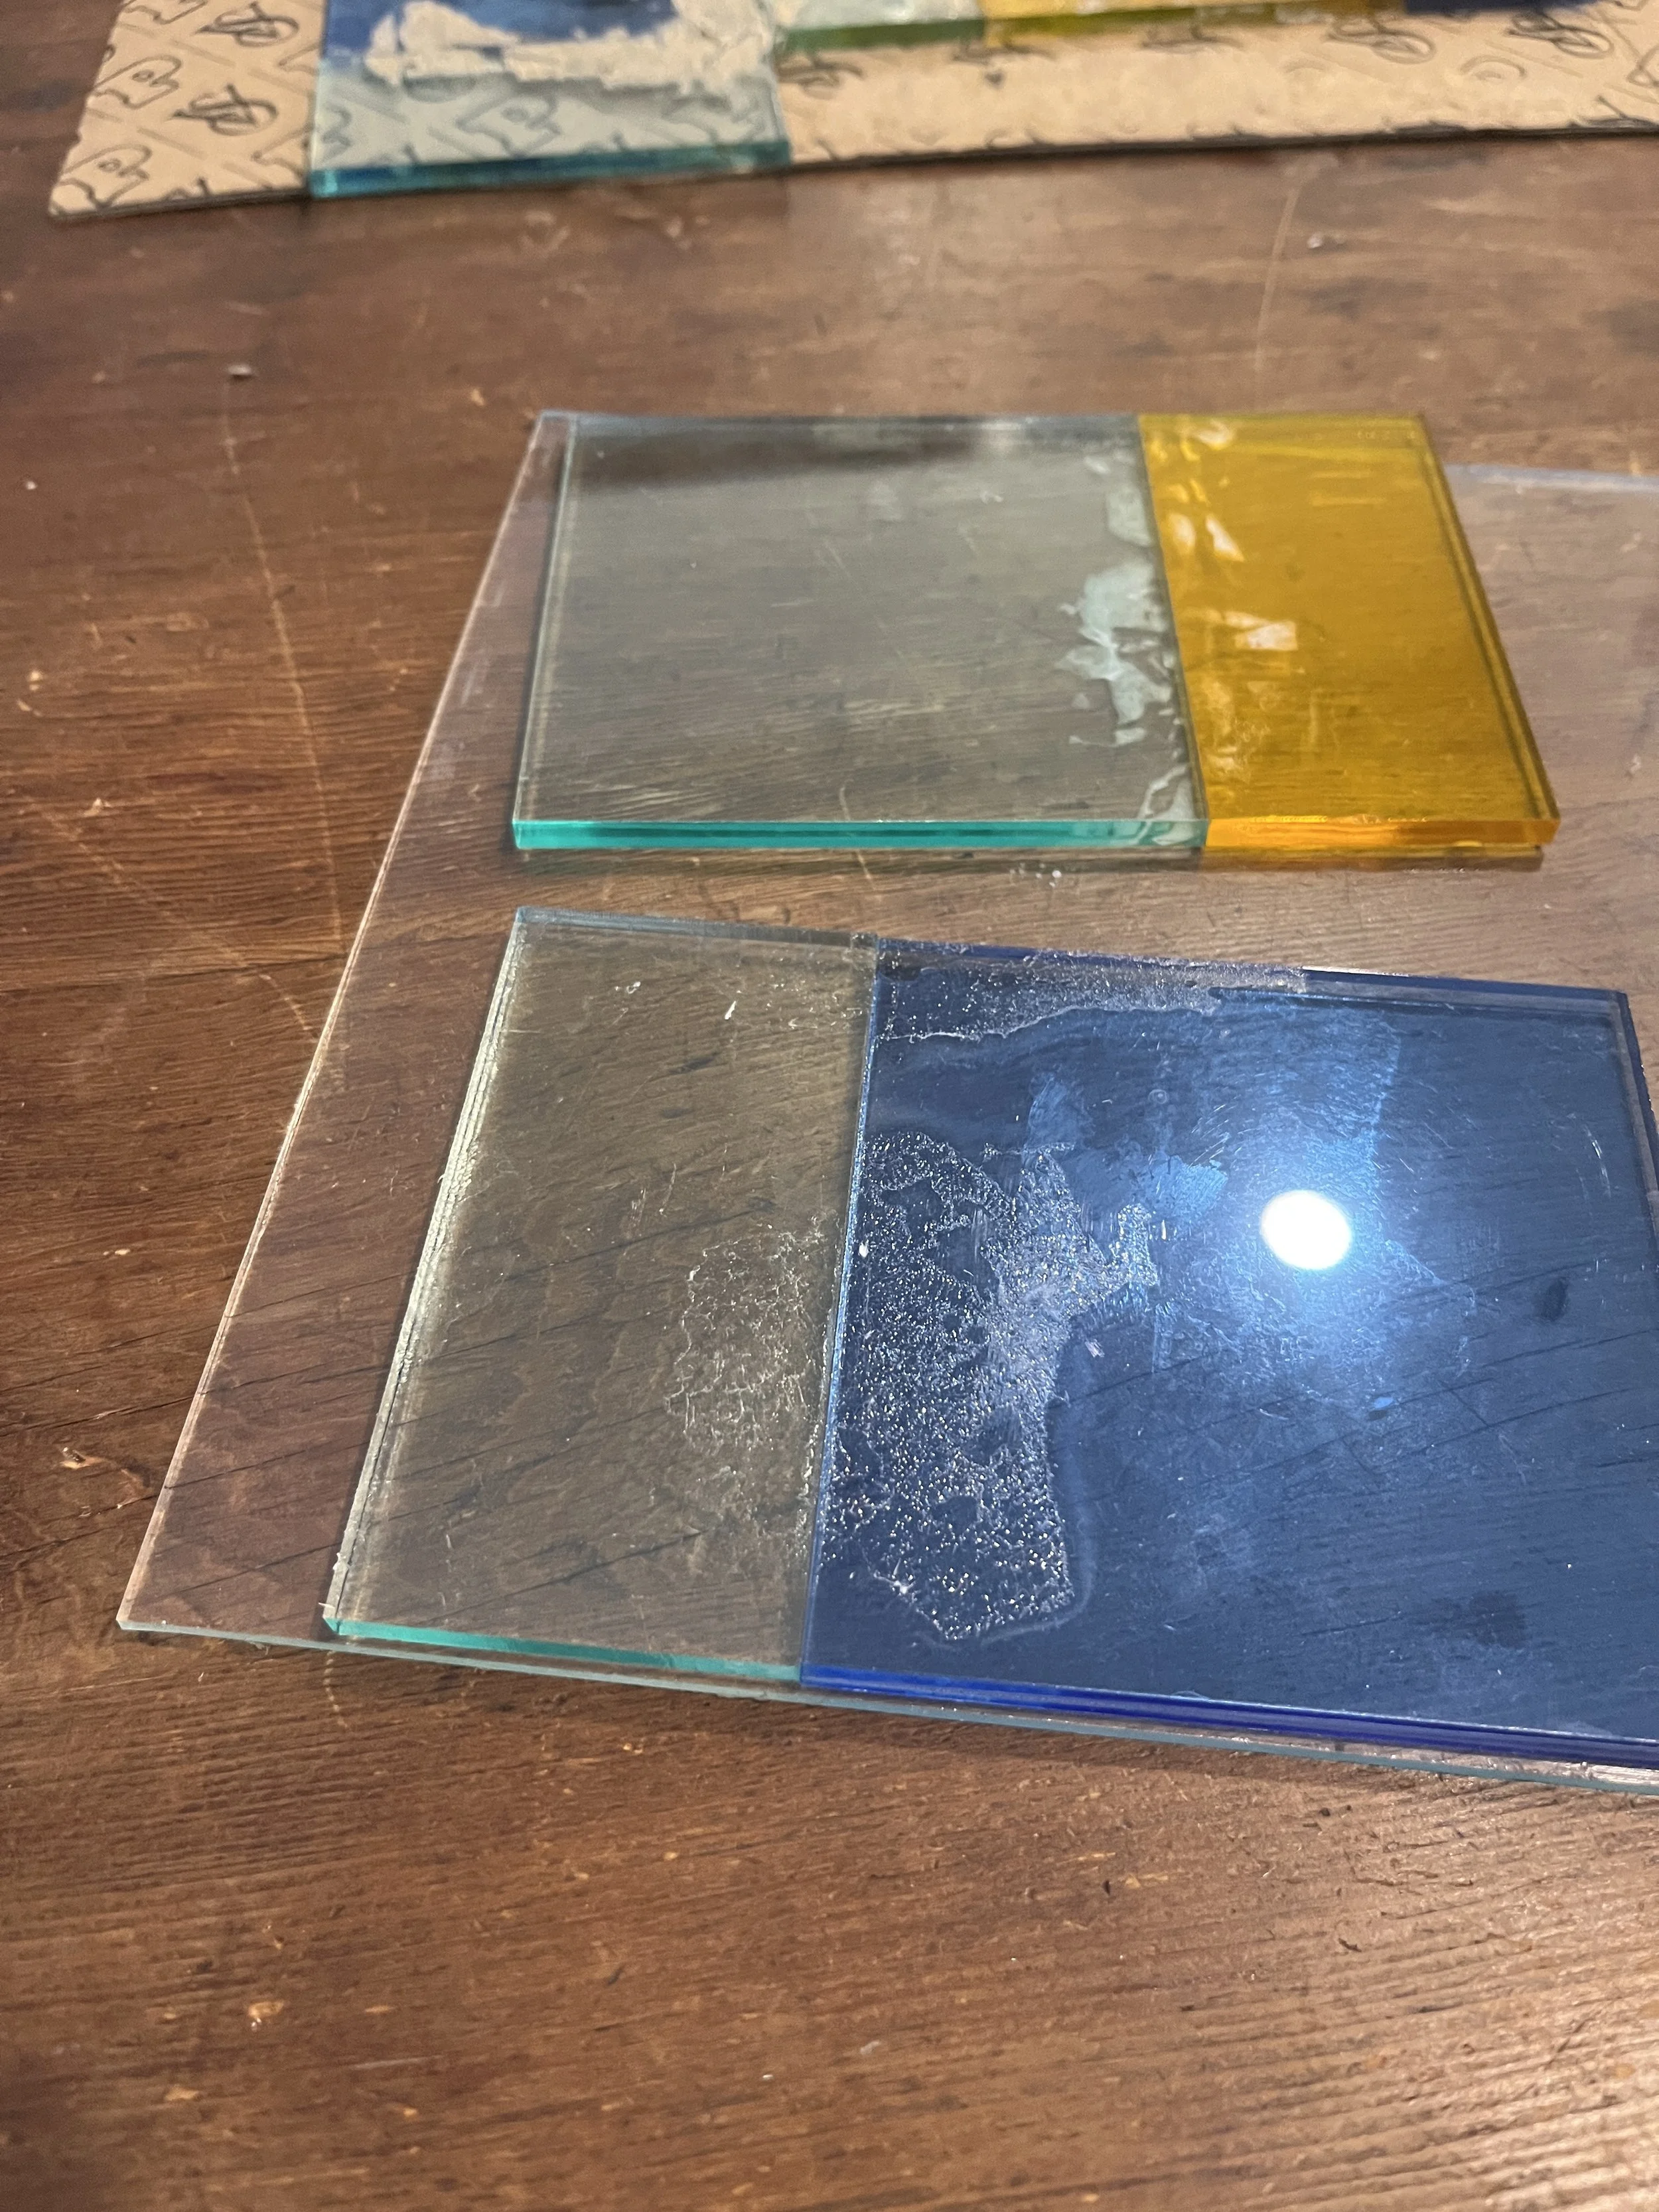
Acrylic is PMMA, or polymethyl methacrylate.There is no native or natural source. It is a man-made material that is a clear, colorless polymer with the molecular formula C5H8O2. It is made via polymerization. This means methyl methacrylate monomers are mixed with a catalyst into a mold. It can then be formed into any shape. The very very base materials are petroleum and natural gas. It is a synthetic polymer. It has a couple noteworthy properties such as scratch resistance, UV resistance, brittle, etc..
PROCESS
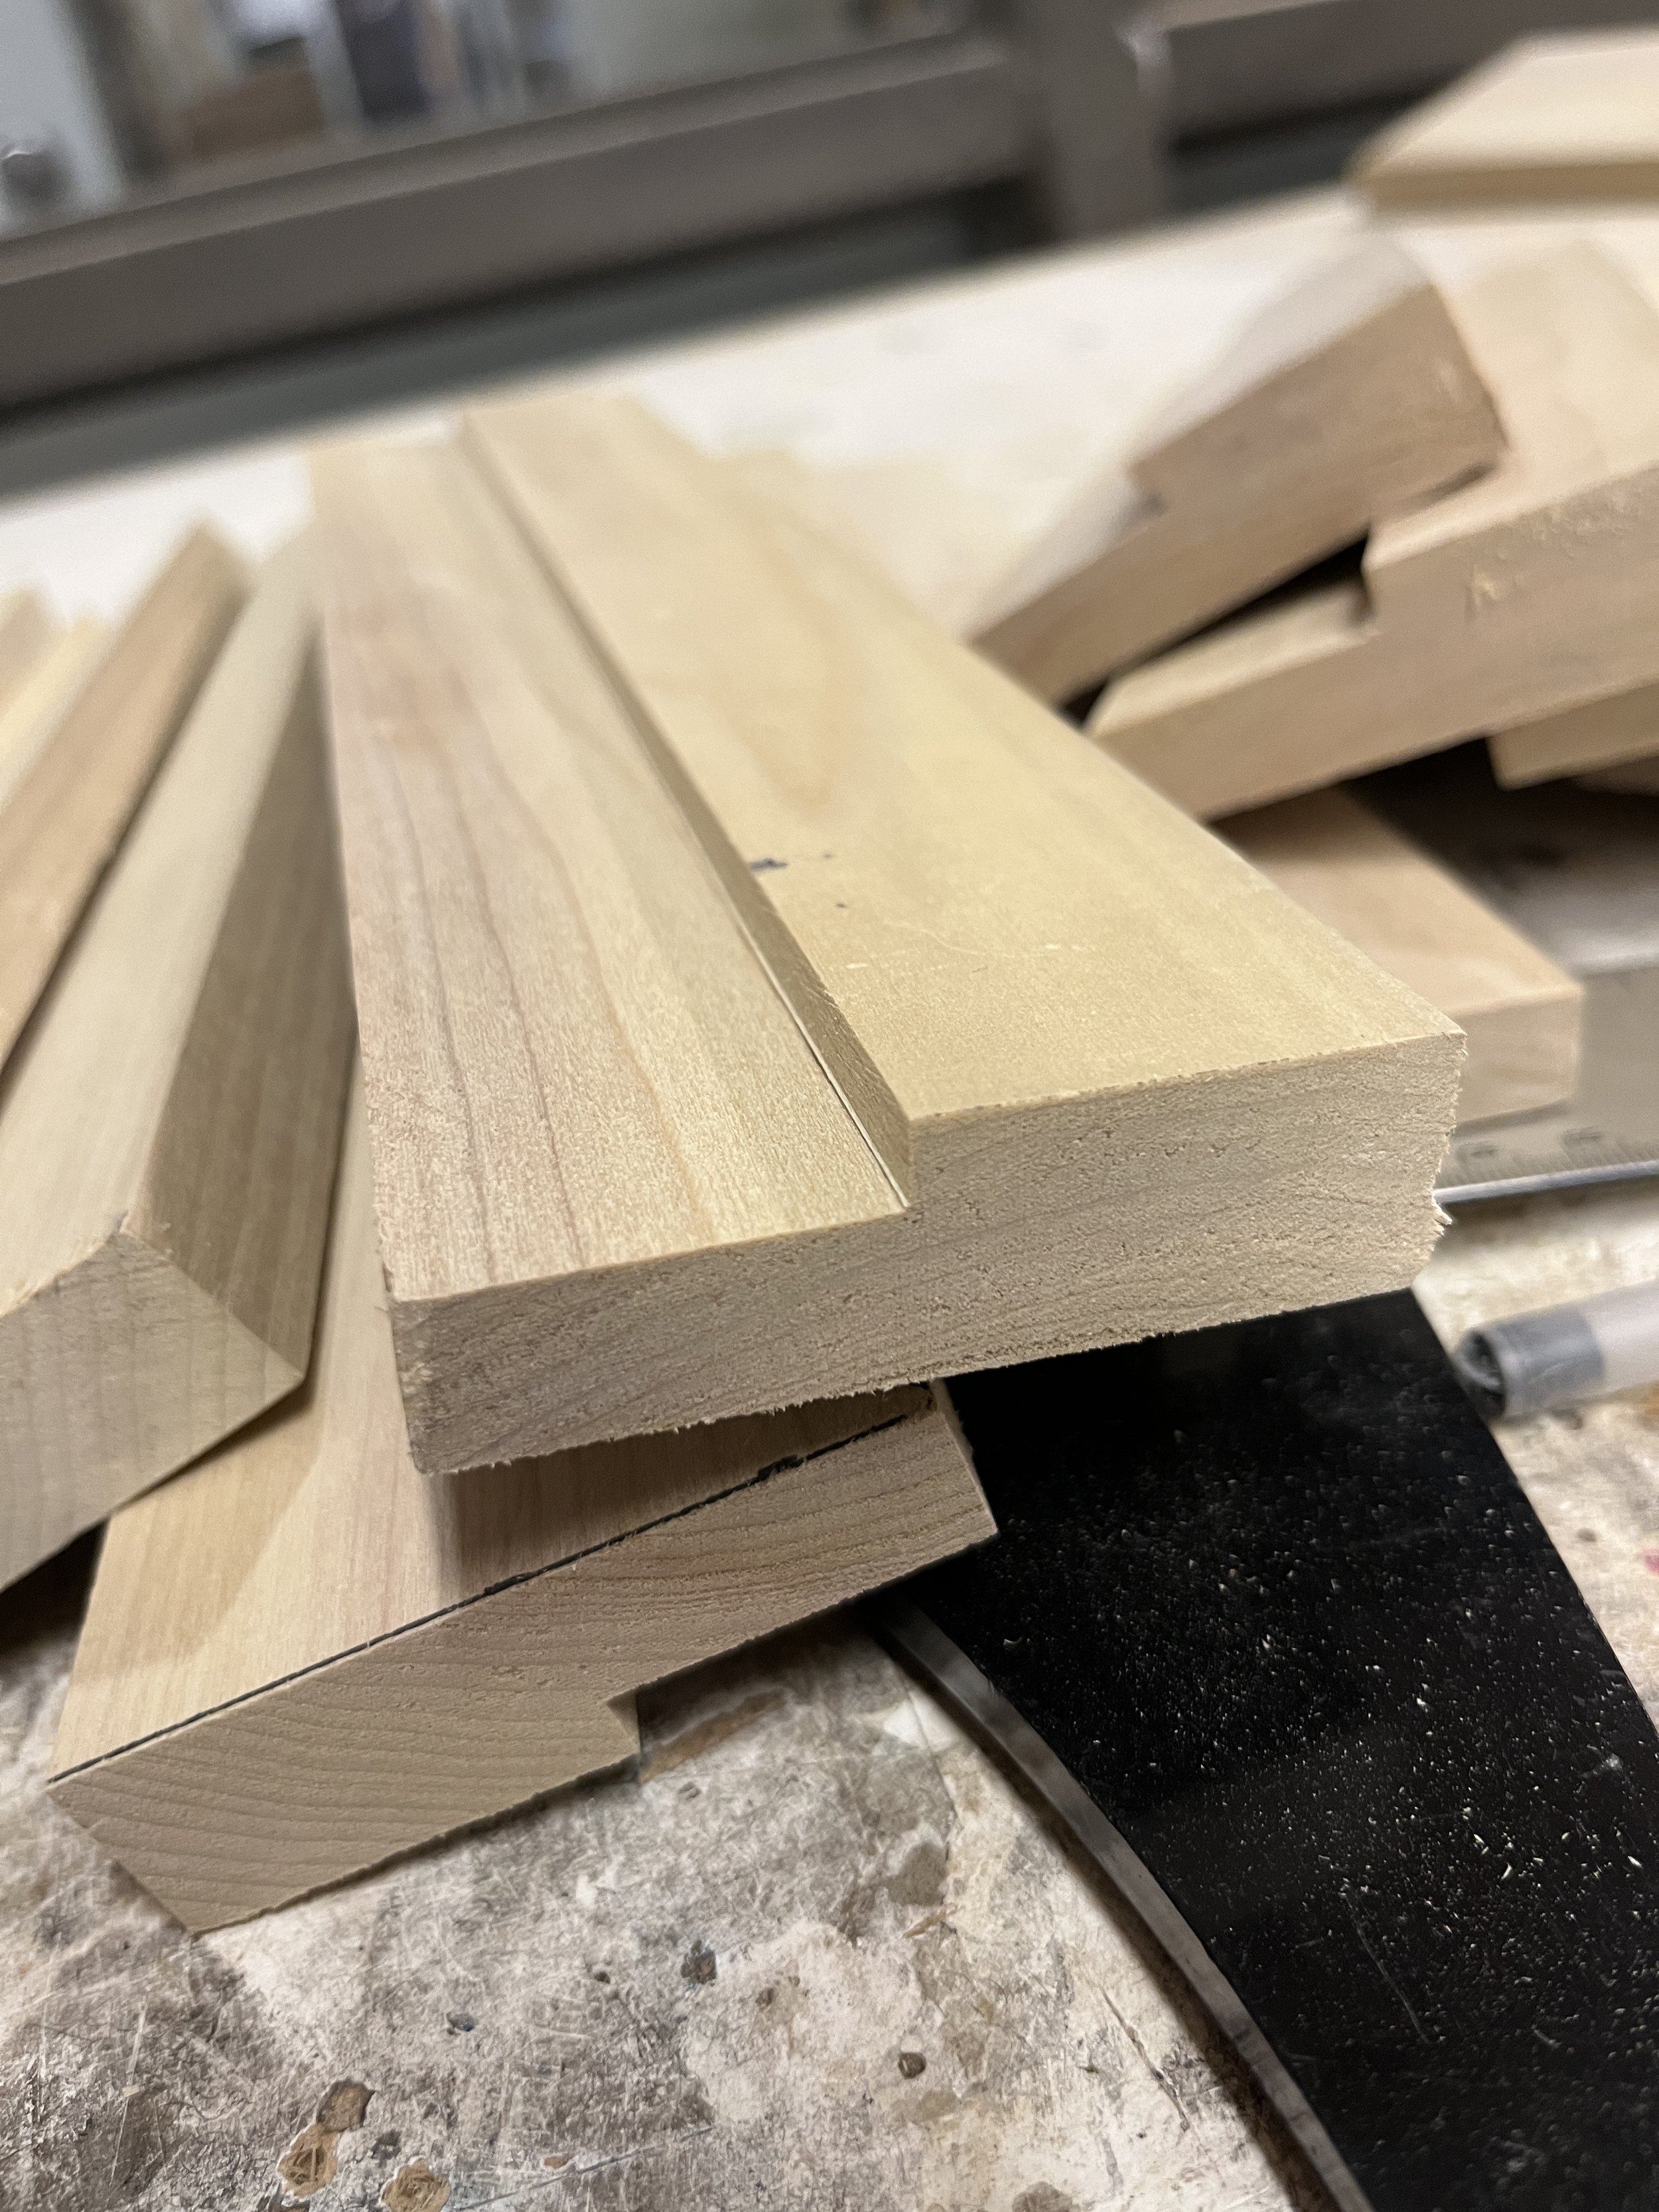
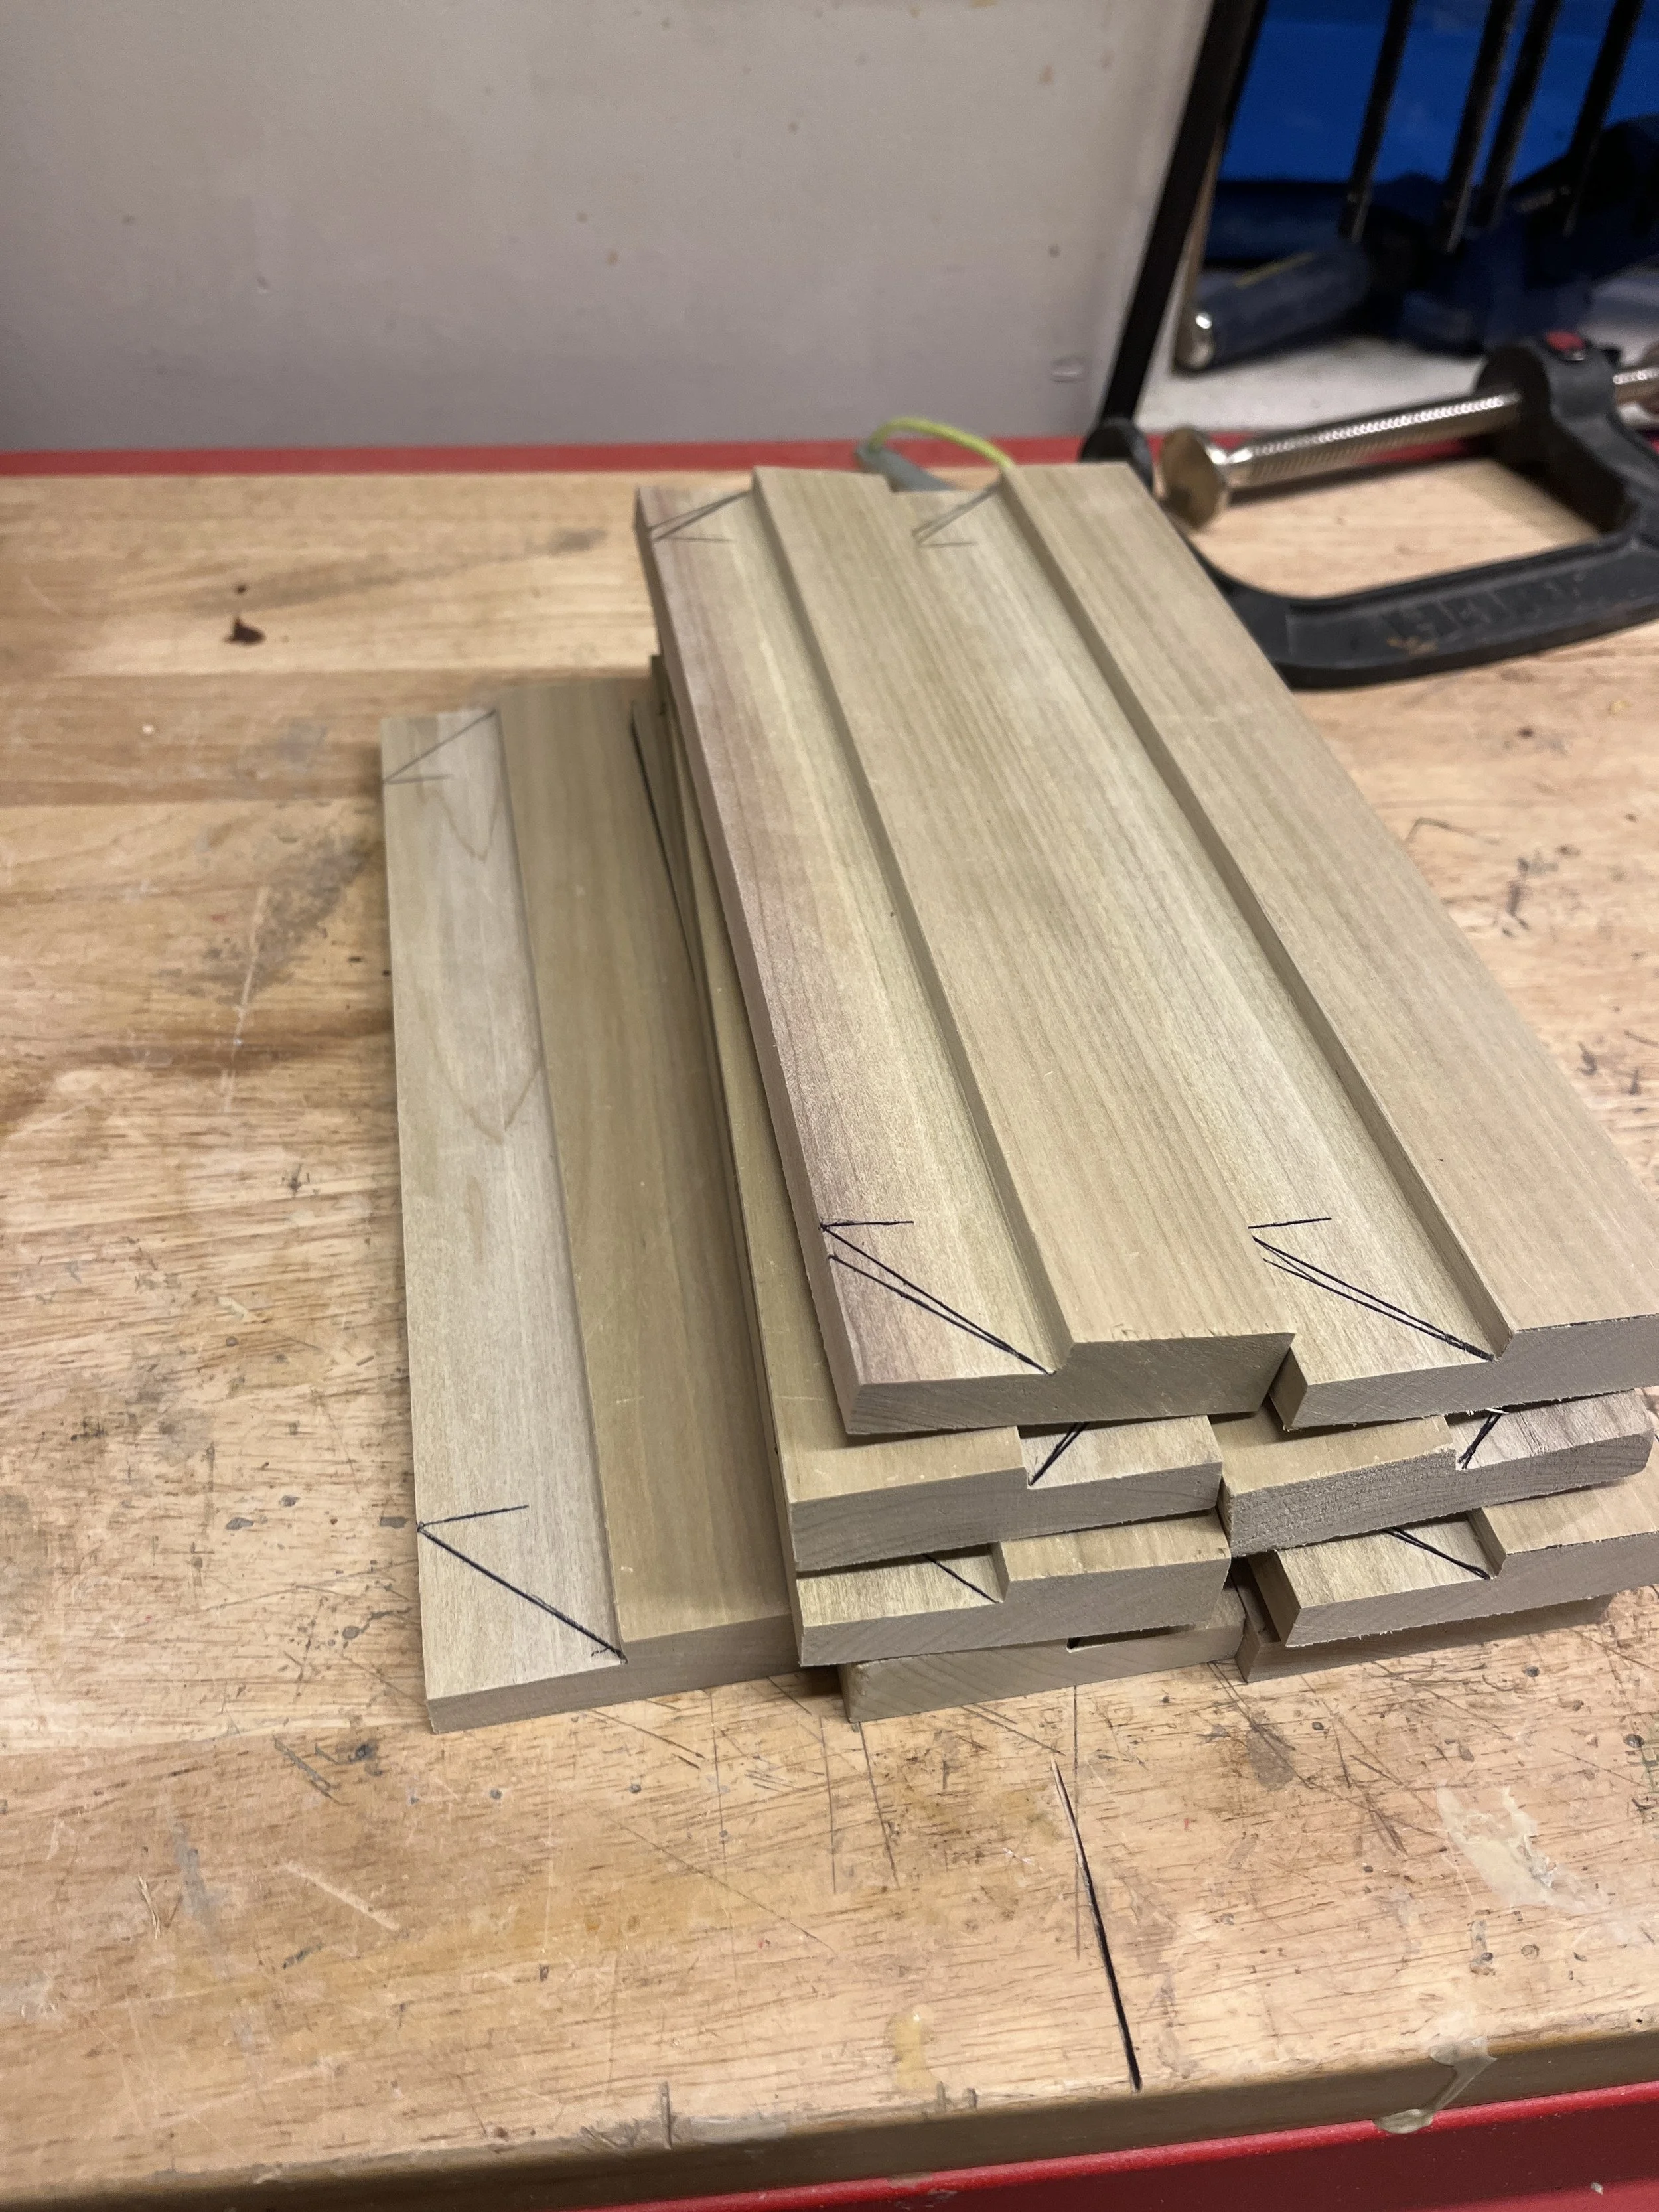
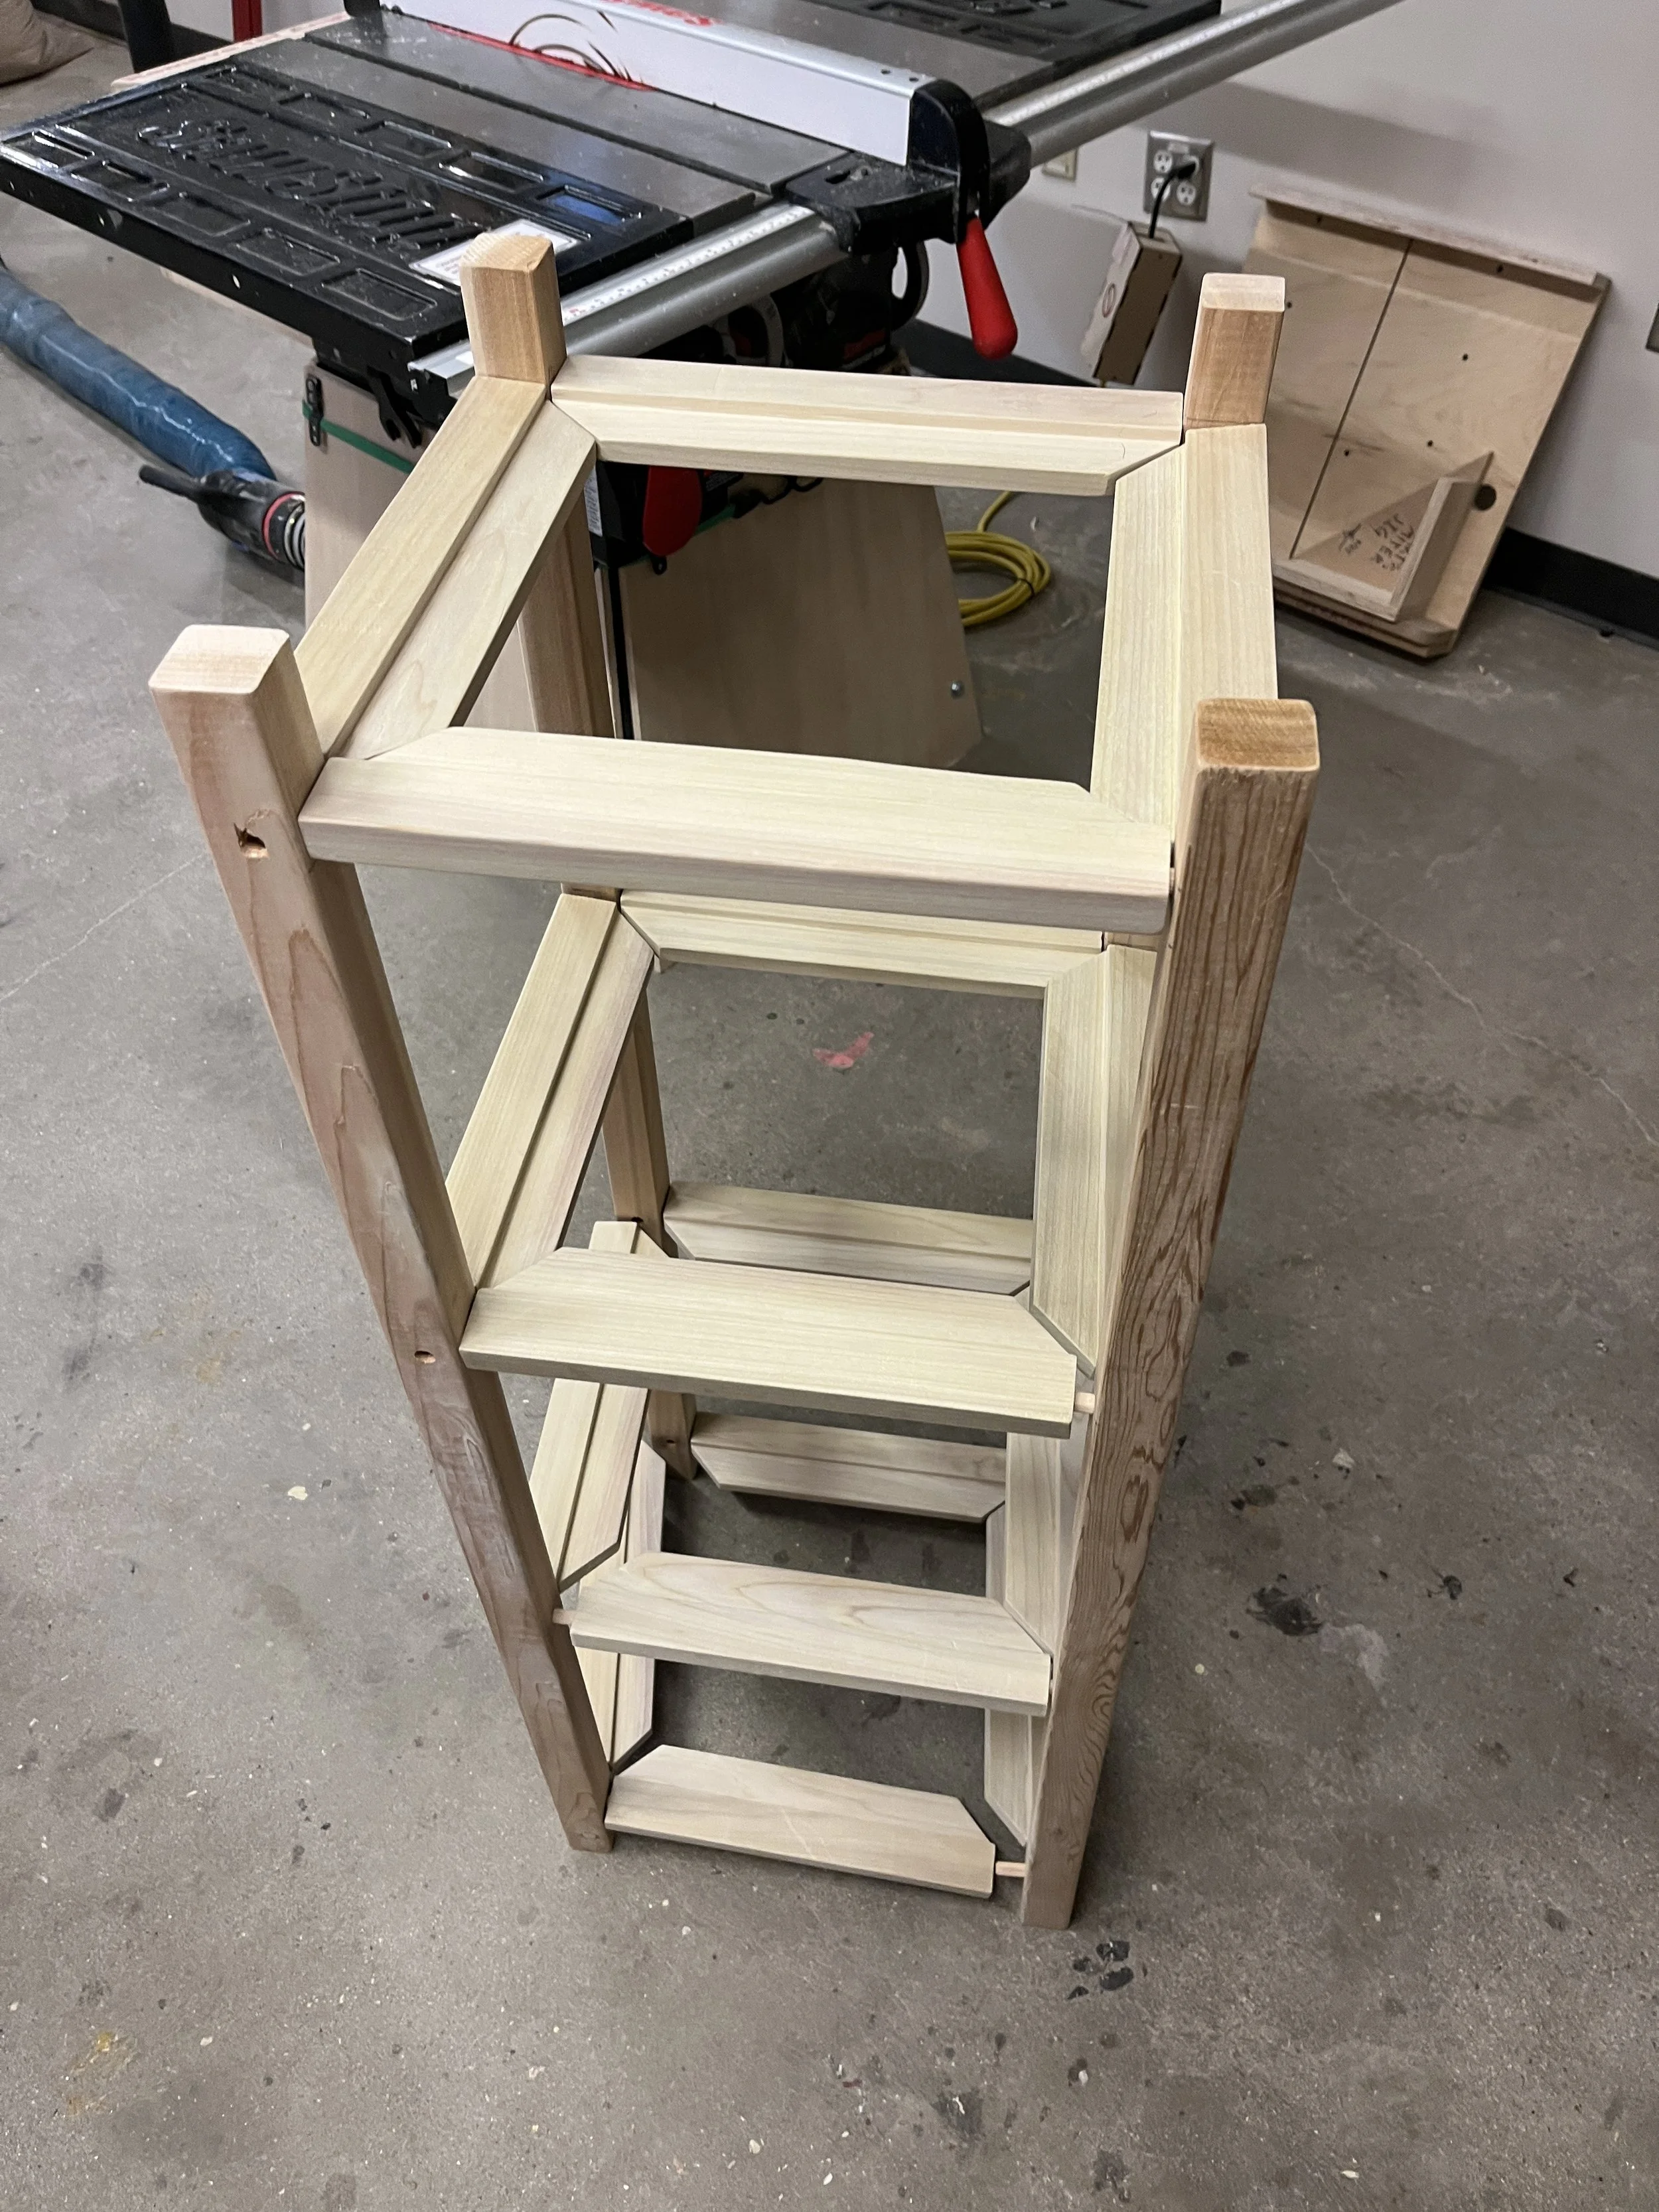
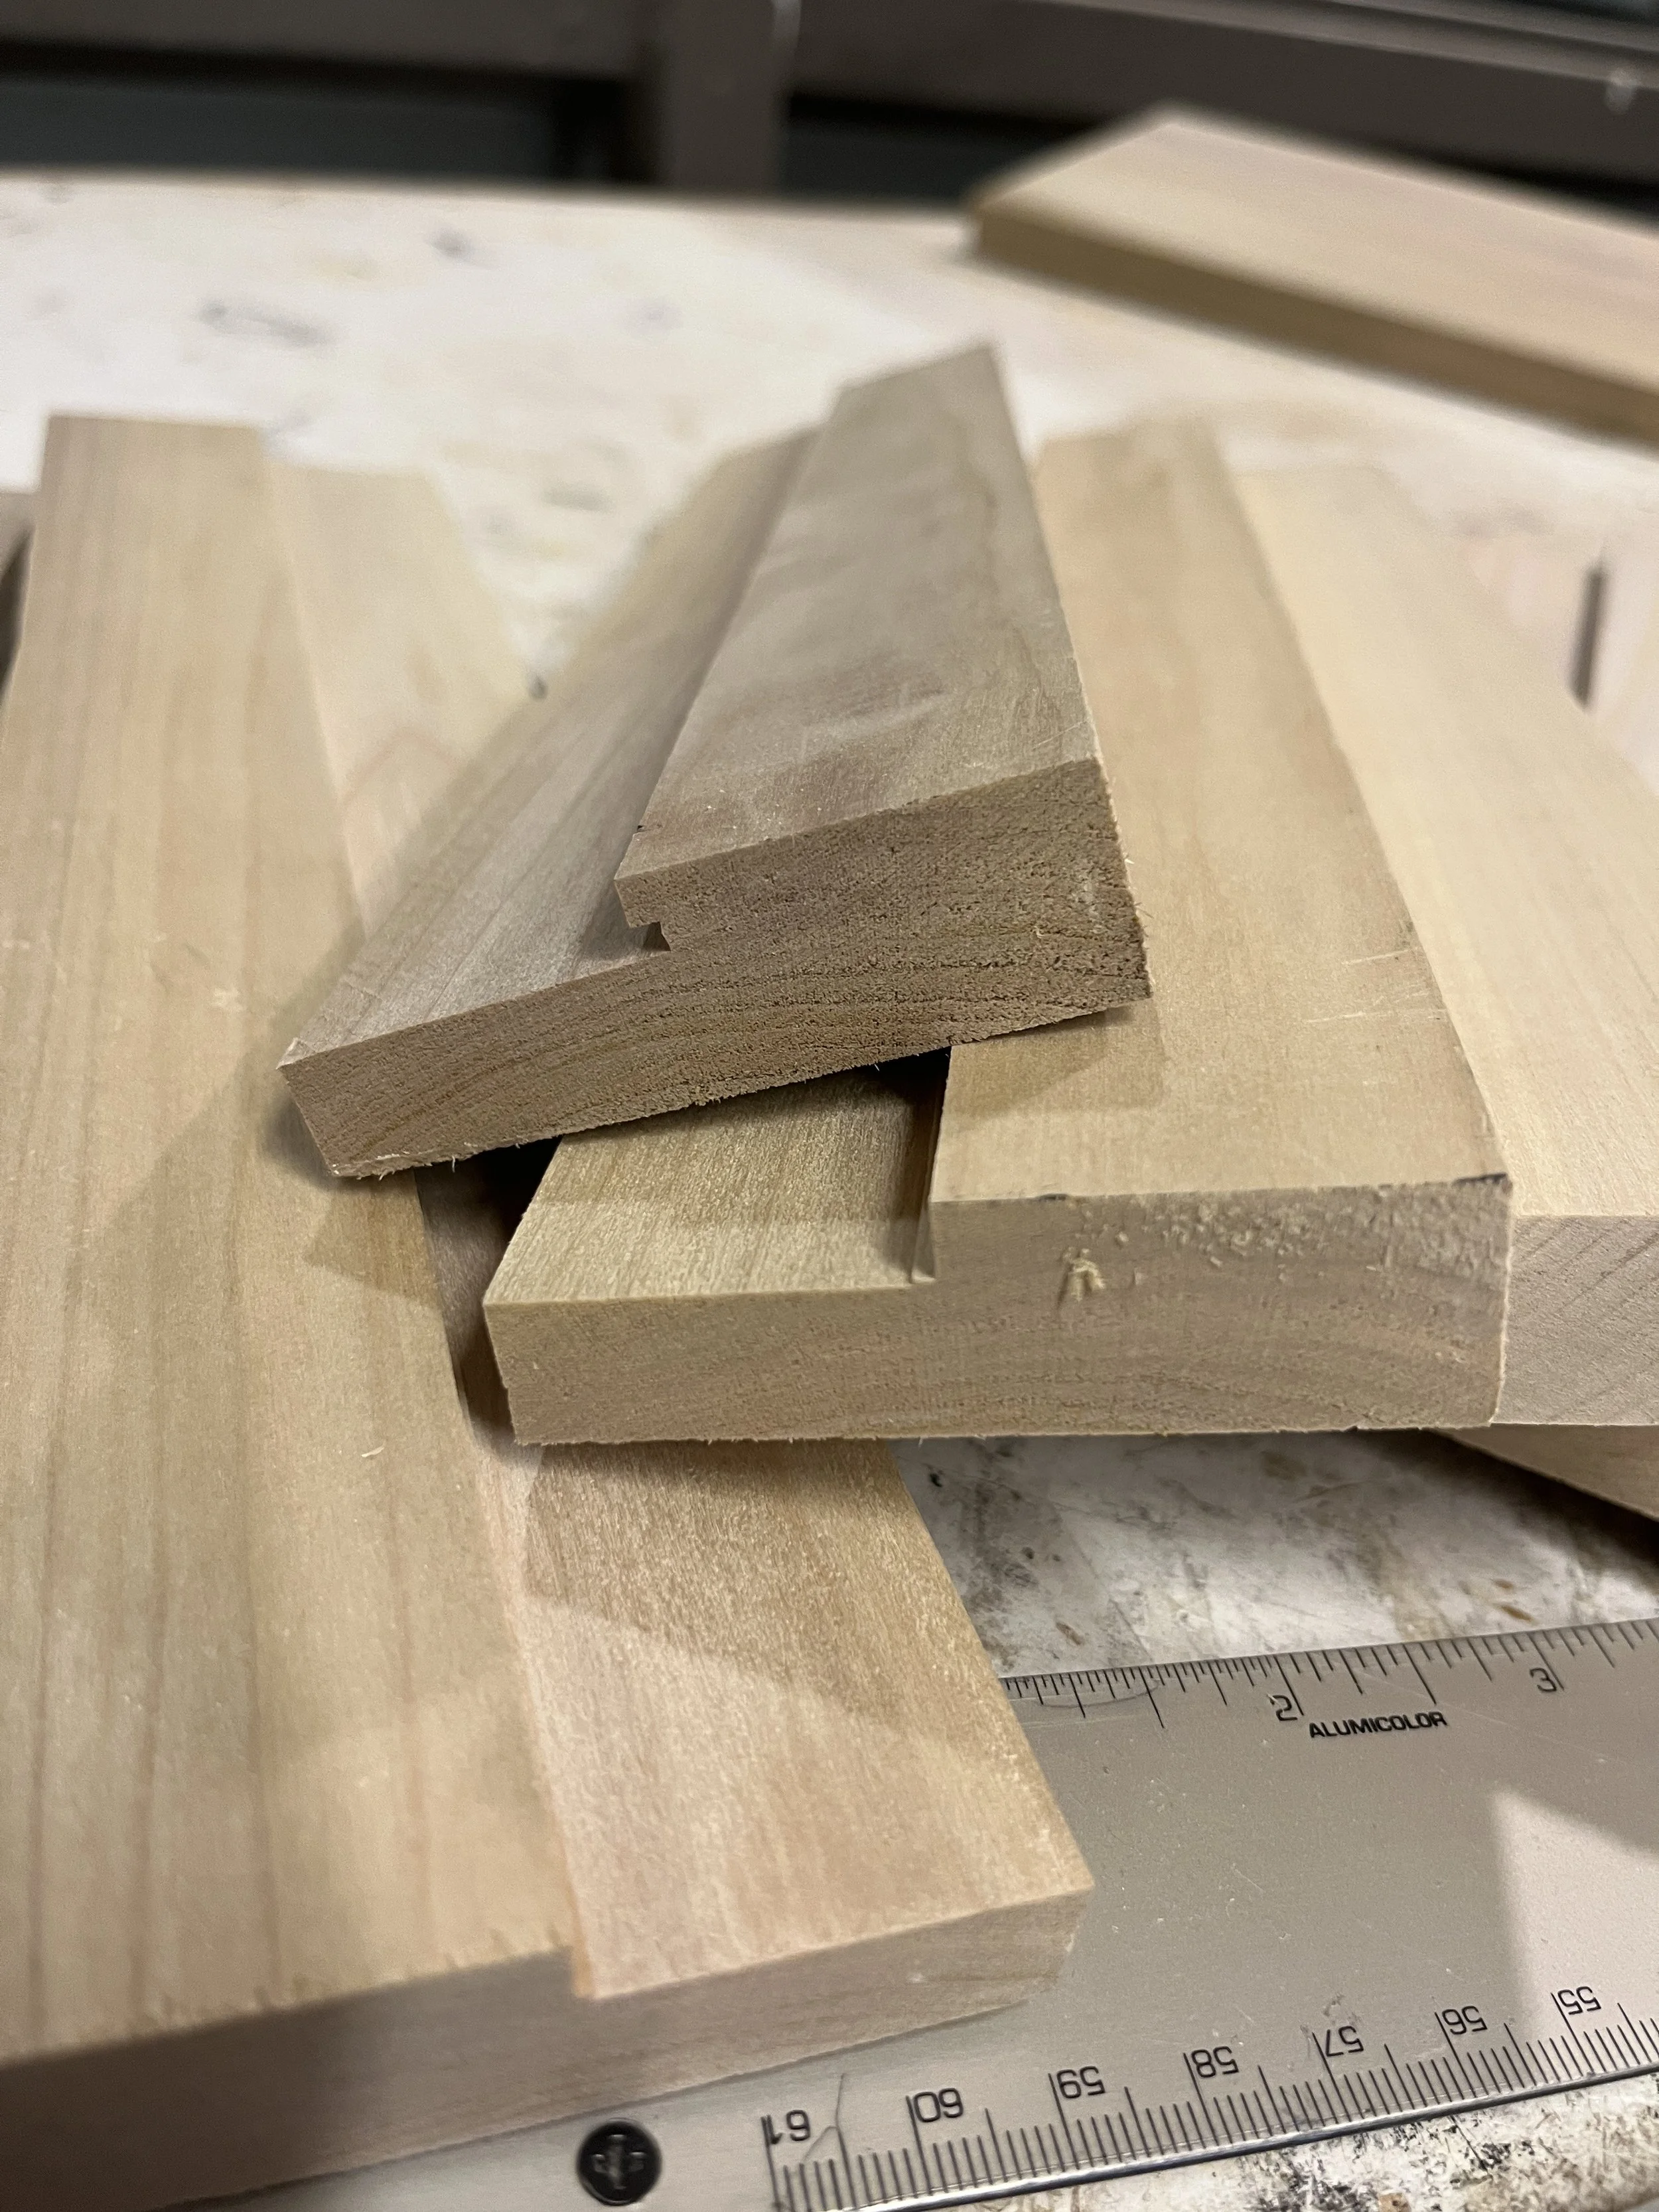
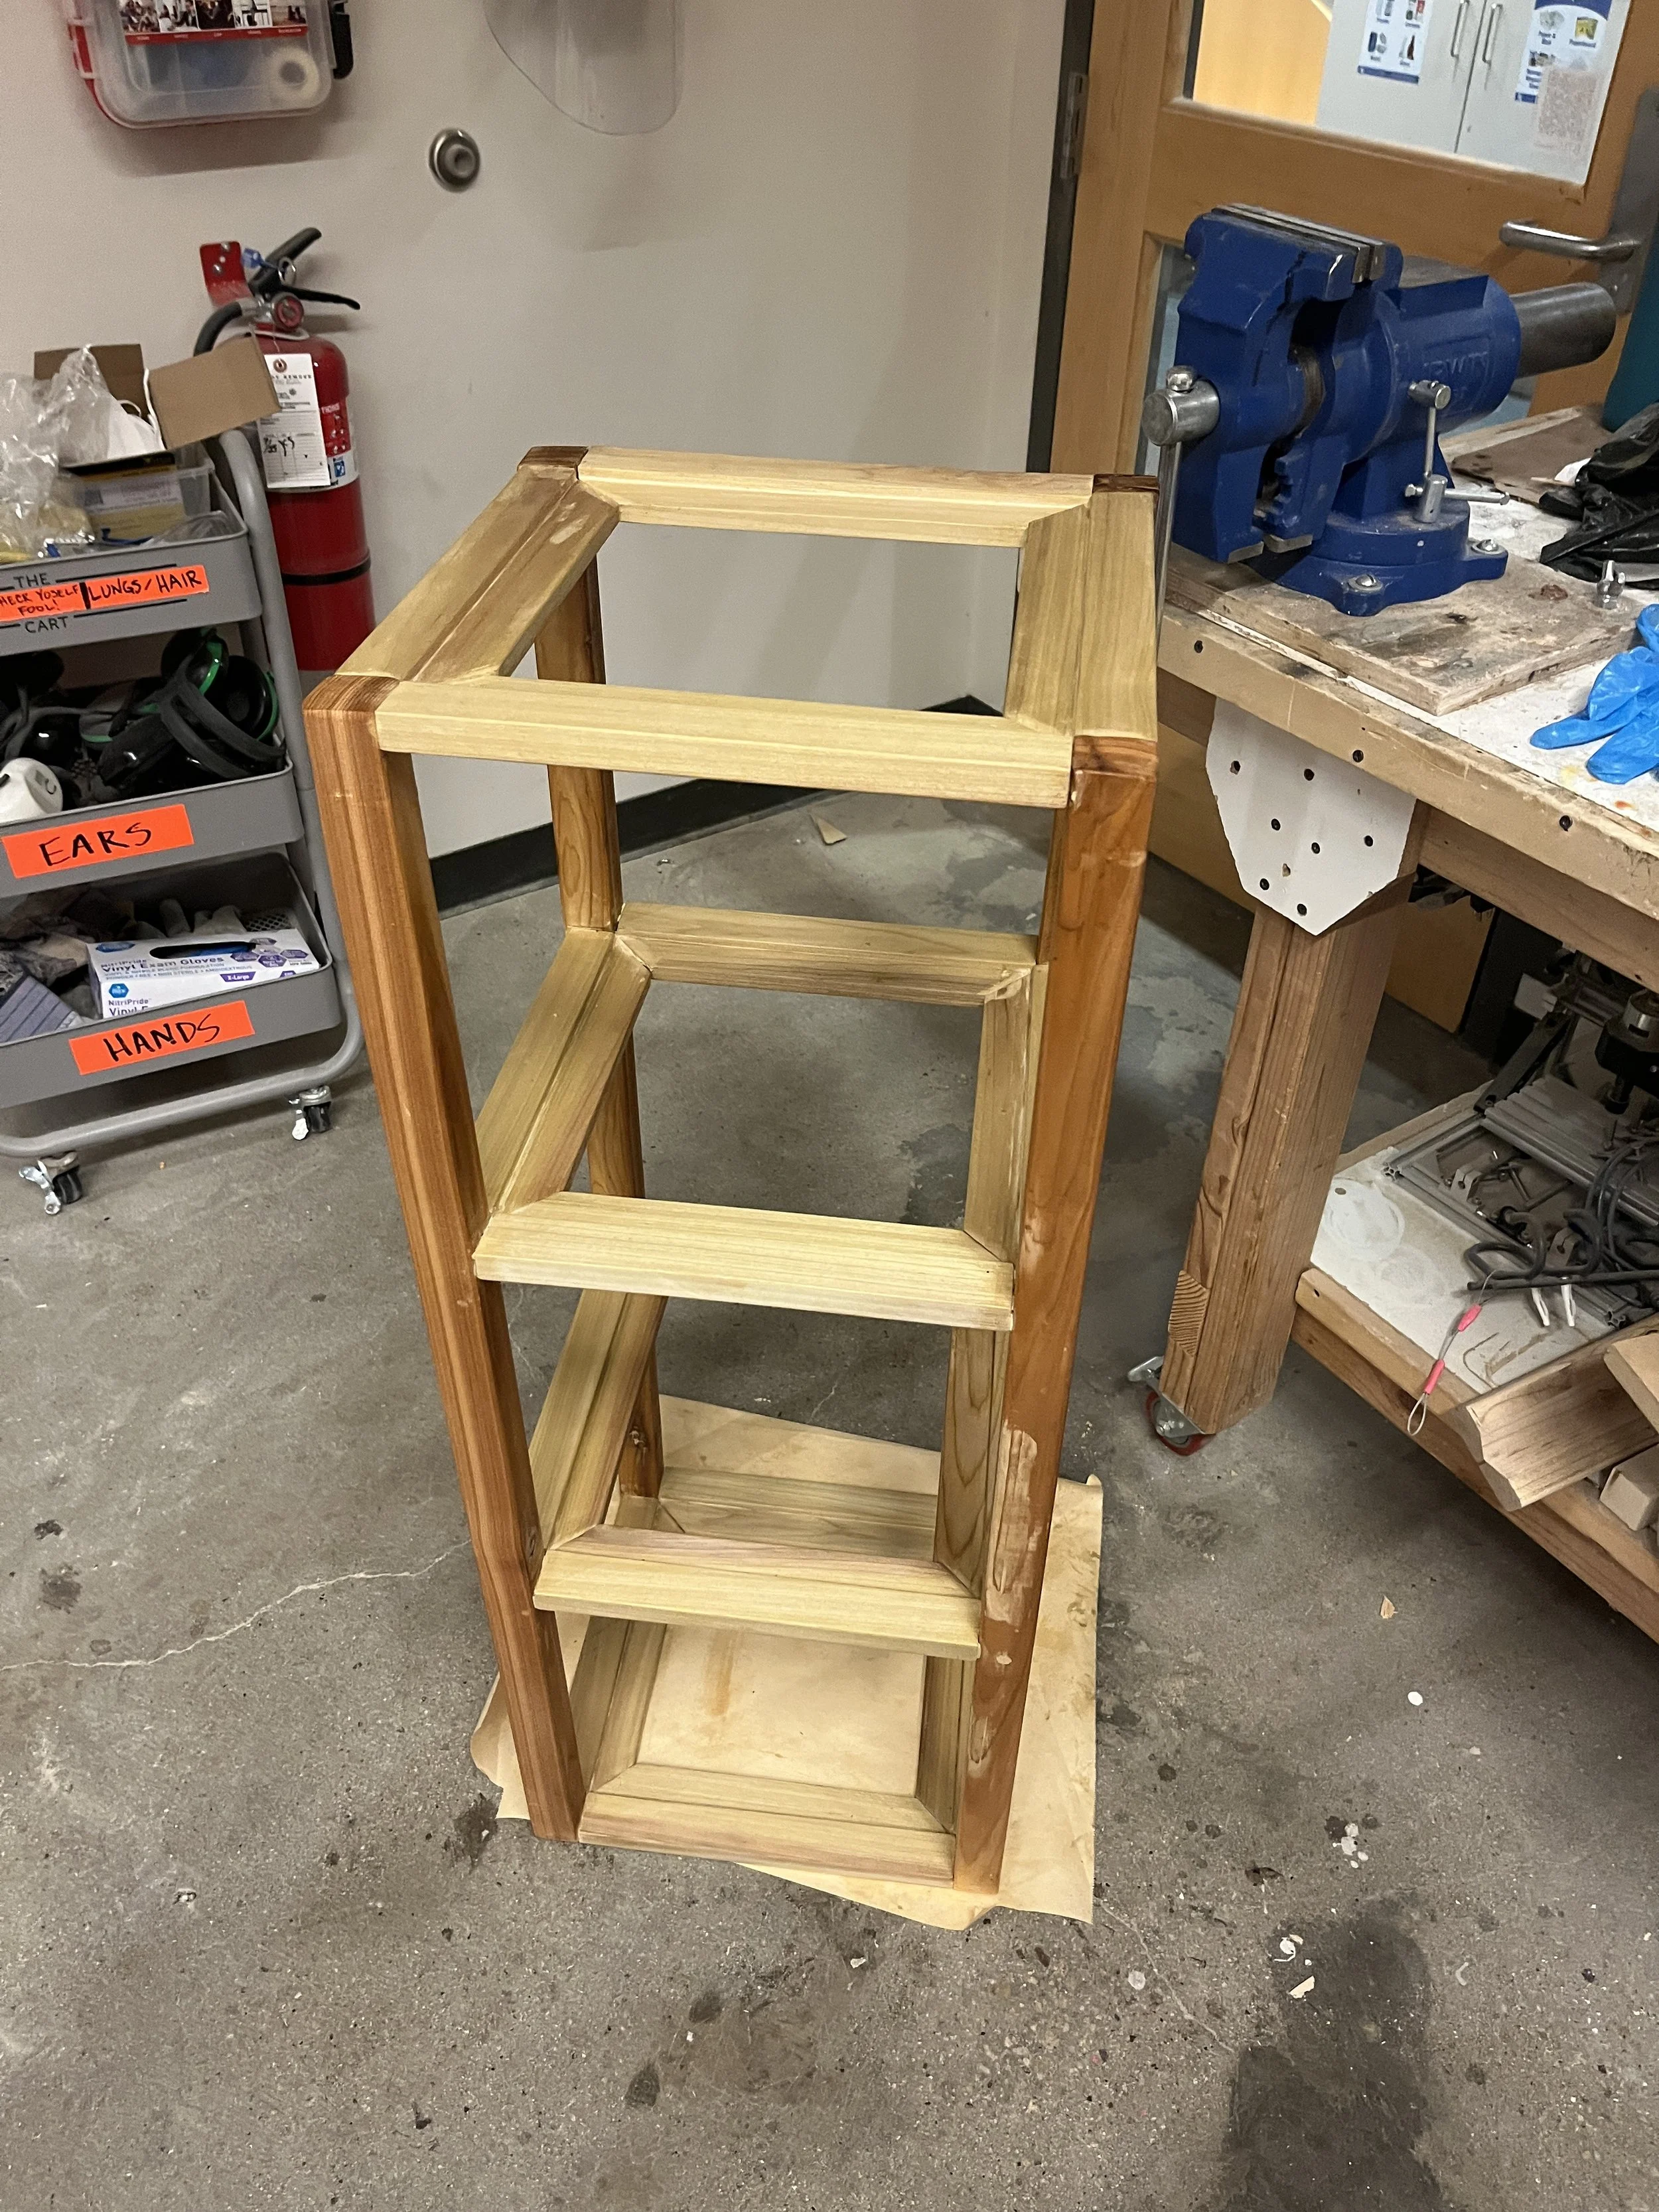
I began by cutting eight 12-inch wood pieces on the chop saw, then used the table saw to rip them into sixteen 12" × 2.5" pieces. I marked a ¼" × 1" groove on each piece for the acrylic inserts and first cut a consistent ¼" depth across all of them. After several trials to find the correct placement for the 1" cut, I adjusted any imperfect grooves with a chisel and file.

Next, I used the chop saw again to cut 45º angles so the pieces could form frame-like structures. I measured the dowel locations and even attempted to 3D-print a marker for accuracy (which didn’t end up working). Using that guide and a makeshift jig, I drilled the dowel holes—though drilling straight down for the shelf pieces proved challenging even with clamping.
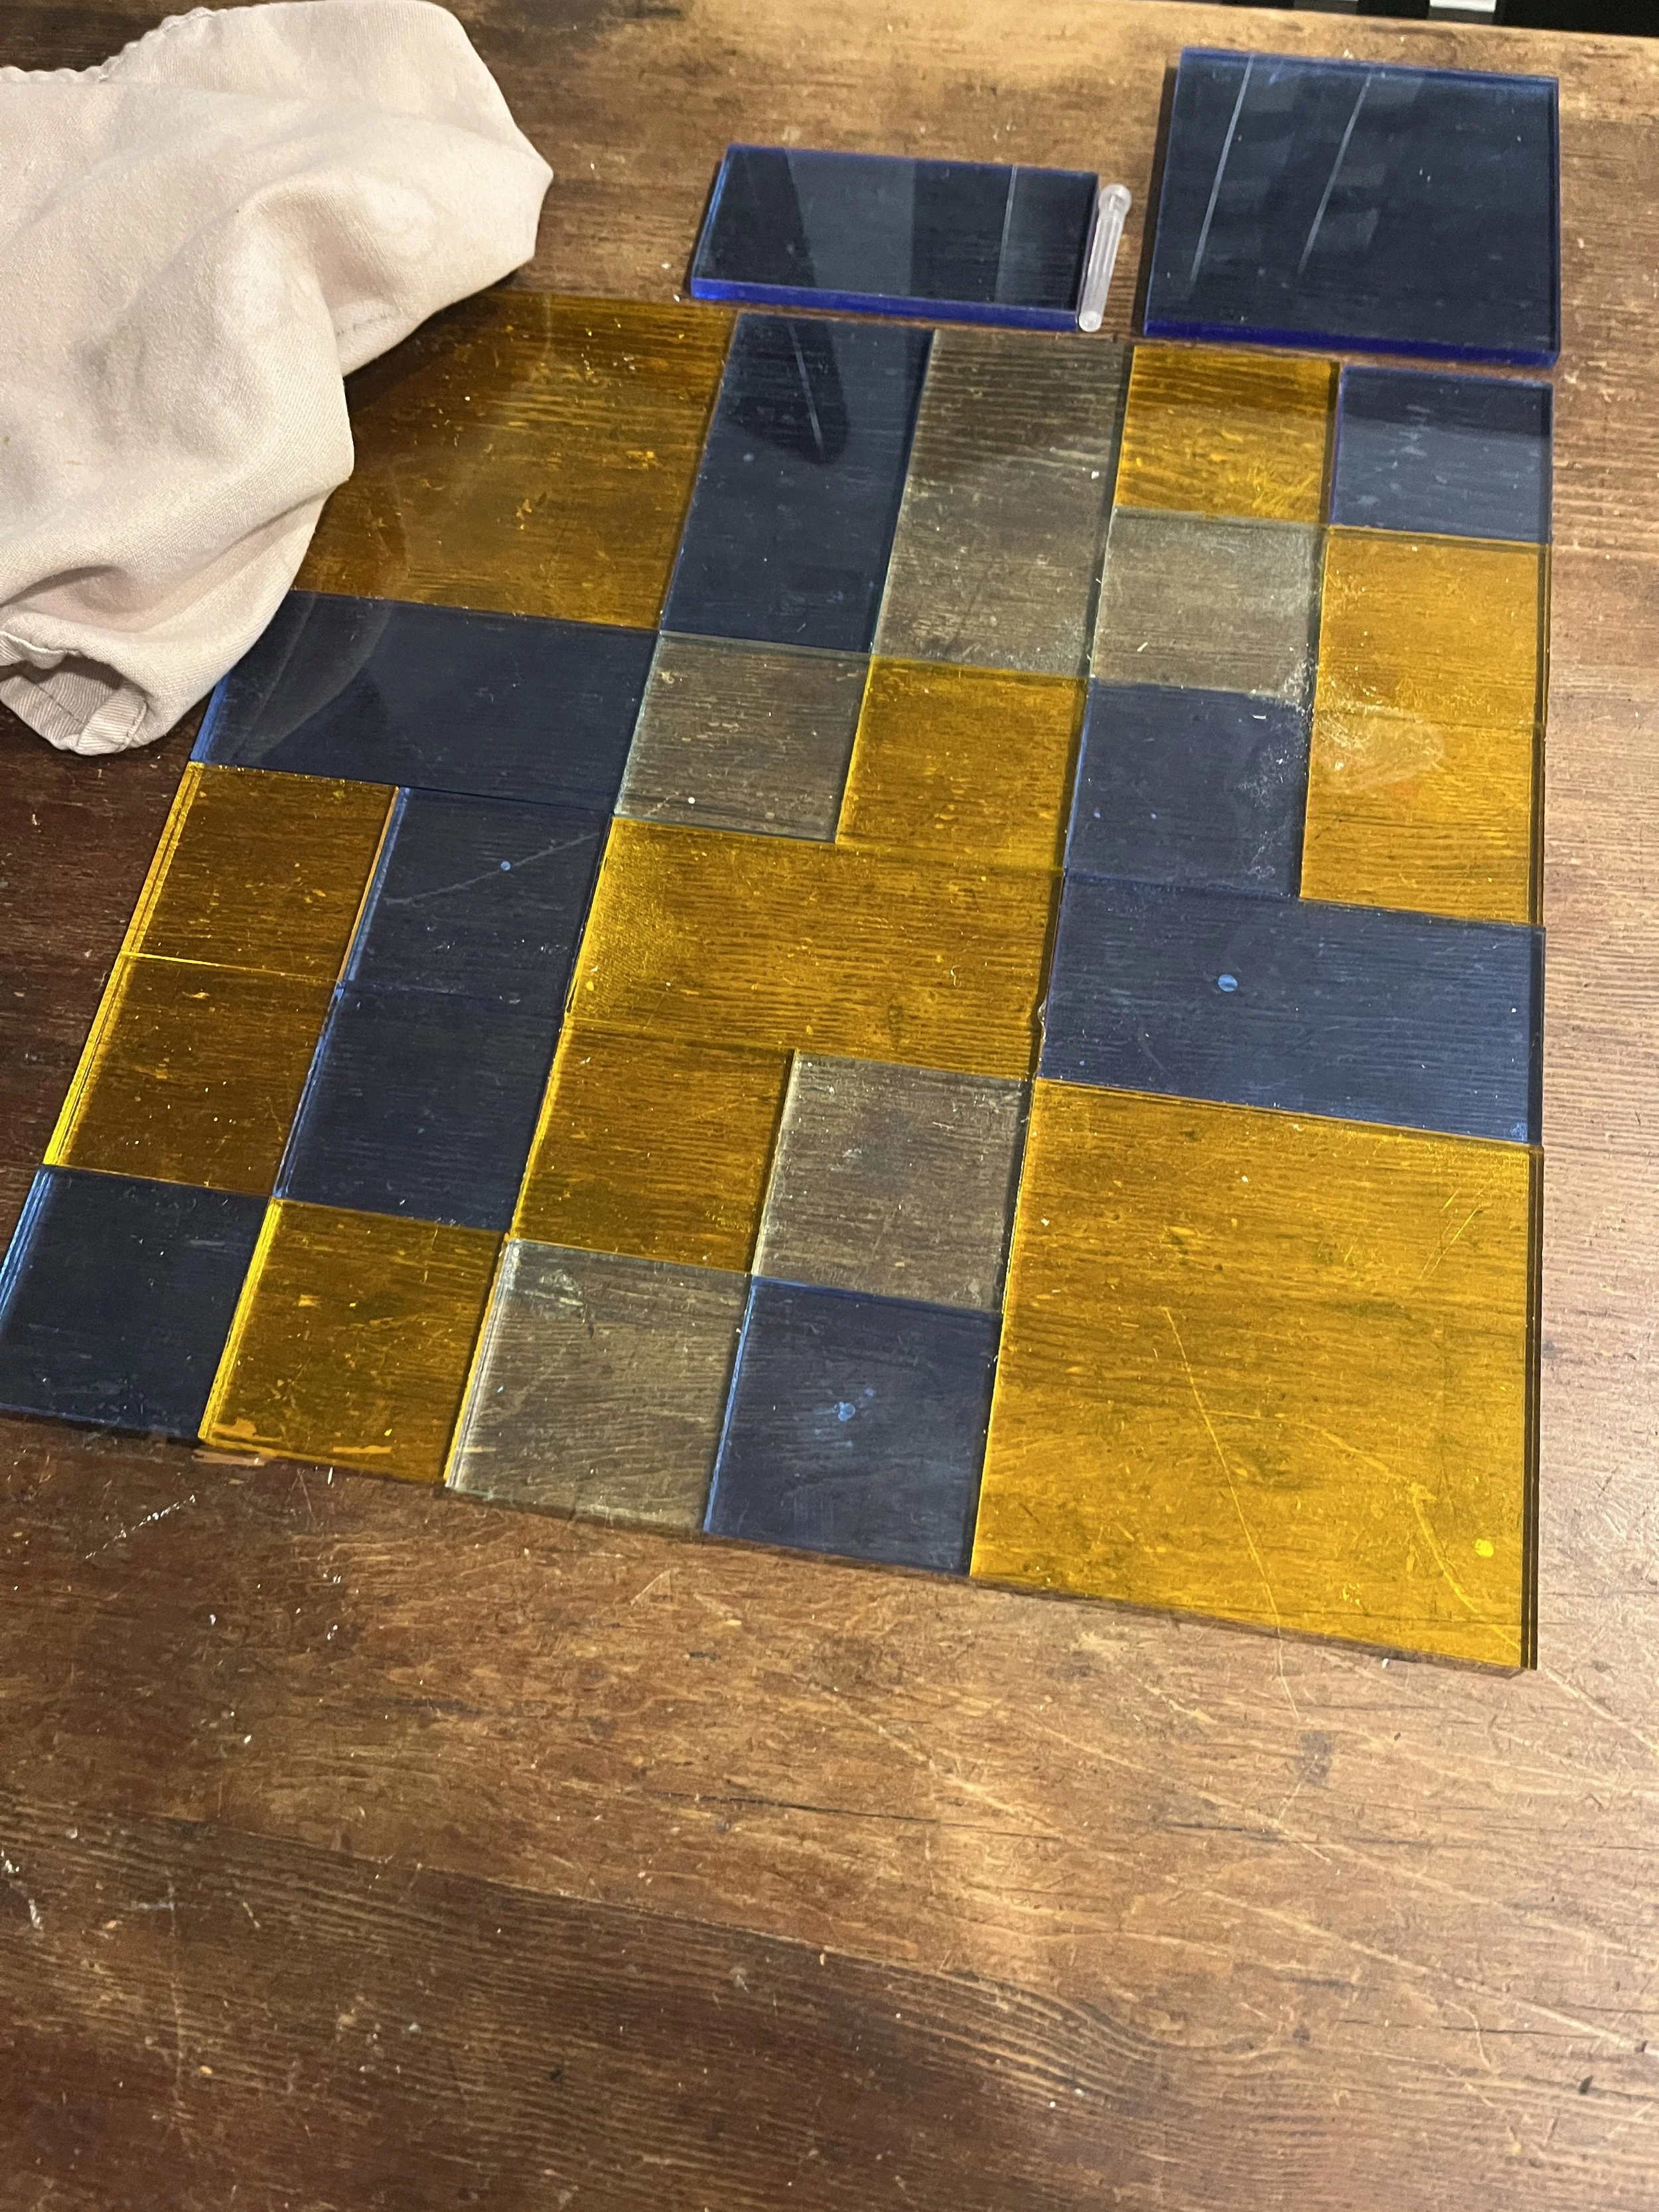
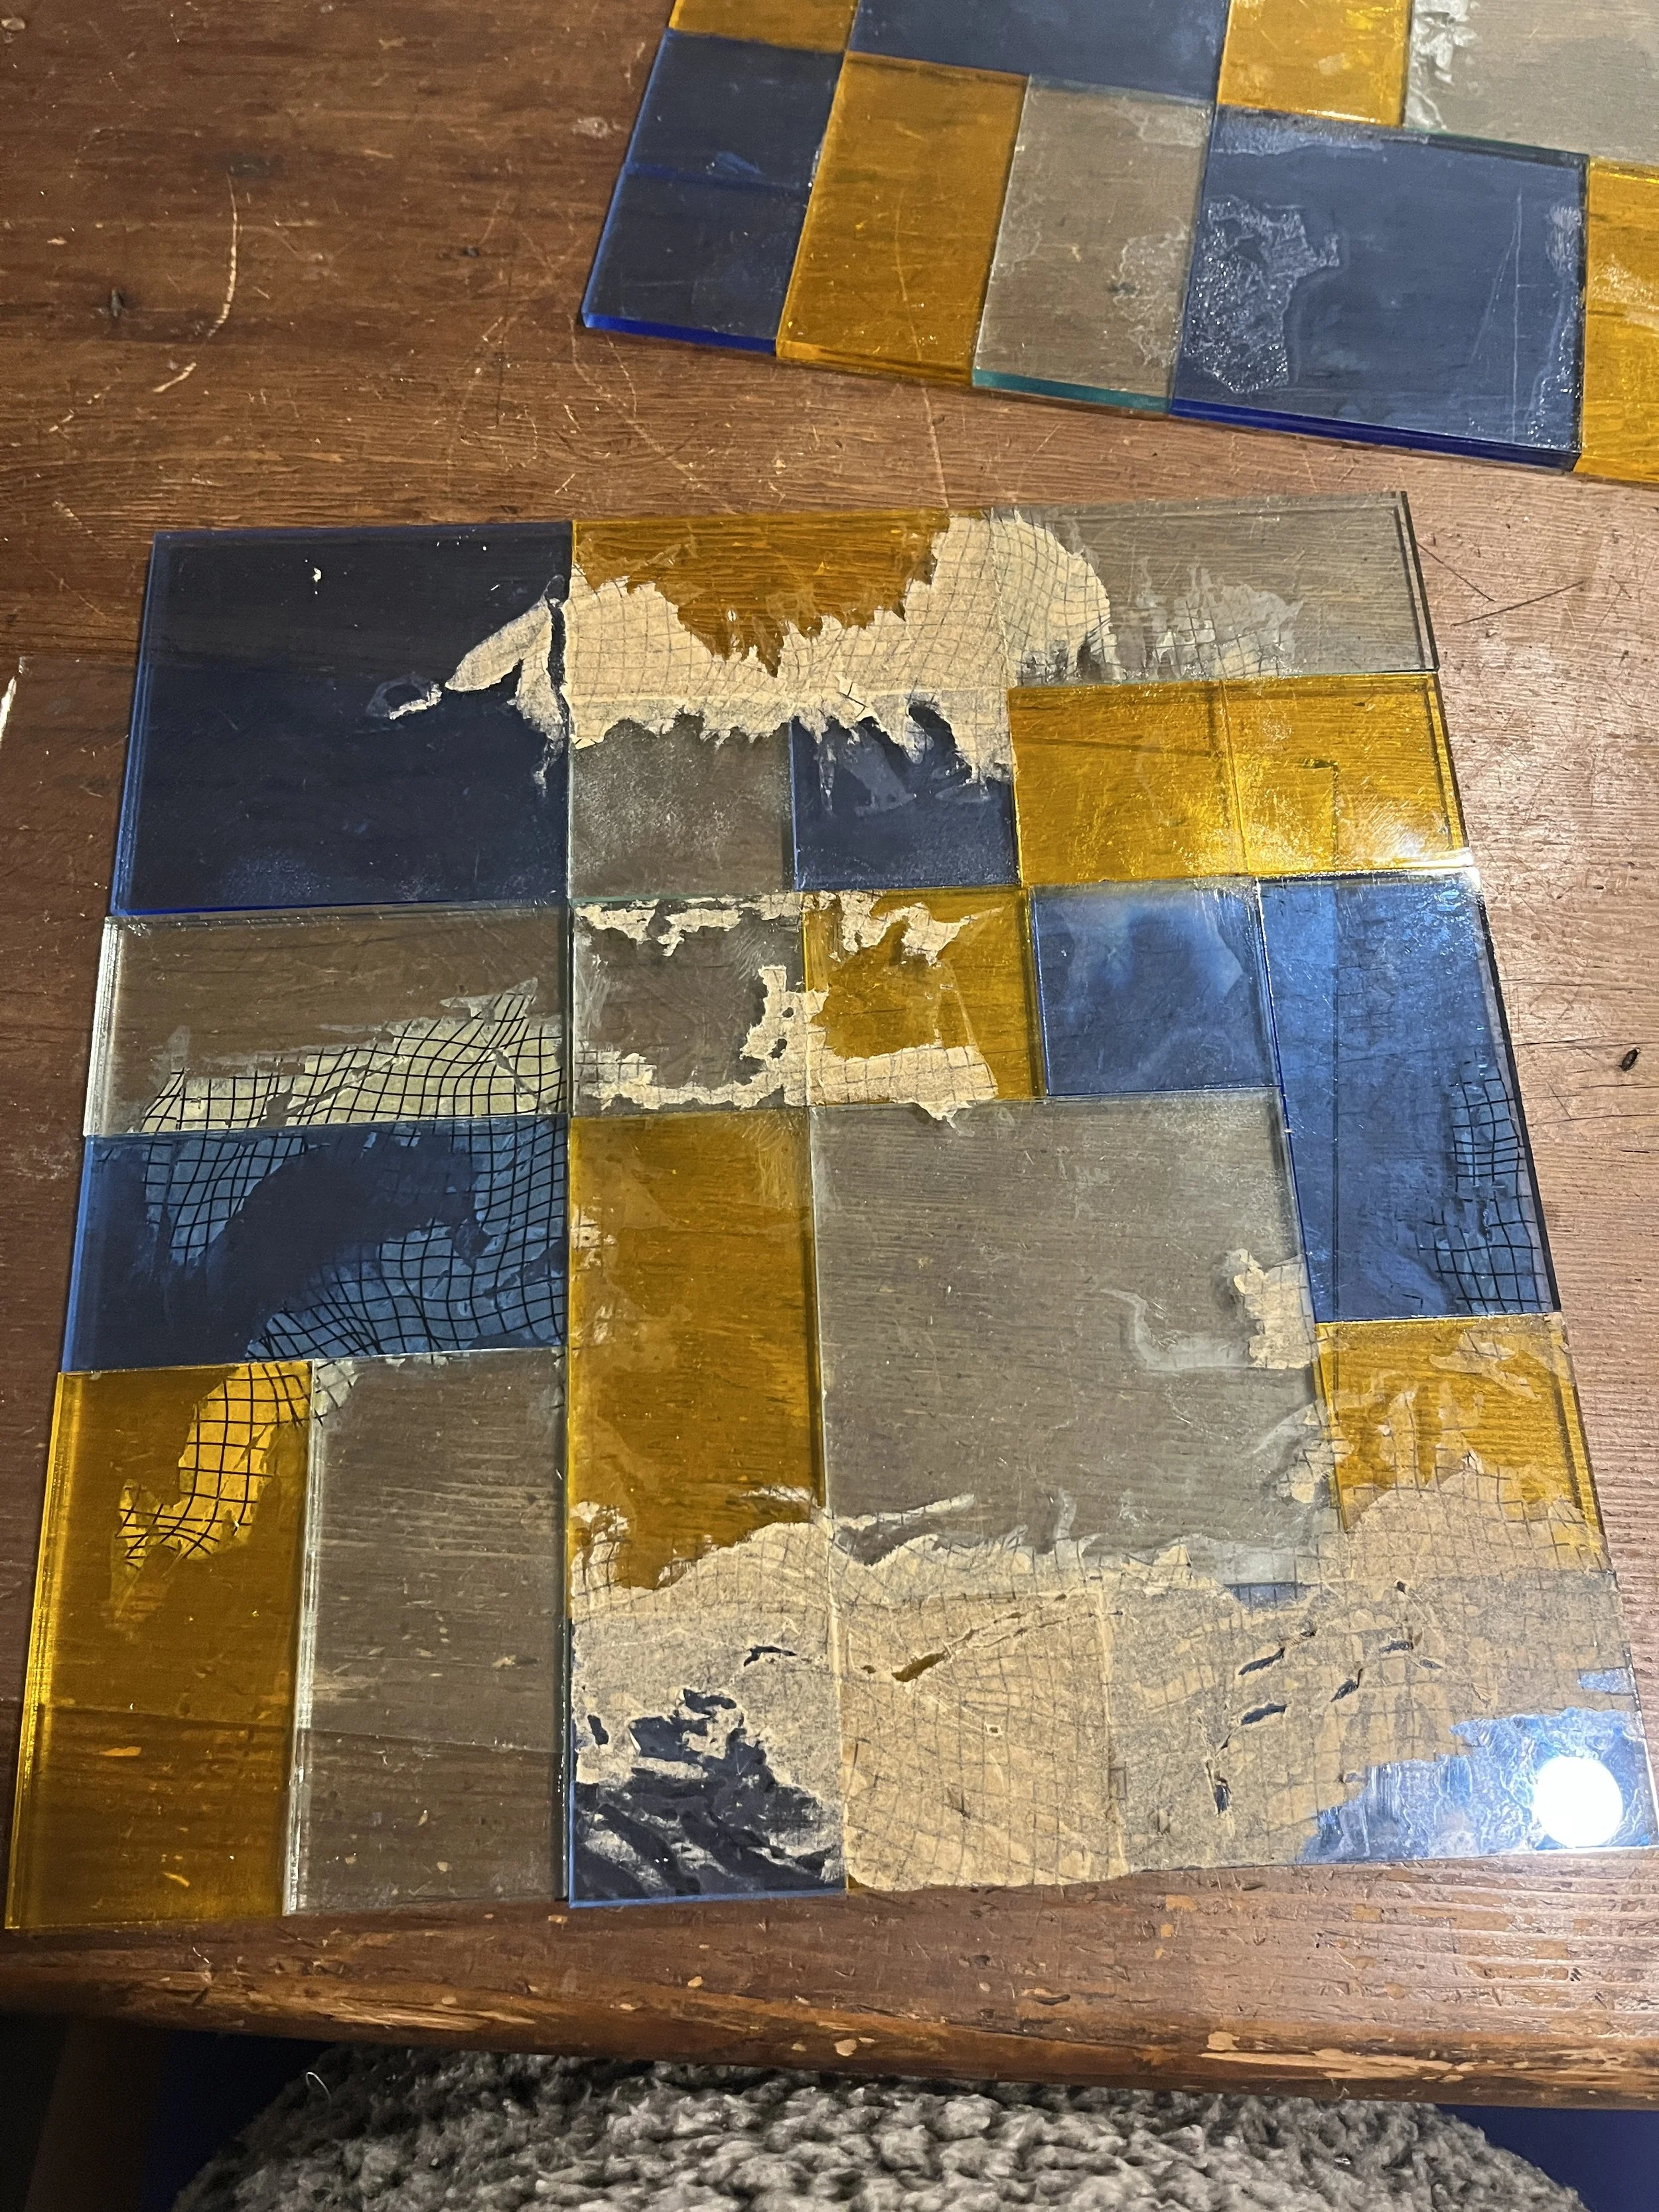
During this stage, I laser-cut various acrylic rectangles (2×2, 4×4, 2×4). One of the laser cutters struggled to cut through the material, but eventually I had enough pieces to begin assembling. Using acrylic cement, I welded the acrylic structures together. Issues emerged: glue spilled underneath and fused with paper, and small size discrepancies created imperfect joints. To fix these, I removed excess material with an x-acto knife and sanded the acrylic to achieve an intentionally fogged look.
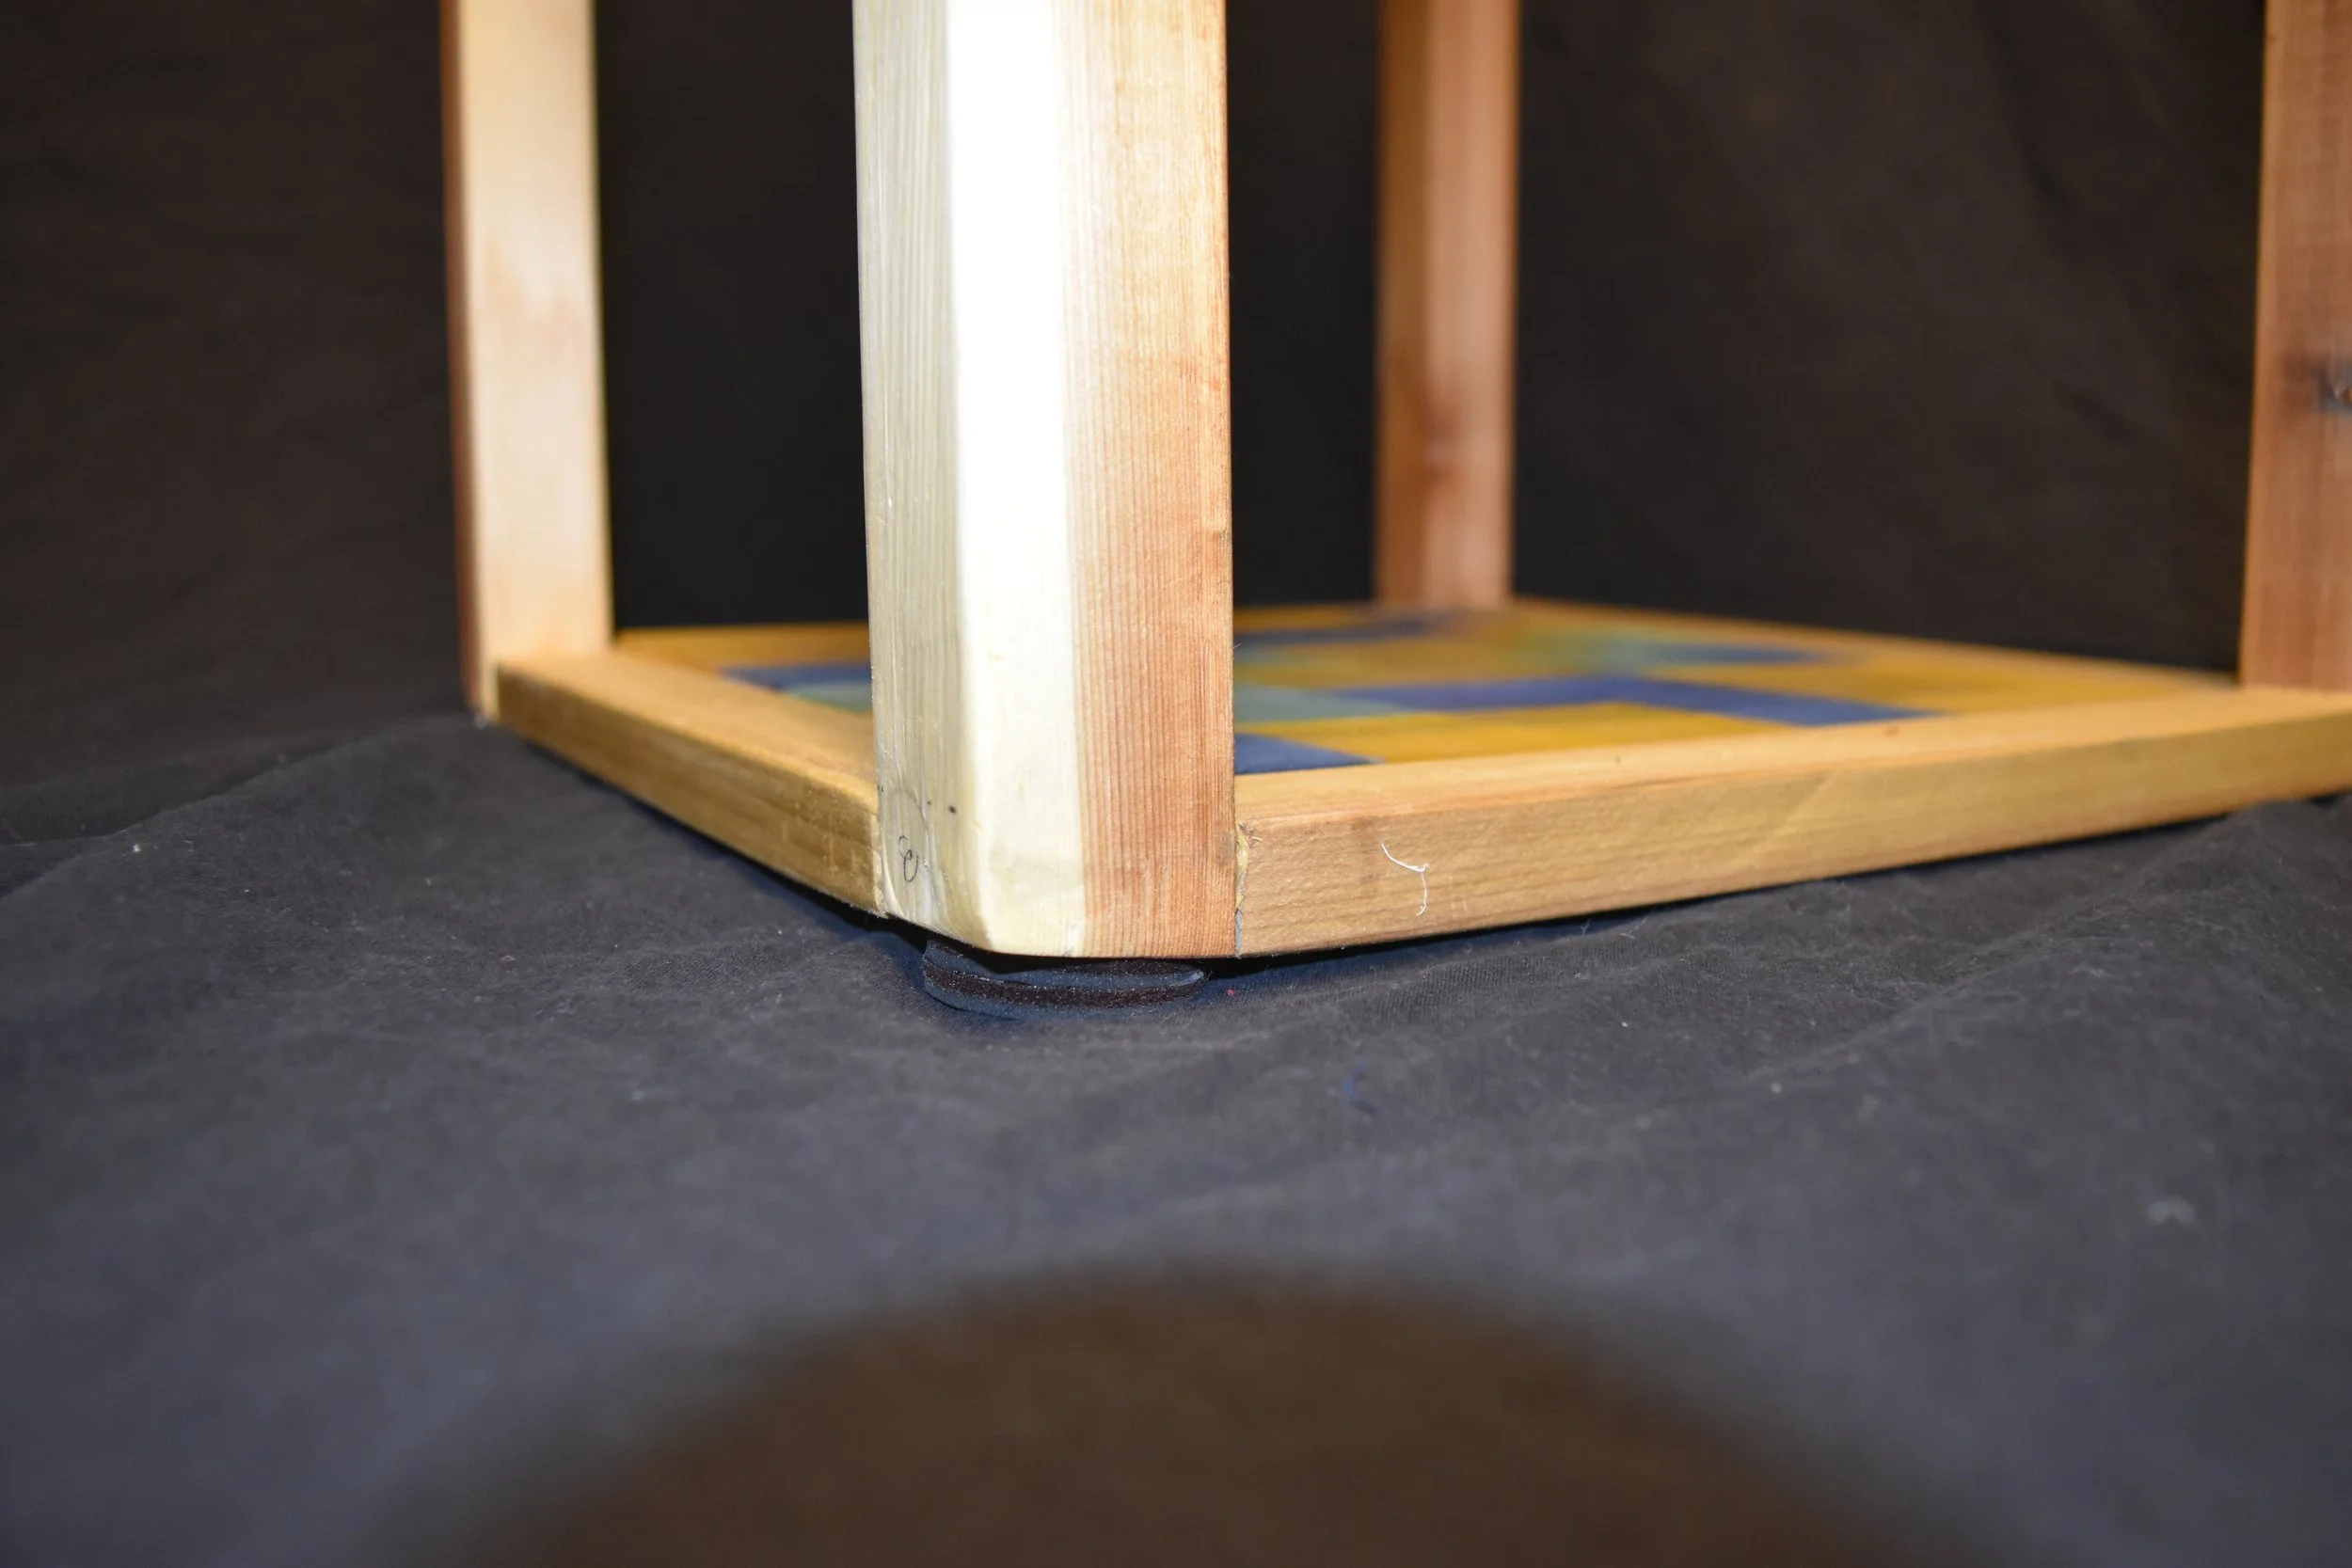
Once all wooden frames were assembled and dowels inserted, I discovered the entire shelf was wobbly. I spent significant time trying to level it – sanding, adjusting, and even sawing off all of the legs with a Japanese saw – before ultimately filling failed dowel attempts with wood filler. Eventually, I settled on using rubber feet to stabilize and balance the shelf.
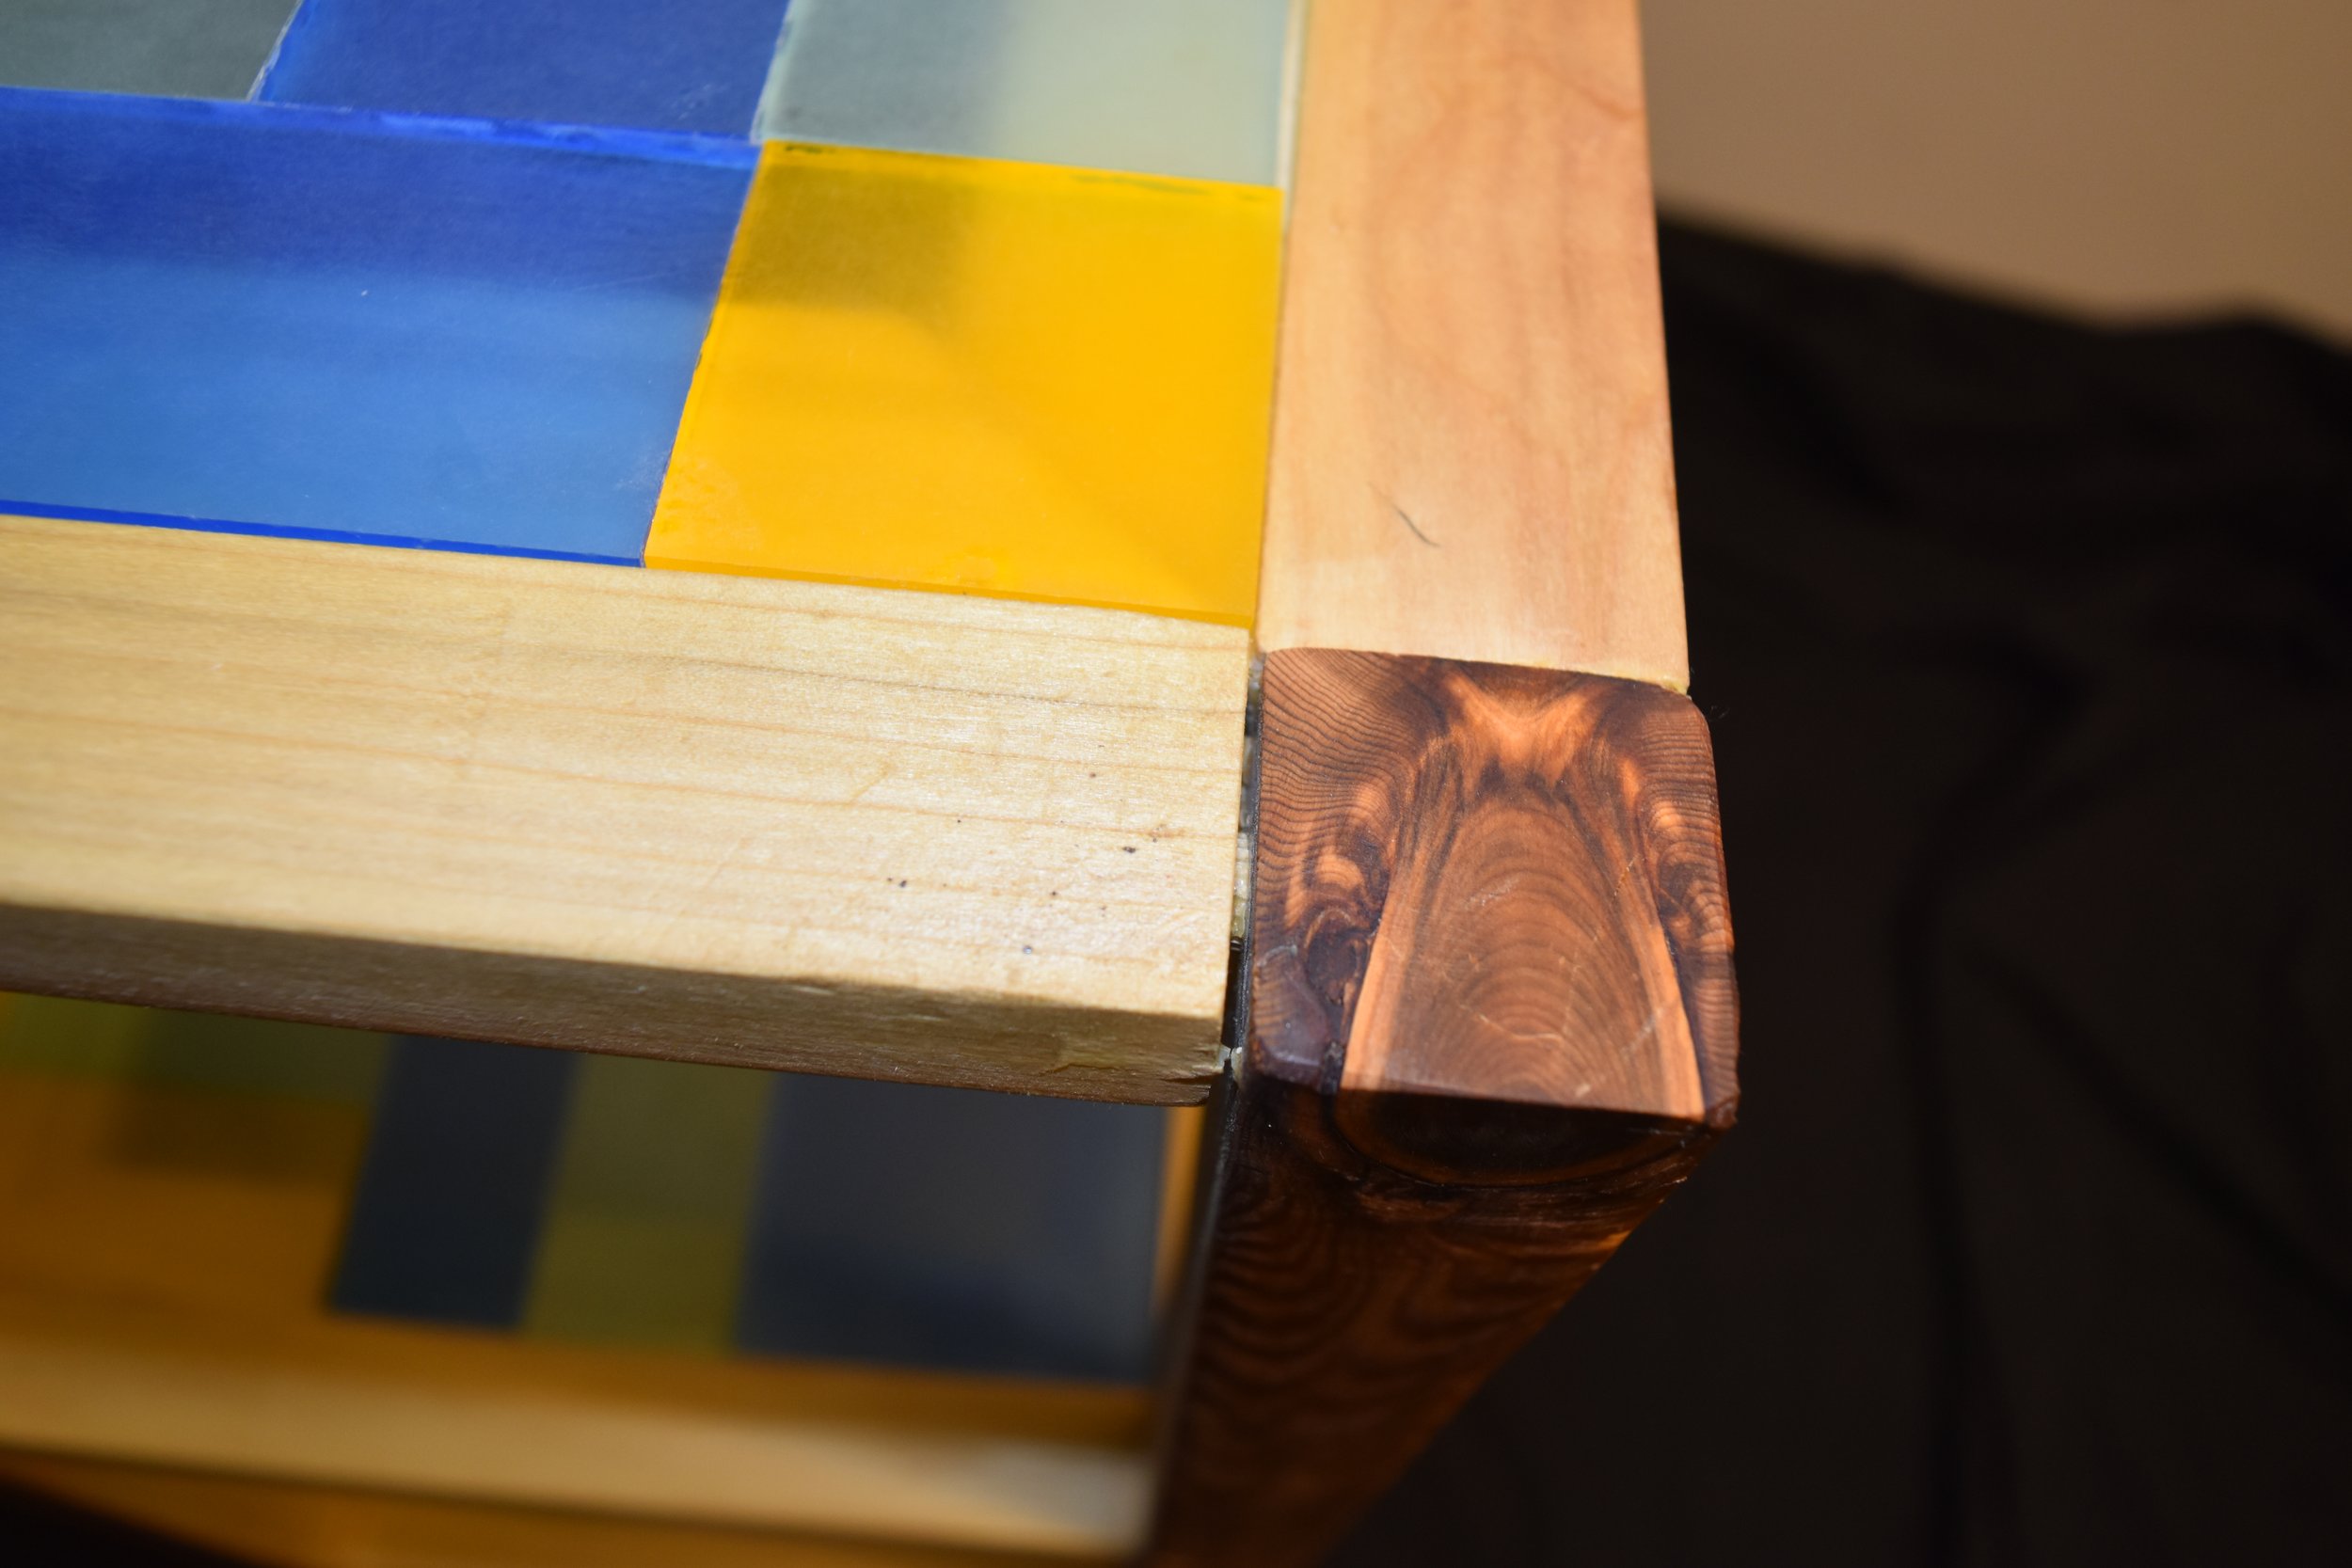
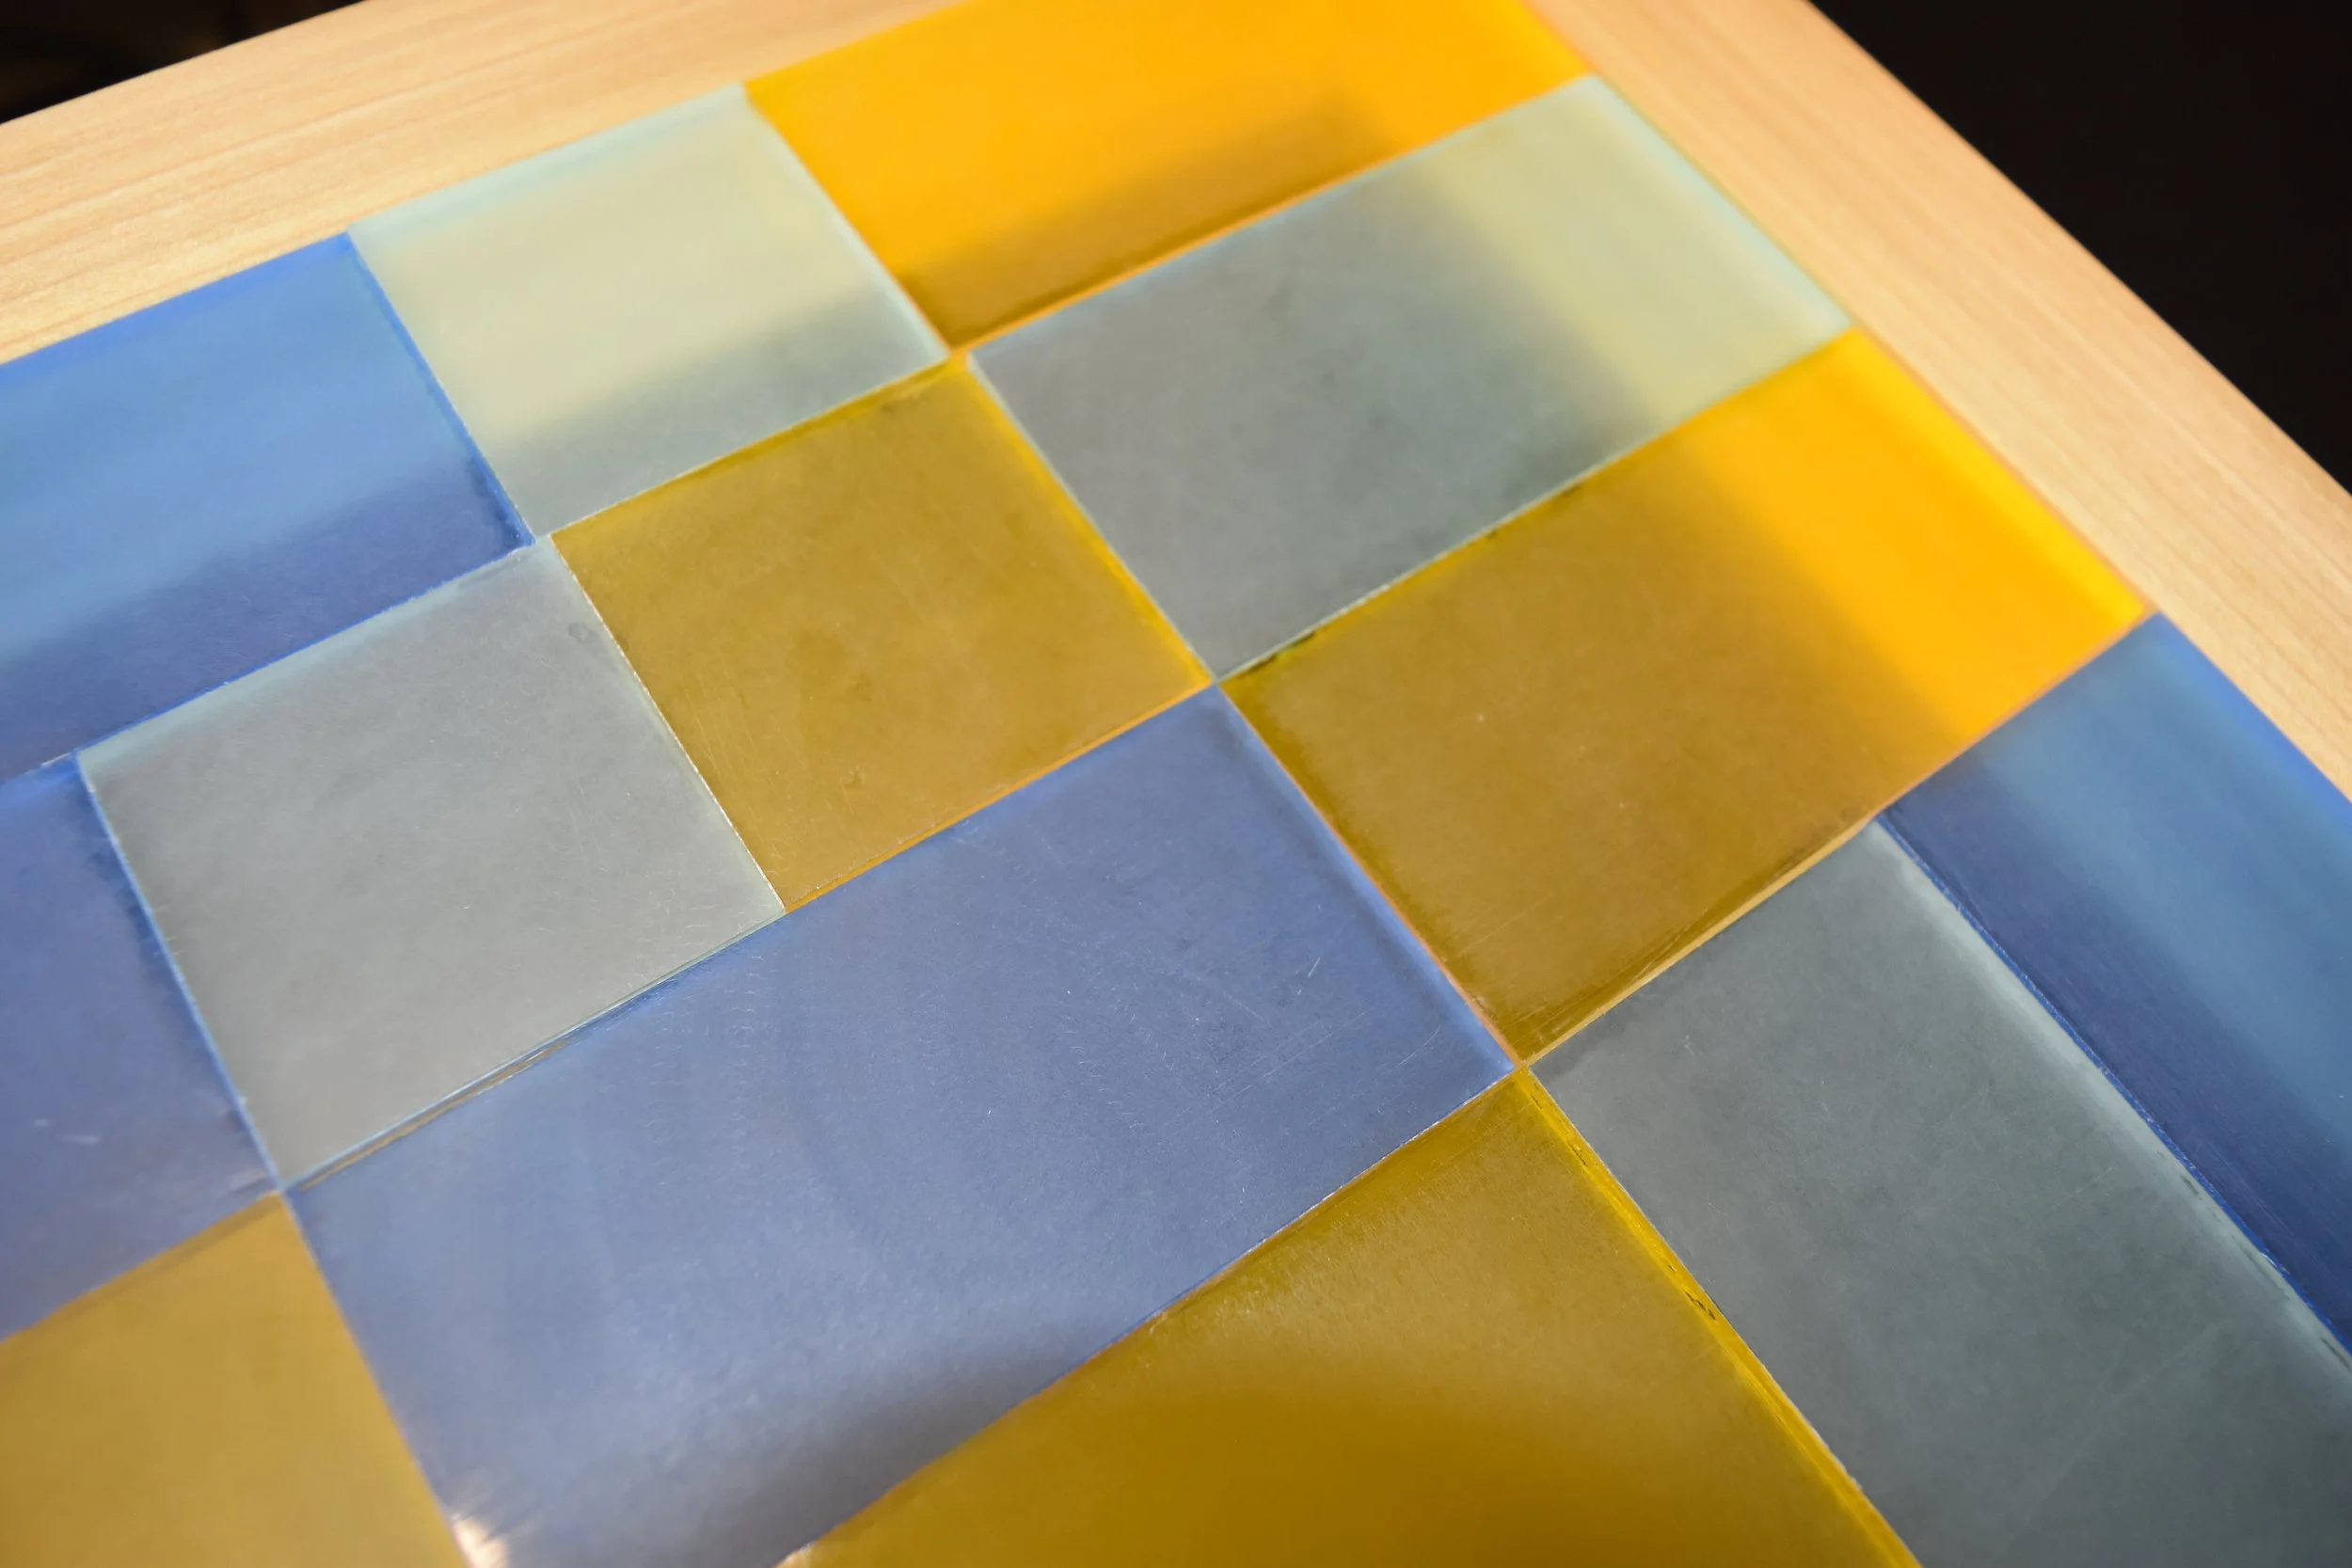

For finishing, I used an orbital sander on the acrylic for consistency and hand-sanded the wooden frames to 120 grit. After prepping the surfaces, I applied Rubio Monocoat to stain the wood. The cedar especially took on a beautiful finish. Finally, I inserted the acrylic panels, added the rubber feet, and completed the piece.
Final Product


REFLECTION
This was my first real woodworking project, and it pushed me far outside my comfort zone. I ran into challenges at almost every stage—precision cutting, dowel alignment, uneven frames, acrylic welding, and leveling the final structure. Many issues came from my inexperience with woodshop tools, but each mistake taught me something essential.
Although I’m hard on myself and initially wished the piece was more perfect, I can now see how much I learned through the process. The sanding, staining, and acrylic finishing transformed the project, and by the end I genuinely liked the final result. I learned which techniques I would approach differently in the future (especially avoiding dowels for structural accuracy), but I also learned to problem-solve creatively—like using rubber feet to stabilize the frame.
Overall, the project required determination, improvisation, and patience, and it significantly improved my understanding of materials and fabrication. Despite the frustrations, I’m proud of how it turned out and of how much more confident I now feel working with wood and acrylic.