3D Platypus
Date: March 2024
Context: Digital fabrication class assignment in creating slot-based 3D sculptures. Turn a fully organic shape into a cleanly sliced, fabricatable, planar geometry without losing its identity.
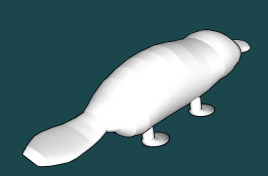
Goal: To digitally model an animal, slice it into planar cross-sections, and fabricate the interlocking parts using laser cutting. I chose a platypus, not because it is a simple geometric shape, but because my dad loves them.
Tools Used: SketchUp, Epilog Laser Cutter, patience, perseverance, and industrial levels of stubbornness
Class: Form - Atlas 3200


Overview
Process
1. Choosing the Animal:
I selected a platypus because:
My dad loves them
I thought it would be cute
First realization:
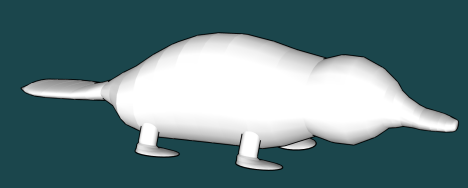
Platypuses do NOT convert well into simple geometric forms. Everything about the head, tail, and body proportions fought back.
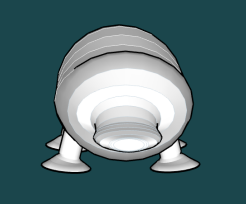
3. Slicing the Model
Using the slicing method shown in class:
Created planes in a repeating pattern
Learned the importance of offsetting slices by exactly 300 mm
Realized too many slices created a blob, and too few erased the platypus entirely
Key learning moment:
“I realized why he moved them 300 mm—lining them up so well is my savior.”
To preserve the general form, I reduced slice count but accepted the consequence:
The platypus silhouette became slightly more rat-shaped with fewer sections.
5. Preparing Laser Files
To preserve correct scale, I kept a 10” x 12” bounding rectangle around the entire layout. This ensured DXF import scaling errors could be corrected by resizing the rectangle back to proper dimensions.
First Cut Attempt = Failure
I forgot to erase internal intersection lines
Two pieces were accidentally sliced in half by the laser
Luckily, there was enough material margin to recut those pieces properly.
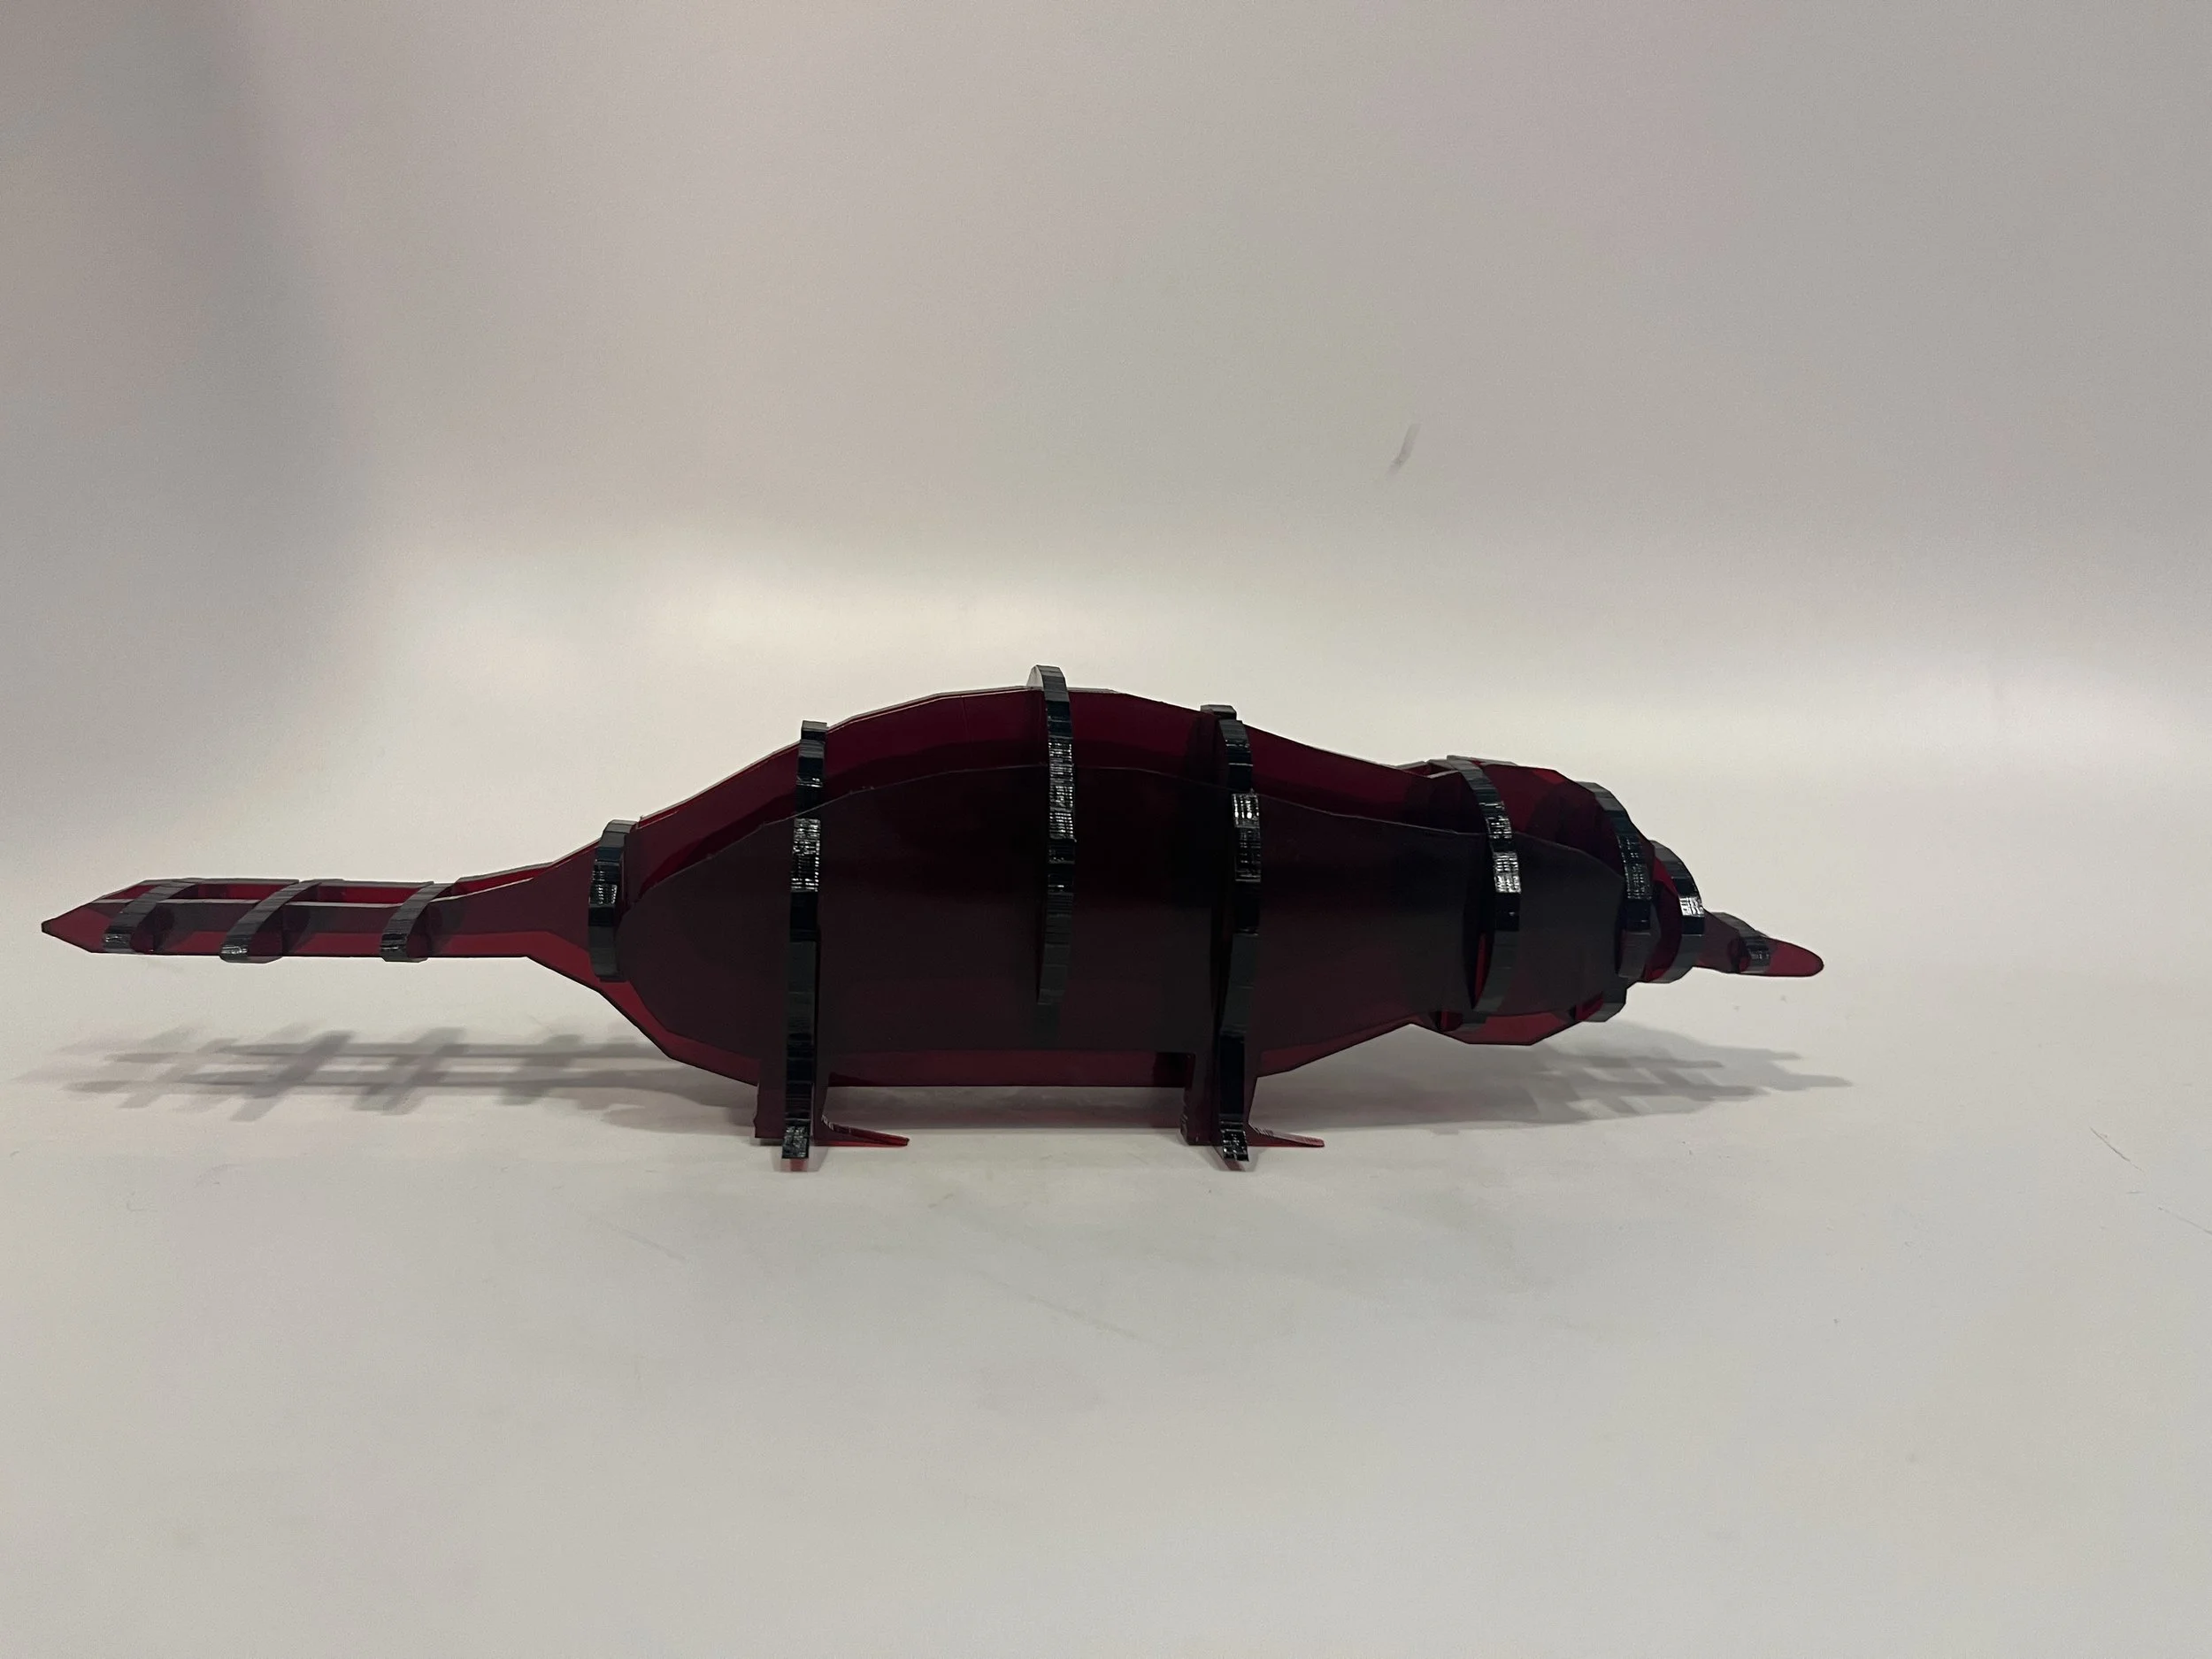
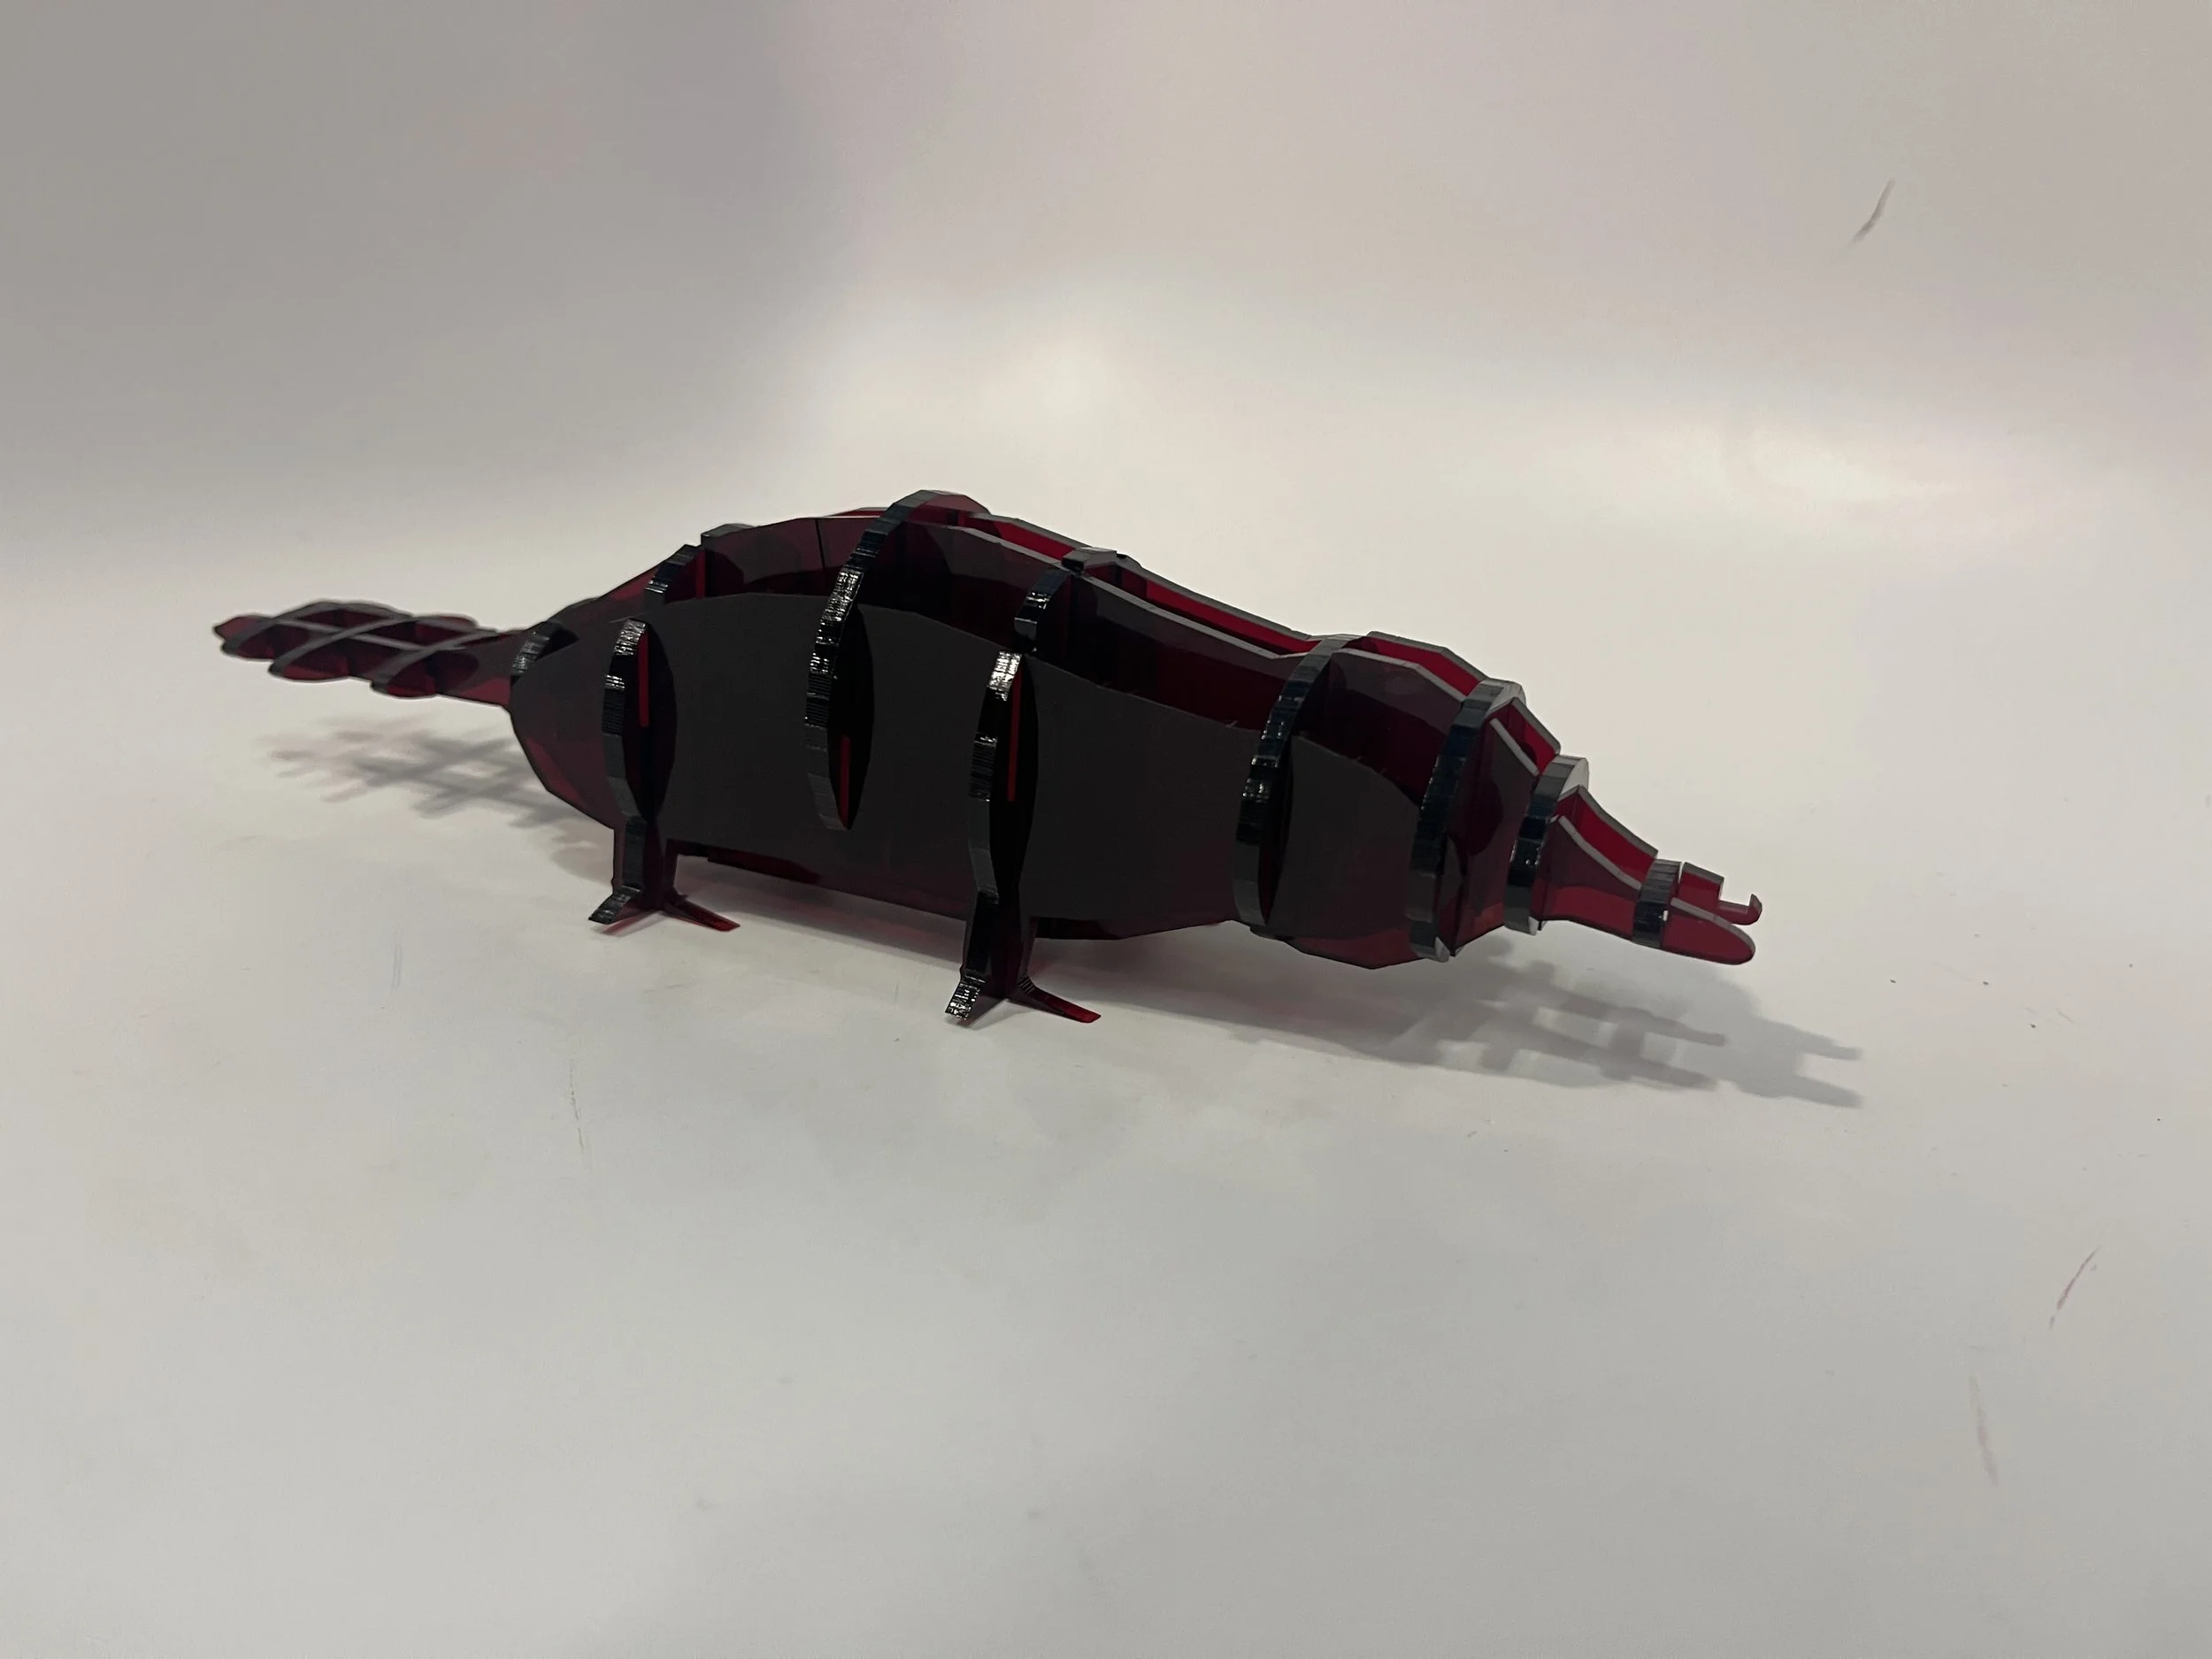
Second Cut Attempt = Success
All pieces cut cleanly, with only one issue left:
Beak Problem: The very front of the platypus lacked a matching slot. I forgot to generate it. One side had a slot, the other didn’t. I accepted it and kept it asymmetrical.
Outcome
A fully fabricated, slotted 3D sculpture of a platypus, constructed entirely from flat pieces cut on an Epilog laser.
Despite modeling challenges, the final object:
Assembles correctly
Stands on its own
Reads as a stylized animal form
Holds sentimental value as a gift
It satisfied all assignment requirements and demonstrated mastery of:
Organic modeling in SketchUp
Digital slicing
Slot joint design
Laser fabrication workflow
Error recovery + iteration under pressure
Personal Insight
I discovered that even when every step feels tedious, the final object can still be meaningful, delightful, and full of personal character.
And most importantly—my dad loved it.
What I Learned
Organic shapes are difficult to model in geometric CAD tools
Slice quantity dramatically affects recognizable form
Slotting requires rigorous attention to alignment
Intersect Faces is a lifesaver
Laser cutting requires meticulous cleanup before export
Always keep a scaling reference rectangle
Perfection is not required for success—functionality and craft matter more
Reflection
This project taught me both the technical discipline of digital fabrication and the emotional process of working through a difficult, sometimes frustrating design challenge.
From a worm-shaped beginning to a vaguely platypus-shaped end, I learned how to:
Adapt
Compromise
Troubleshoot
And laugh at the process
Even when the final result leaned more “rat” than “platypus,” I was proud of the craftsmanship and the daily growth it demanded.
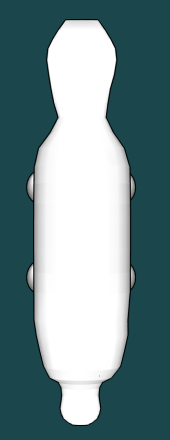
2. Early Modeling
Using SketchUp, I attempted to sculpt the base body using push/pull and curved surfaces.
Challenges included:
Circular body with subtle tapering
The beak/snout hybrid shape
Flattened tail
Maintaining symmetry
Quote from my journal:
“It is just looking like a worm, a weird worm.”
4. Slotting the Pieces - this was the most tedious phase.
Workflow:
Use Intersect Faces to generate slot intersection geometry
Mark every slot manually
Ensure slots meet cleanly in both directions
Remove unnecessary lines
Resize cutouts to fit material thickness
Mental state during this phase:
“I think I would cry without the intersect planes tool.”
“I hate every single step of this project.”
But… I completed it successfully.
6. Assembly
Assembled the slotted pieces into a standing figure:
Body slices interlocked seamlessly
Vertical and horizontal slices formed stable structure
The head and beak joined despite the missing slot
Tail and body proportions read as “platypus enough”
The final result: Cute. Recognizable. Slightly rodent-coded. But charming.