Oven oops
Overview
Oven Oops is an Arduino-powered safety device designed to solve a real pet peeve: my roommate repeatedly left the oven on after cooking. The product evolved over the course of a 16-week semester through three major iterations, beginning with basic circuitry and ending with a functional, interactive prototype featuring a remote-controlled display, timer, and temperature-responsive Neopixel indicator.
This project emphasizes rapid prototyping, problem framing, electronics design, and moving from low-fidelity to high-fidelity iterations.
Context: Object 3300 — Fall 2023
Semester long project
Form, sensors, and circuitry course project over a full 16-week semester.
The first five weeks were dedicated to learning basics of circuitry, Arduino, and writing simple
Goal: Design a physical device that prevents or alerts users when an oven is left on.
As part of the “solve a pet peeve” assignment, the device needed to:
Sense oven usage or timing
Alert the user when the oven is on longer than intended
Use Arduino as the core technology
Progress through structured iterations over the semester
Tools used: Arduino IDE, Arduino Uno, Neopixel LEDs, LCD screen (remote-controlled), buttons, resistors, sensors, soldering tool, breadboard + jumper wires, acrylic, laser cutter, E6000 glue
Timeline:
Weeks 1–5: Learn circuitry + Arduino fundamentals
Weeks 6–10: Iteration 1 (basic timer + push-button interface)
Weeks 11–15: Iteration 2 (remote-controlled screen + temperature visualization)
Week 16: Final assembly + testing + documentation
Process
1. Defining the Pet Peeve
My roommate repeatedly left the oven on, creating both a safety hazard and unnecessary energy usage.
I framed the problem as:
“How can I create a system that notifies users when the oven has been left on too long or forgotten?”
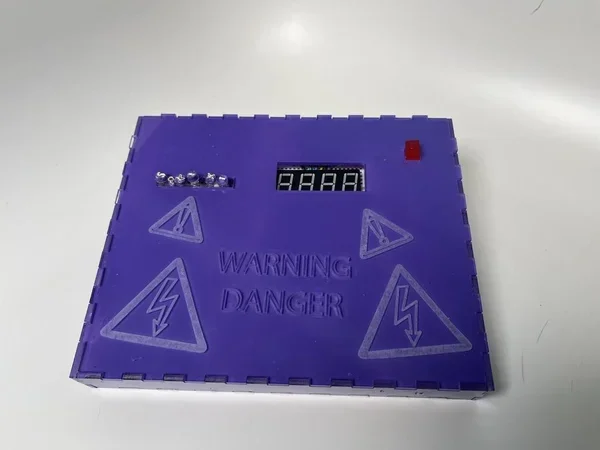
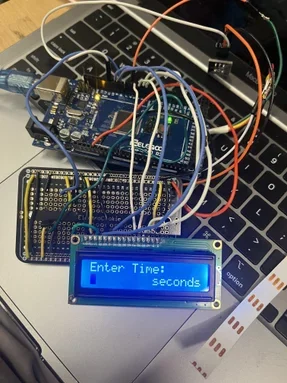
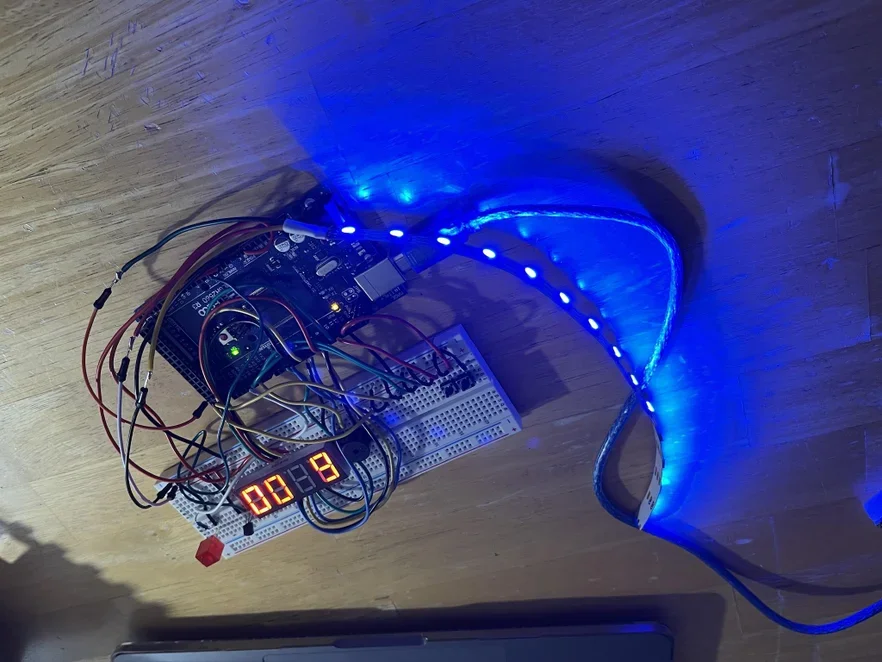
2. Iteration 1 — Basic Timer + Buttons
The first iteration focused on learning the basics of Arduino through simple physical interaction.
Features
Countdown timer
Physical buttons
Simple LED or buzzer alert
Goals of Iteration 1
Understand Arduino hardware logic
Learn digital inputs & outputs
Build confidence with basic prototyping
What I learned
Timing functions in Arduino
Debouncing buttons
Managing limited hardware functionality
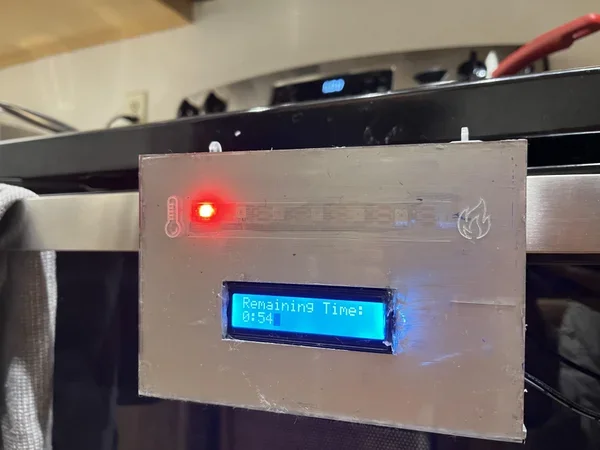
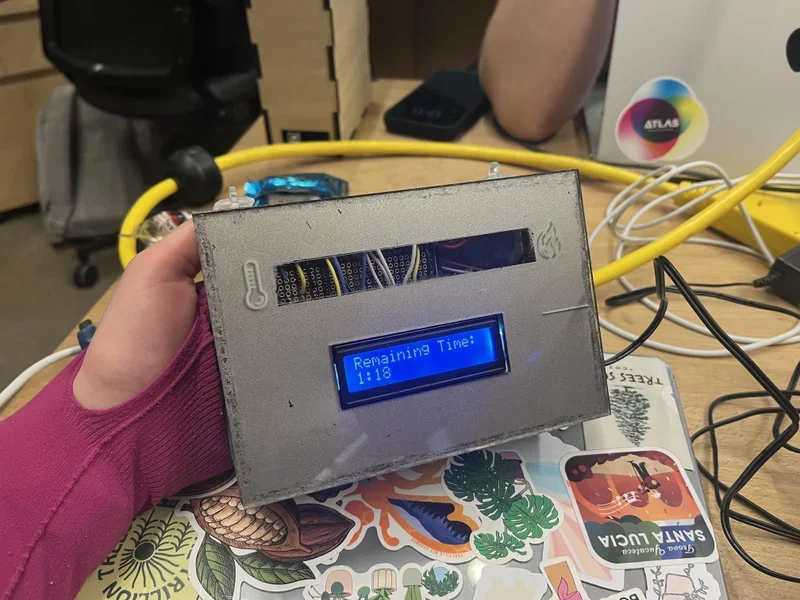
3. Iteration 2 — Final System
Upgraded Features:
Remote-controlled interface (IR remote)
OLED/LCD display with clear messages and countdown timer
Neopixel temperature gauge (color changes based on heat/time)
More polished functional behavior
Design Improvements:
Eliminated the need for physical buttons
Upgraded to a screen for better feedback
Added ambient lighting to show status at a distance
Organized code into cleaner, modular logic
Improved wiring and layout
What Changed From Iteration 1:
Added display → more user-friendly
Swapped physical buttons for remote input → easier + cleaner
Added Neopixel → more intuitive and visible alerts
Increased technical complexity significantly
This iteration taught me:
How to work with IR remote signals
How to integrate multiple Arduino libraries
How to design multimodal feedback (light + text)
The value of refining functionality before worrying about aesthetics
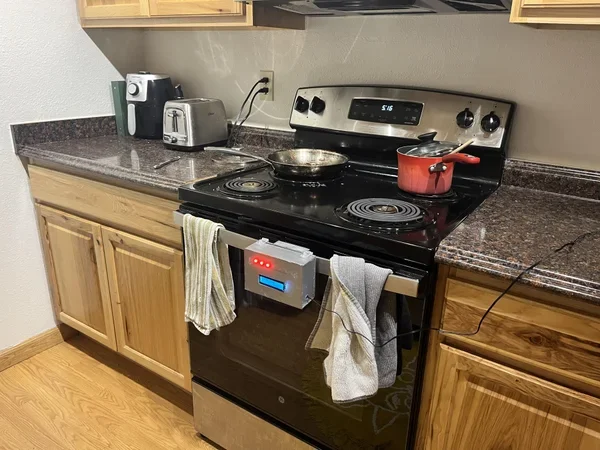
Outcome
A functional Arduino-based alert system that:
Tracks oven use time
Notifies the user via display messages
Uses Neopixels for heat/time indication
Works via remote control
Solves the real-life problem that inspired it
It is a complete, working prototype demonstrating electronics, interface design, and problem solving.
What I Learned
Rapid prototyping from low → high fidelity
Working with display modules + remote input
Using Neopixels for intuitive visualization
Managing longer, more complex Arduino code
Real-world design constraints (user behavior, timing, visibility)
Reflection
Even though the final physical build wasn’t as aesthetically refined as I imagined, the technical growth was dramatic. I moved from basic circuitry to building a remote-controlled notification system with custom UI and LED logic.
I learned that iteration is everything—and that the biggest improvements often happen when functionality becomes the priority.
Personal Insight
This project gave me the confidence to tackle more advanced electronics. I realized that I really enjoy building interactive tools that solve everyday problems, and I now feel much more equipped to handle Arduino-based systems in future projects.